Category: Manuals

manual safety vs trigger safety

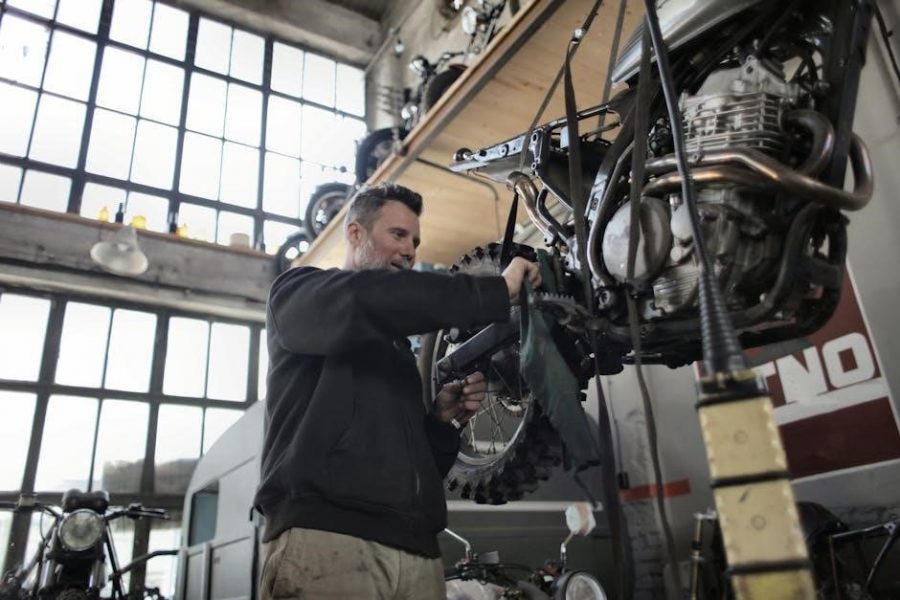
Firearm safety mechanisms, such as manual safety and trigger safety, are essential for preventing accidental discharges, ensuring safer handling, and promoting responsible gun ownership practices․

Overview of Manual Safety and Trigger Safety

Manual safety and trigger safety are two distinct mechanisms designed to prevent accidental firearm discharges․ Manual safety involves a physical lever or switch that must be intentionally disengaged before firing, offering an additional layer of control․ Trigger safety, on the other hand, relies on integrated components that block the trigger unless pressed correctly, reducing the risk of unintended activation․ Both systems aim to enhance firearm safety, but they cater to different preferences and scenarios․ While manual safety provides a tangible control option, trigger safety offers seamless integration with the firearm’s operation, making it a popular choice in modern pistols․ Each mechanism has its unique benefits and use cases, reflecting the diversity of safety needs in firearms․

Importance of Firearm Safety in Modern Weapons

Firearm safety mechanisms are critical in preventing accidental discharges and ensuring responsible gun ownership․ Modern weapons often integrate advanced safety features to minimize risks, particularly in self-defense and concealed carry scenarios․ These mechanisms not only protect users but also bystanders, reducing the likelihood of unintended harm․ Safety features like manual and trigger safeties are essential for ethical and legal firearm use, emphasizing the importance of proper handling and storage․ As firearms evolve, so do safety standards, reflecting a commitment to reliability and user confidence․ Prioritizing safety ensures that firearms remain tools for protection rather than potential hazards, aligning with societal expectations for responsible weapon ownership․

Understanding Manual Safety

Manual safety is a physical mechanism, often a lever, designed to prevent accidental discharge by blocking the firearm’s action when engaged․

Definition and Mechanism of Manual Safety

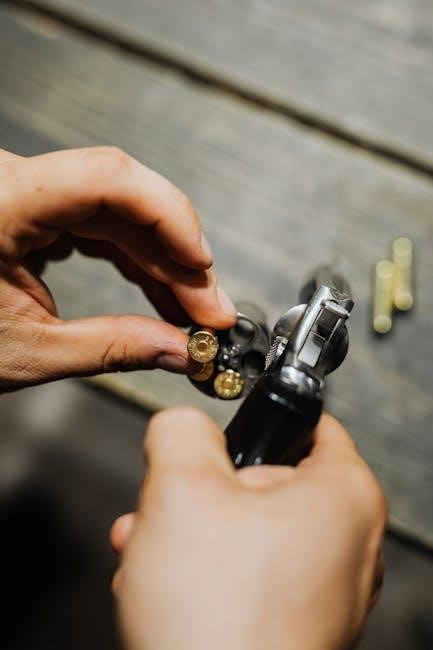
Manual safety refers to a physical mechanism, typically a lever, designed to prevent accidental discharge by blocking the firearm’s action․ Located on the side, it stops the trigger from being pulled or the firing pin from striking the primer․ Engaging the safety ensures the firearm cannot fire, even if the trigger is accidentally activated․ This feature is particularly useful for carrying loaded weapons, as it adds an extra layer of security․ The mechanism is simple: flipping the lever upward engages the safety, while flipping it downward disengages it, readying the firearm for use․ This design provides a clear, tactile indicator of the firearm’s status, enhancing safety and control for the user․

Pros of Manual Safety in Firearms

Manual safety offers an additional layer of security, preventing accidental discharges when engaged․ It provides a clear, tactile indicator of the firearm’s status, giving users confidence in carrying loaded weapons․ This feature is particularly beneficial for concealed carry, as it reduces the risk of unintended firing․ Manual safety also allows for deliberate control, ensuring the firearm only fires when intentionally activated․ For shooters who value an extra safety step, manual safeties enhance situational awareness and reduce the likelihood of negligent discharges․ However, it requires consistent training to ensure proper engagement and disengagement, making it a preferred choice for disciplined users․

Cons of Manual Safety in Modern Pistols

Manual safety mechanisms can pose challenges, particularly in high-stress situations where split-second decisions are critical․ The risk of forgetting to disengage the safety during an emergency can lead to failure to fire when needed․ Additionally, the physical act of manipulating the safety can be cumbersome, especially for users with limited dexterity or during rapid draws․ Modern pistols often omit manual safeties, as they can complicate the user experience․ Furthermore, reliance on manual safeties requires consistent training to ensure proper engagement and disengagement, which may not always be practical․ This has led many to favor trigger safety systems, which are inherently more intuitive and less prone to user error․

Understanding Trigger Safety

Trigger safety mechanisms are designed to prevent accidental discharges by requiring intentional trigger activation, often incorporating passive systems integrated into the trigger itself for enhanced security․

Definition and Mechanism of Trigger Safety

Trigger safety refers to a firearm mechanism designed to prevent accidental discharge by requiring deliberate activation of the trigger․ It typically involves a safety lever or component within the trigger system that must be intentionally pressed or moved to fire the weapon․ This mechanism ensures that the gun cannot discharge if the trigger is not fully pressed, reducing the risk of unintentional firing․ Trigger safeties are commonly found in modern pistols, such as those with striker-fired designs, and are often integrated into the trigger itself, providing an additional layer of safety without the need for a manual safety lever․

Pros of Trigger Safety in Firearms

Trigger safety offers several advantages, primarily by preventing accidental discharges without requiring manual engagement․ It is inherently intuitive, as the safety mechanism is built into the trigger, ensuring the firearm cannot fire unless the trigger is intentionally pressed․ This design simplifies operation, eliminating the need to manipulate a separate safety lever, which can be beneficial in high-stress situations․ Trigger safeties are also less prone to being inadvertently disengaged, providing consistent reliability․ Additionally, they streamline the firearm’s design, reducing the number of external controls and making the weapon lighter and more ergonomic․ This makes trigger safety particularly appealing for concealed carry and everyday use․

Cons of Trigger Safety in Modern Pistols

While trigger safety mechanisms are effective, they have certain drawbacks․ One notable disadvantage is the potential for unintended trigger engagement, particularly if the trigger is inadvertently pressed․ This risk is heightened in stressful situations where proper trigger discipline might be compromised․ Additionally, trigger safeties may not prevent accidental discharges caused by drops or external objects pressing the trigger․ Some users find trigger safeties less reassuring than manual safeties, as they rely on mechanical components that could potentially fail․ Furthermore, trigger safeties can complicate maintenance and repair, as they are often integrated into the trigger system, making them harder to inspect or replace without specialized tools․

Manual Safety vs․ Trigger Safety

Manual safety requires physical engagement, offering a clear, tactile way to secure firearms, while trigger safety relies on internal mechanisms to prevent accidental discharge, appealing to different user preferences and trust levels․

Key Differences Between the Two Systems

Manual safety involves a physical lever that must be deliberately disengaged, offering a clear tactile indicator of the firearm’s status․ Trigger safety relies on internal mechanisms that block the firing process unless the trigger is fully pressed․ Manual safety provides an additional layer of control, while trigger safety reduces the risk of accidental discharge during holstering or handling․ Manual safety is often preferred for its simplicity and direct engagement, whereas trigger safety is valued for its seamless integration into the firearm’s operation․ Both systems aim to enhance safety but cater to different preferences and shooting styles, making them suited for varied situational needs․

Reliability and Performance in Real-World Scenarios

Manual safety and trigger safety differ in reliability and performance during real-world use․ Manual safety requires intentional disengagement, reducing accidental discharges but potentially causing delays in high-stress situations․ Trigger safety automatically prevents firing unless the trigger is fully pressed, offering passive security without user intervention․ In chaotic scenarios, manual safety may be inadvertently left engaged, while trigger safety ensures the firearm operates when needed․ Trigger safety is less prone to human error, making it ideal for concealed carry, whereas manual safety relies on proper handling․ Both systems excel in preventing accidents but cater to different operational preferences and situational demands, showcasing their unique strengths in practical applications․

Choosing the Right Safety Mechanism

Choosing the right safety mechanism depends on understanding the differences between manual and trigger safety, considering personal preference, usage scenario, and ease of use effectively․

Situational Use of Manual Safety

Manual safety is ideal for specific situations, such as concealed carry or high-stress environments, where an extra layer of control is desired․ It provides a physical barrier against accidental discharges, offering peace of mind for users who prioritize added security․ However, it requires deliberate action to engage or disengage, which may not be suitable for rapid-response scenarios․ Manual safety is particularly beneficial for shooters who are trained to rely on it as part of their drawing or handling routine․ Despite its advantages, it is less common in modern pistols, as many favor trigger safety for its simplicity and instinctive operation․

Situational Use of Trigger Safety

Trigger safety is widely embraced for its intuitive design, making it ideal for self-defense and rapid-response situations․ It ensures the firearm only fires when the trigger is intentionally pressed, reducing accidental discharges without requiring manual activation․ This mechanism is particularly advantageous in high-stress scenarios where split-second decisions are critical․ Trigger safety systems are commonly found in striker-fired pistols, such as the popular Glock, and are favored by law enforcement and civilians alike․ Their reliability and simplicity make them a practical choice for users who prioritize ease of use and immediate readiness․ This feature is especially beneficial for those who may not have extensive training in manual safety protocols․

Best Practices for Firearm Safety

Regardless of whether a firearm features manual or trigger safety, adhering to best practices is crucial for safe handling․ Always treat the gun as if it is loaded, ensuring the muzzle is pointed in a safe direction․ Keep fingers off the trigger until ready to shoot, and use proper holsters to prevent accidental discharges․ Regular training and practice with the specific safety mechanism are essential to build muscle memory and confidence․ Additionally, familiarize yourself with local laws and regulations regarding firearm safety․ By combining these practices with the chosen safety mechanism, users can maximize safety and effectiveness in various situations, ensuring responsible gun ownership and operation․

Final Thoughts on Manual Safety vs․ Trigger Safety

Manual safety and trigger safety each offer distinct benefits, catering to different priorities․ Manual safety provides an additional layer of control, appealing to those who prefer an extra failsafe․ Trigger safety, on the other hand, is seamless and intuitive, ideal for quick action scenarios․ Both mechanisms have proven reliable, but their suitability depends on the user’s training, lifestyle, and specific needs․ While debates continue, the choice ultimately hinges on personal comfort and trust in the system․ Balancing convenience, reliability, and situational awareness is key to making an informed decision․ Each option has its merits, ensuring safer firearm handling․

Future of Firearm Safety Mechanisms

The future of firearm safety mechanisms is likely to involve advanced technologies that enhance security without compromising functionality․ Innovations such as smart guns with biometric locks and AI-driven safeties could revolutionize the industry․ These systems would prevent unauthorized use, reducing accidents and misuse․ Additionally, user-centric designs may integrate customizable safety features, allowing owners to tailor mechanisms to their preferences․ As technology evolves, the focus will remain on balancing safety, reliability, and accessibility․ The integration of training simulators and AI-driven safety protocols could further enhance user education and mishap prevention․ The goal is to create firearms that are both secure and intuitive for responsible owners․

mercedes service manual

Mercedes service manuals provide essential guides for maintaining‚ repairing‚ and understanding Mercedes-Benz vehicles. They include detailed instructions‚ wiring diagrams‚ and troubleshooting tips for various models.

1.1 What is a Mercedes Service Manual?

A Mercedes Service Manual is a comprehensive guide providing detailed instructions for maintaining‚ diagnosing‚ and repairing Mercedes-Benz vehicles. It includes maintenance schedules‚ diagnostic procedures‚ and repair guides‚ ensuring proper care and functionality. Available in PDF format‚ these manuals are essential for both professional technicians and DIY enthusiasts‚ covering everything from routine checks to complex overhauls.

1.2 Importance of Service Manuals for Mercedes Owners

Mercedes Service Manuals are crucial for owners‚ offering detailed guidance on maintenance‚ diagnostics‚ and repairs. They ensure proper vehicle care‚ help prevent issues‚ and enhance safety. With maintenance schedules‚ diagnostic procedures‚ and repair guides‚ owners can address problems early‚ saving costs and extending the vehicle’s lifespan. They also empower DIY enthusiasts and professionals alike to perform accurate and efficient repairs.

Types of Mercedes Service Manuals

Mercedes service manuals come in various types‚ including Owner’s Manuals‚ Workshop Manuals‚ and Repair Manuals. Each provides specific guidance‚ from maintenance tips to advanced technical details.

2.1 Owner’s Manuals

Mercedes Owner’s Manuals provide drivers with essential information for operating and maintaining their vehicles. These manuals include details on features‚ controls‚ and basic maintenance tips. They are designed for everyday use‚ helping owners understand their car’s functions and ensure optimal performance. Available in PDF formats‚ they cover models like C230k and Slk230‚ offering troubleshooting basics and care guidelines for Mercedes-Benz vehicles.

2.2 Workshop Manuals

Mercedes Workshop Manuals are comprehensive guides for professionals and DIY enthusiasts. They include detailed instructions for diagnostics‚ repairs‚ and overhauls‚ covering systems like brakes‚ transmissions‚ and engines. Available in PDF formats‚ these manuals provide step-by-step procedures‚ wiring diagrams‚ and specifications for models such as W123 and 722.1-722.2 transmissions‚ ensuring precise and effective servicing of Mercedes-Benz vehicles.

2.3 Repair Manuals

Mercedes Repair Manuals offer in-depth guidance for fixing specific components‚ such as engines‚ transmissions‚ and electrical systems. They include detailed diagrams‚ repair procedures‚ and troubleshooting tips for models like the W123 and ML320. Available online as PDFs‚ these manuals are indispensable for mechanics and car owners aiming to restore their vehicles to optimal condition efficiently and safely.

How to Obtain Mercedes Service Manuals

Mercedes service manuals can be obtained through official Mercedes-Benz websites‚ third-party forums‚ or paid platforms. They are available as downloadable PDFs or printed copies for purchase.

3;1 Official Mercedes-Benz Websites

Official Mercedes-Benz websites offer service manuals‚ owner’s manuals‚ and parts catalogs for various models. These resources are free‚ model-specific‚ and available in formats like PDF. They are regularly updated‚ ensuring accuracy and relevance for DIY enthusiasts and professionals. Accessing these manuals directly from Mercedes ensures authenticity and reliability‚ making them a trusted source for vehicle maintenance and repair needs.

3.2 Third-Party Forums and Websites

Third-party forums and websites offer a wealth of Mercedes service manuals and repair guides. Platforms like CarManualsOnline.info and Motor Era provide free or paid access to PDF manuals for various Mercedes models. These resources often include DIY tutorials‚ wiring diagrams‚ and troubleshooting tips. While convenient‚ users should verify the source’s reliability to ensure accuracy and safety when downloading or using these materials.

3.3 Paid Platforms and Retailers

Paid platforms like Motor Era and CarManualsOnline.info offer extensive collections of Mercedes service manuals. These platforms provide high-quality‚ downloadable PDFs‚ including workshop manuals‚ repair guides‚ and wiring diagrams. They cater to various models‚ ensuring access to detailed instructions for maintenance and repairs. Paid options often guarantee authenticity and comprehensive coverage‚ making them a reliable choice for DIY enthusiasts and professionals alike.

Key Sections of a Typical Mercedes Service Manual

A typical Mercedes service manual includes maintenance schedules‚ diagnostic procedures‚ repair guides‚ and wiring diagrams‚ providing comprehensive support for vehicle upkeep and troubleshooting.

4.1 Maintenance Schedules

Maintenance schedules in Mercedes service manuals outline routine services‚ oil changes‚ tire rotations‚ and part replacements. They align with manufacturer recommendations to ensure optimal vehicle performance and prevent potential issues. These schedules are tailored to specific models and driving conditions‚ providing clear guidelines for when and how to perform essential upkeep tasks.

4.2 Diagnostic Procedures

Diagnostic procedures in Mercedes service manuals guide users through identifying and troubleshooting issues. They include step-by-step instructions for checking error codes‚ testing sensors‚ and inspecting systems. These procedures help pinpoint problems accurately‚ ensuring efficient repairs and minimizing downtime. They are designed for both DIY enthusiasts and professional technicians to resolve issues systematically and effectively.

4.3 Repair Guides

Repair guides in Mercedes service manuals are comprehensive resources for fixing specific components. They detail procedures for engine‚ transmission‚ and electrical system repairs‚ among others. These guides include step-by-step instructions‚ part specifications‚ and tool requirements. Whether for DIY enthusiasts or professional mechanics‚ they provide clear‚ actionable advice to restore vehicle performance and longevity effectively.

4.4 Wiring Diagrams

Wiring diagrams in Mercedes service manuals provide detailed visual representations of electrical circuits and component connections. They help technicians and DIY enthusiasts identify wiring routes‚ diagnose issues‚ and perform repairs. These diagrams are essential for understanding complex electrical systems‚ ensuring accurate troubleshooting‚ and preventing errors during installations or modifications.

Common Repairs Covered in Mercedes Service Manuals

Mercedes service manuals cover repairs like brake systems‚ transmission issues‚ engine overhauls‚ and electrical fixes‚ providing step-by-step solutions for common problems encountered by drivers and technicians.

5.1 Brake System Repair

Mercedes service manuals detail procedures for brake system repairs‚ including pad replacement‚ rotor resurfacing‚ and fluid checks. They provide diagnostic steps for issues like squeaking brakes or reduced stopping power‚ ensuring safe and effective maintenance aligned with Mercedes-Benz standards.

5.2 Transmission Repair

Mercedes service manuals cover transmission repair procedures for models like the 722.1-722.2 and 722.3-722.4. They include steps for disassembly‚ troubleshooting‚ and reassembly‚ along with torque specifications and fluid requirements. These guides are designed for trained technicians but can aid DIY enthusiasts in understanding complex transmission systems‚ ensuring precise and safe repairs for both automatic and manual transmissions.

5.3 Engine Repair

Mercedes service manuals provide detailed guidance for engine repair‚ covering models like 220‚ 220D‚ and 250. They include procedures for diagnosis‚ overhaul‚ and preventive maintenance. Manuals often feature torque specifications‚ component removal steps‚ and reassembly instructions. These resources are essential for both professionals and enthusiasts‚ ensuring accurate and efficient engine repairs while maintaining Mercedes-Benz standards and performance.

5.4 Electrical System Repair

Mercedes service manuals offer comprehensive guides for electrical system repairs‚ including wiring diagrams and troubleshooting steps. They cover common issues like faulty sensors‚ circuit testing‚ and connector repairs. Detailed instructions for models like W123 and 722.1 are provided‚ emphasizing proper diagnostic tools and techniques to ensure reliable electrical system performance and adherence to Mercedes-Benz standards.

Tools and Equipment Needed for Mercedes Repairs

Mercedes service manuals emphasize the need for specialized tools and general equipment for repairs. Proper tools ensure accurate diagnostics and efficient fixes‚ adhering to Mercedes-Benz standards.

6.1 Specialized Tools

Mercedes service manuals highlight the need for specialized tools like diagnostic scanners‚ torque wrenches‚ and model-specific equipment. These tools ensure precise repairs for systems like transmissions and engines‚ optimizing performance and safety‚ as outlined in manuals for models like W123 and W210.

6.2 General Tools and Equipment

General tools like socket sets‚ wrenches‚ pliers‚ and screwdrivers are essential for Mercedes repairs. Diagnostic equipment‚ such as multimeters‚ and workshop essentials like jack stands and hydraulic lifts are also crucial. These tools support routine maintenance and repairs‚ ensuring safety and efficiency for both DIY enthusiasts and professionals‚ as detailed in Mercedes service manuals for models like W123 and W210.

Safety Tips for Using Mercedes Service Manuals

Always follow safety guidelines in Mercedes service manuals to ensure proper procedures. Wear protective gear‚ understand instructions thoroughly‚ and be aware of vehicle-specific hazards to avoid accidents.

7.1 General Workshop Safety

Ensure a safe working environment by wearing protective gear like gloves and goggles. Use proper tools‚ avoid loose clothing‚ and keep the area well-ventilated. Always disconnect the battery before starting repairs and be cautious with electrical systems. Keep a fire extinguisher nearby and follow manual guidelines to prevent accidents and injuries during maintenance or repairs.

7.2 Mercedes-Specific Safety Guidelines

Always follow Mercedes-Benz guidelines for handling advanced systems like SRS‚ ABS‚ and high-voltage components in hybrid models. Use specialized tools for systems requiring calibration. Avoid unauthorized modifications and ensure all repairs comply with emissions standards. Refer to the manual for specific precautions and use genuine parts to maintain safety and performance.

Troubleshooting Tips from Mercedes Service Manuals

Mercedes service manuals offer diagnostic steps for common issues like error codes‚ dashboard warnings‚ and performance problems. They guide users through systematic checks to identify faults efficiently.

8.1 Common Issues and Solutions

Common issues in Mercedes vehicles include error codes‚ transmission problems‚ and engine performance faults. Solutions often involve diagnostic tests‚ wiring diagram checks‚ and following repair guides. Regular maintenance‚ as outlined in service manuals‚ helps prevent these issues. Addressing symptoms promptly ensures optimal performance and longevity of the vehicle‚ aligning with Mercedes-Benz standards for reliability and safety.

8.2 When to Seek Professional Help

Seek professional help for complex issues like transmission overhauls or advanced electrical system repairs. If DIY solutions exceed your expertise or require specialized tools‚ consulting a certified Mercedes technician is advisable. Additionally‚ any safety-critical repairs should be handled by professionals to ensure reliability and prevent further damage‚ aligning with Mercedes-Benz service manual recommendations for optimal vehicle maintenance and performance.

jura ena 8 manual

Welcome to the Jura ENA 8 manual, your comprehensive guide to unlocking the full potential of your coffee machine. This manual provides essential information on setting up, operating, and maintaining your ENA 8, ensuring optimal performance and delicious coffee every time. Discover key features like the Professional Aroma Grinder and Fine Foam Technology, and learn how to troubleshoot common issues for a seamless brewing experience.

Overview of the Jura ENA 8 Coffee Machine

The Jura ENA 8 is a compact, high-end coffee machine designed for coffee enthusiasts seeking premium quality and convenience. It combines sleek design with advanced features like the Professional Aroma Grinder and Fine Foam Technology. Built for durability and performance, the ENA 8 offers a user-friendly interface and Bluetooth connectivity for seamless control via the JURA Cockpit app. Its compact footprint makes it ideal for home or office use. With its robust construction and innovative features, the ENA 8 delivers exceptional coffee experiences, ensuring every cup is crafted to perfection. Its versatility and modern design make it a standout choice for those who value both quality and style in their coffee machine.

Importance of Reading the Manual

Reading the Jura ENA 8 manual is crucial for safe and effective operation of your coffee machine. It provides essential guidelines to ensure optimal performance, longevity, and safety. The manual details proper usage, maintenance routines, and troubleshooting tips, helping you avoid common issues. By understanding the machine’s features and settings, you can tailor your coffee experience to your preferences. Additionally, the manual highlights safety precautions to prevent accidents and damage. Regular maintenance, such as descaling and cleaning, is also explained to keep your machine functioning at its best. Following the manual ensures you maximize your investment and enjoy consistent, high-quality coffee for years to come.

Structure of the Manual

The Jura ENA 8 manual is organized to guide users through every aspect of the machine. It begins with an overview of the coffee machine and its key features, followed by essential safety precautions and setup instructions. The manual then dives into daily usage, including step-by-step brewing guides and maintenance routines like cleaning and descaling. A dedicated troubleshooting section helps resolve common issues, while detailed technical specifications ensure comprehensive understanding. The manual also includes a table of contents for easy navigation and references to additional resources, such as the JURA website. This clear structure ensures users can quickly find the information they need to operate and maintain their ENA 8 effectively.

Key Features of the Jura ENA 8

The Jura ENA 8 features a Professional Aroma Grinder, Fine Foam Technology, compact design, and Bluetooth connectivity, ensuring premium coffee with modern convenience.

Design and Build Quality

The Jura ENA 8 boasts a sleek, compact design that fits seamlessly into modern kitchens. Its durable construction features high-quality materials, ensuring long-lasting performance and a premium feel. The machine’s intuitive interface, including a touchscreen display, makes navigation effortless. The compact design does not compromise on functionality, offering a robust build that withstands regular use. With a focus on aesthetics and usability, the ENA 8 combines elegance with practicality, making it a standout addition to any home or office. Its Bluetooth connectivity further enhances convenience, allowing users to control settings via the JURA Cockpit app for a personalized coffee experience.

Professional Aroma Grinder

The Jura ENA 8 features a high-performance Professional Aroma Grinder, designed to deliver precise and consistent grinding. This advanced grinder ensures the perfect extraction of coffee aroma and flavor, preserving the delicate notes of your beans. With its robust burr technology, it adapts automatically to the selected coffee drink, guaranteeing optimal results. The grinder’s design minimizes noise and heat, ensuring a quiet and efficient operation. Regular maintenance is essential to maintain its performance, as outlined in the manual. Using only original JURA products ensures the grinder’s longevity and optimal functionality, providing you with a superior coffee experience every time.

Fine Foam Technology

The Jura ENA 8 incorporates Fine Foam Technology, designed to create silky-smooth milk foam for cappuccinos and lattes. This innovative system ensures precise temperature control and optimal frothing, delivering a professional-grade texture every time. The technology automatically adjusts to the selected drink, guaranteeing consistent results. It also features an automatic cleaning function, maintaining hygiene and reducing maintenance effort. Fine Foam Technology enhances the overall coffee experience, allowing you to enjoy barista-quality milk-based drinks effortlessly. Regular cleaning with JURA-approved products ensures the system’s longevity and performance, keeping your ENA 8 in top condition for years to come.

Compact Design and Bluetooth Connectivity

The Jura ENA 8 boasts a sleek, compact design, perfect for modern kitchens with limited space; Its slim profile ensures it fits seamlessly into any setting without compromising on functionality. Additionally, the machine features Bluetooth connectivity, allowing users to control and customize their coffee experience via the JURA Cockpit app. This innovative feature enables effortless adjustment of brewing parameters, scheduling, and maintenance alerts. The app also provides guided troubleshooting and access to exclusive coffee recipes. Bluetooth connectivity enhances the user experience, offering a convenient and intuitive way to optimize your ENA 8. This combination of compact design and smart technology makes the ENA 8 a versatile and user-friendly coffee machine.

First-Time Setup and Initial Configuration

Unbox and prepare your Jura ENA 8 by plugging it in and ensuring all accessories are included. Follow the manual to prime the machine for first use.

Unboxing and Preparing the Machine

Begin by carefully unboxing your Jura ENA 8 and ensuring all components, such as the water tank, power cord, and coffee grounds container, are included. Place the machine on a stable, flat surface, ensuring good ventilation. Plug in the power cord but avoid turning it on immediately. Inspect the machine for any damage or defects. Rinse the water tank thoroughly before filling it with fresh water. Familiarize yourself with the control panel and accessories provided. Refer to the manual for specific instructions on first-time preparation to ensure proper functionality and prevent damage. This step is crucial for a smooth initial setup and optimal performance.

Configuring Basic Settings

After unboxing, configure the basic settings on your Jura ENA 8 to tailor it to your preferences. Start by selecting your preferred language and setting the time and date. Adjust the water hardness level according to your local water supply to ensure optimal performance and prevent scaling. Choose your default cup size and coffee strength, which can be customized for different users. Familiarize yourself with the control panel, using the rotary dial and buttons to navigate through the menu. For advanced customization, use the JURA Cockpit app via Bluetooth connectivity. Save your settings to enjoy consistent brewing results. Proper configuration ensures seamless operation and personalized coffee experiences. Refer to the manual for detailed guidance on each setting.

Priming the Machine for First Use

Before brewing your first cup, prime the Jura ENA 8 to ensure proper function and hygiene. Fill the water tank with fresh, filtered water. Insert a JURA cleaning tablet into the pre-ground coffee compartment. Close the compartment and press the rinse button to start the priming cycle. The machine will flush water through the system to remove any manufacturing residue. Repeat the process without the tablet to rinse thoroughly. This step ensures the machine is ready for use and maintains water quality. Regular priming is essential for preventing scale buildup and ensuring optimal performance. Always use JURA-recommended cleaning products to avoid damaging the machine. Follow the manual’s guidance for a smooth first-time setup.

Daily Usage and Maintenance

Regularly clean and descale your Jura ENA 8 to maintain performance. Use only JURA-approved cleaning tablets to prevent damage. Daily rinsing and checking water hardness ensure optimal brewing conditions and extend machine longevity.

Brewing Coffee: Step-by-Step Guide

Ensure the machine is preheated and ready for use. Select your preferred coffee beans and grind them using the Professional Aroma Grinder for optimal flavor.
Insert a coffee filter or use the internal grinder, depending on your setup. Choose your desired drink type via the intuitive interface.
Place a cup under the spout and select the brewing parameters, such as strength and cup size, using the touch controls.
The machine will automatically grind, tamp, and brew your coffee to perfection. For milk-based drinks, use the Fine Foam Technology to create silky-smooth froth.
Regularly clean the brew group and milk system to maintain hygiene and performance. Always use JURA-approved cleaning products to avoid damage.
After each use, rinse the machine and wipe down surfaces to prevent residue buildup. This ensures your ENA 8 continues to deliver exceptional results.

Cleaning and Descaling the Machine

Regular cleaning and descaling are crucial for maintaining the performance and longevity of your Jura ENA 8. Start by rinsing the brew group daily and running a cleaning cycle using JURA-approved tablets. For descaling, follow the on-screen instructions to ensure proper removal of mineral buildup. Use only original JURA cleaning products to avoid damaging the machine. After each use, wipe down surfaces and empty the drip tray. Descaling should be done every 2-3 months, depending on water hardness. Neglecting maintenance can lead to poor coffee quality and machine damage. Always refer to the manual for specific cleaning and descaling procedures.

Regular Maintenance Tasks

Regular maintenance ensures your Jura ENA 8 performs optimally. Check and replace worn-out parts like seals and gaskets periodically. Empty and clean the bean container weekly to prevent oil buildup. Clean the water tank and refill it with fresh water daily. Run the automated cleaning cycle every 1-2 weeks using JURA-approved tablets. Check the grind setting and adjust if necessary. Regularly wipe down the machine’s exterior and internal components. Additionally, inspect the milk system (if applicable) and clean it according to the manual. Always follow the machine’s maintenance reminders on the display. Proper upkeep extends the lifespan of your ENA 8 and ensures consistent coffee quality.

Troubleshooting Common Issues

Troubleshooting common issues with your Jura ENA 8 involves identifying error messages, understanding their causes, and applying solutions. Scale buildup, incorrect bean settings, and clogged milk systems are frequent problems. Using original JURA cleaners and following maintenance guidelines can resolve most issues. If problems persist, contact JURA support for assistance.

Common Errors and Solutions

The Jura ENA 8 may display error codes like “Fill Water Tank” or “Clean Machine.” These indicate low water levels or the need for descaling. If the grinder is clogged, ensure only recommended beans are used. For frothing issues, clean the milk system with JURA’s original cleaner. Scale buildup is a common problem; descale regularly to prevent damage. If the machine stops working, reset it by turning it off and on. For persistent issues, refer to the troubleshooting guide or contact JURA support. Proper maintenance and using genuine parts can prevent many of these errors, ensuring smooth operation and optimal coffee quality.

Resetting the Machine

To reset the Jura ENA 8, switch it off, then back on after 30 seconds. This often resolves minor glitches. For a factory reset, press and hold the “Menu” and “OK” buttons while powering on; Release when the display lights up. This restores default settings but retains customizations like drink preferences. If issues persist, such as error codes like “Fill Water Tank” or “Clean Machine,” perform a full descale cycle. Use JURA’s original cleaning products for best results. Resetting ensures optimal performance and prevents long-term damage. Always refer to the manual for detailed reset procedures to avoid unintended changes to your machine’s settings.

When to Contact JURA Support

Contact JURA support if you encounter issues that troubleshooting cannot resolve. Persistent error codes, such as “Fill Water Tank” or “Clean Machine,” or mechanical malfunctions, like a blocked grinder or frother, require professional assistance. If the machine fails to power on or displays unfamiliar errors, reach out to support. Damage caused by non-recommended cleaning products or improper use may also necessitate expert help. For warranty-related inquiries or concerns about compatibility with JURA accessories, contact their team. Support is also available for clarifying complex maintenance procedures or addressing software updates. Ensure to have your machine’s serial number ready for efficient assistance. JURA support is your go-to for resolving advanced issues and ensuring your ENA 8 operates flawlessly.

kenmore dishwasher model 665 manual

Welcome to the Kenmore Dishwasher Model 665 manual! This guide provides essential information on installation‚ operation‚ and maintenance. Discover key features‚ troubleshooting tips‚ and optimal usage to ensure your dishwasher runs efficiently. Designed for user-friendly navigation‚ this manual helps you make the most of your appliance.

1.1 Overview of the Kenmore Dishwasher Model 665

The Kenmore Dishwasher Model 665 is a popular and reliable appliance designed for efficient cleaning. It features multiple wash cycles‚ including heavy-duty and energy-saving options‚ to suit various needs. Known for its quiet operation and robust construction‚ this model offers advanced options like delay start and a soil removal system. The dishwasher is equipped with a user-friendly control panel and indicators for easy operation; Its compact design fits seamlessly into most kitchens‚ making it a practical choice for homeowners seeking durability and performance. This model is part of Kenmore’s Ultra Wash series‚ ensuring high-quality results.

1.2 Importance of Reading the Manual

Reading the Kenmore Dishwasher Model 665 manual is crucial for safety‚ optimal performance‚ and troubleshooting. It provides detailed instructions on installation‚ operation‚ and maintenance‚ ensuring you get the most out of your appliance. The manual highlights key features‚ such as delay start and soil removal systems‚ and explains how to use them effectively. Additionally‚ it covers error codes‚ warranty information‚ and maintenance tips to prevent issues. By understanding the manual‚ you can avoid misuse‚ reduce repair needs‚ and extend the dishwasher’s lifespan. It serves as a comprehensive guide to help you operate your dishwasher efficiently and safely.

Installation and Setup

Proper installation is essential for optimal performance. Ensure the dishwasher is level‚ securely fastened‚ and connected to water and power sources. Follow manual guidelines for a smooth setup.

2.1 Pre-Installation Requirements

Before installing the Kenmore Dishwasher Model 665‚ ensure the following:

  • A level surface to prevent vibration and ensure stability.
  • Adequate space for proper ventilation and access.
  • Water supply lines and electrical connections within reach.
  • Drainage system compatibility with the dishwasher.
  • Check filters and ensure they are clean and properly installed.

Refer to the manual for specific measurements and compatibility guidelines to ensure a smooth installation process.

2.2 Step-by-Step Installation Guide

Install your Kenmore Dishwasher Model 665 by following these steps:

  • Prepare the installation area by ensuring a level surface and adequate space.
  • Connect the water supply lines to the dishwasher and water source.
  • Install the drainage hose securely into the sink drain or garbage disposal.
  • Connect the electrical connections as per the manual’s wiring diagram.
  • Mount the dishwasher and secure it to the countertop to prevent movement.
  • Level the appliance to ensure proper operation.
  • Test the dishwasher by running a short cycle to check for leaks and functionality.

Complete these steps carefully to ensure safe and proper installation.

2.3 Leveling and Securing the Dishwasher

Proper leveling and securing are crucial for optimal performance. Start by adjusting the dishwasher’s legs to ensure it is completely level. Use a spirit level to verify balance. Tighten the legs firmly to prevent wobbling. Next‚ secure the dishwasher to the surrounding countertop or cabinets using the provided mounting brackets. This prevents movement during operation. Ensure all connections remain accessible after securing. Finally‚ double-check the level to confirm proper alignment. A well-leveled dishwasher ensures efficient operation‚ reduces noise‚ and prevents potential damage or leaks.

Key Features and Parts of the Kenmore 665 Dishwasher

The Kenmore 665 dishwasher features advanced components like a soil removal system and multiple wash cycles. Key parts include the control panel‚ spray arms‚ and filtration system for efficient cleaning.

3.1 Main Components and Their Functions

The Kenmore 665 dishwasher includes key components like the control panel‚ spray arms‚ and filtration system. The control panel allows you to select cycles and options. Spray arms distribute water for cleaning dishes. The filtration system captures food particles‚ ensuring clean wash water. Additional parts like racks and detergent dispenser are designed for convenience and efficiency. Each component works together to deliver optimal cleaning performance and maintain appliance longevity‚ ensuring your dishes come out sparkling clean every time.

3.2 Special Features Like Delay Start and Soil Removal System

The Kenmore 665 dishwasher boasts innovative features like Delay Start‚ allowing you to schedule cycles up to 24 hours in advance. The Soil Removal System ensures thorough food particle elimination‚ enhancing cleaning efficiency. Additional features include multiple wash cycles‚ energy-saving modes‚ and a quiet operation design. These advanced functionalities make the dishwasher user-friendly and efficient‚ catering to various household needs while maintaining superior performance and energy efficiency.

3.3 Overview of the Control Panel and Indicators

The Kenmore 665 dishwasher features a user-friendly control panel with intuitive buttons for selecting cycles and options. Key indicators include lights for cycle status‚ delay start timing‚ and error codes. The control panel also displays indicators for rinse aid levels and detergent usage. These indicators provide clear feedback‚ ensuring easy monitoring of the dishwasher’s operation. The panel’s layout is designed for simplicity‚ allowing users to navigate settings and monitor progress effortlessly. This section helps you understand the dashboard‚ enabling seamless control over your dishwasher’s functionality and maintenance.

Operating the Kenmore 665 Dishwasher

Start cycles effortlessly using the intuitive control panel. Select from various wash options‚ delay start‚ and monitor progress. Designed for efficiency and quiet operation‚ ensuring optimal performance.

4.1 Understanding the Wash Cycles and Options

The Kenmore 665 dishwasher offers multiple wash cycles tailored to different needs. Choose from options like Normal Wash‚ Heavy Duty‚ Light/China‚ and Rinse Only. Select cycles based on load size and soil level. The Delay Start feature allows scheduling washes to fit your routine. Advanced sensors optimize water temperature and energy use. Customizable settings ensure dishes come out sparkling clean. Proper cycle selection enhances efficiency and maintains appliance longevity‚ ensuring optimal performance for years to come.

4.2 Loading the Dishwasher for Optimal Performance

Proper loading ensures efficient cleaning and prevents damage. Place larger items like plates and bowls on the bottom rack‚ facing the center. Utensils go in designated trays or baskets‚ with sharp objects secured. Smaller items like glasses and cups belong on the top rack. Avoid overcrowding to allow water and detergent to circulate. Fragile items should be placed securely to prevent breakage. Ensure no items block the spray arms or detergent dispenser. Proper arrangement maximizes cleaning performance and protects your dishes.

4.3 Using Detergent and Rinse Aid

For optimal cleaning‚ use a high-quality dishwasher detergent designed for automatic dishwashers. The recommended detergent dosage is one tablespoon per cycle. Excess detergent can leave residue‚ while too little may result in poor cleaning. Rinse aid helps water sheet off dishes‚ reducing spots and improving drying. Ensure the rinse aid dispenser is filled as indicated. Adjust the dispenser settings if you notice excessive water spots. Proper detergent and rinse aid usage ensures sparkling clean dishes and prevents streaks or residue buildup after each cycle.

Maintenance and Cleaning

Regular maintenance ensures optimal performance. Clean filters‚ check for blockages‚ and run cleaning cycles to prevent grease buildup. This helps maintain hygiene and efficiency‚ preventing common issues.

5.1 Cleaning the Filters and Drain

Regularly cleaning the filters and drain ensures your Kenmore 665 dishwasher runs efficiently. Locate the filters at the bottom and rinse them under warm water to remove debris. Check the drain for blockages and clear any food particles. For tougher buildup‚ run a cleaning cycle with a dishwasher cleaner. Proper maintenance prevents poor drainage and odors. Refer to your manual for specific instructions on accessing and cleaning these components. Keeping these areas clean ensures optimal performance and extends the lifespan of your appliance.

5.2 Checking and Replacing Wearable Parts

Regular inspections of wearable parts in your Kenmore 665 dishwasher are crucial for maintaining performance. Check the door seals for cracks or wear and replace them if leaks occur. Inspect the spray arms for blockages or damage and clean or replace as needed. Additionally‚ examine the float switch and drain hose for any obstructions. Refer to your manual for guidance on accessing these components. Replacing worn parts promptly ensures efficient operation and prevents potential damage. Sears Parts Direct offers genuine replacement parts for easy maintenance and repair. Regular checks help extend the lifespan of your appliance.

5.3 Running a Cleaning Cycle

Periodically running a cleaning cycle helps maintain your Kenmore 665 dishwasher’s efficiency. Check your manual for specific instructions‚ as cycles may vary. Ensure the dishwasher is empty and add a dishwasher cleaner or white vinegar to the detergent dispenser. Select the hottest water setting and the longest cycle. This process removes grease‚ food residue‚ and odors. For optimal results‚ run the cleaning cycle every 1-3 months. Regular cleaning ensures better performance‚ prevents bad smells‚ and extends the appliance’s lifespan. Always refer to the manual for model-specific cleaning recommendations.

Troubleshooting Common Issues

Identify and resolve common issues like noise‚ error codes‚ or leaks. Refer to the manual for specific solutions‚ or contact Kenmore support for assistance.

6.1 Identifying and Solving Noise Problems

Strange noises from your Kenmore 665 dishwasher can be concerning. Common issues include rattling‚ grinding‚ or vibrating sounds. Check for loose parts‚ misaligned racks‚ or items hitting the spray arms.
Ensure the dishwasher is properly leveled and secured to prevent vibrations. If noises persist‚ inspect the wash arms or filters for blockages. Refer to the manual for diagnostic cycles or error codes. Addressing these issues early can prevent further damage and ensure quiet operation. Regular maintenance‚ like cleaning filters‚ can also minimize noise-related problems. Contact Kenmore support if the issue remains unresolved.

6.2 Addressing Error Codes and Blinking Lights

Error codes and blinking lights on your Kenmore 665 dishwasher indicate specific issues. Refer to the manual to interpret codes like “CLE” or “E1″‚ which often relate to problems such as water sensor malfunctions or drainage issues. Start by restarting the dishwasher to clear temporary glitches. If the issue persists‚ check for blockages in filters or hoses. For complex errors‚ consult the troubleshooting section or contact Kenmore customer support. Blinking lights may signal completed cycles or maintenance needs. Regularly updating your knowledge of error codes ensures efficient problem-solving and optimal appliance performance.

6.3 Fixing Leaks and Water-Related Issues

Leakage or water-related problems in your Kenmore 665 dishwasher often stem from loose connections or faulty hoses. Start by inspecting the water supply lines and ensuring they are securely attached. Check the door gasket for wear or damage‚ as it may cause leaks during cycles. If water remains after a cycle‚ verify that the drain filter is clean and free of debris. Addressing these issues promptly prevents damage and ensures optimal performance. Always refer to the manual for specific guidance or contact Kenmore support for complex water-related concerns.

Warranty and Customer Support

Understand your warranty terms‚ contact Kenmore customer service for assistance‚ and locate authorized service providers for professional help with your dishwasher. Ensure your appliance is covered and supported.

7.1 Understanding the Warranty Terms

Understanding the warranty terms for your Kenmore Dishwasher Model 665 is crucial for ensuring coverage and protection. The warranty typically covers repairs and replacements for defective parts and labor under normal use. It’s important to review the terms to know what is included and what is excluded‚ such as damage from misuse or normal wear and tear. Sears Parts Direct provides detailed warranty information and manuals for your specific model. Always refer to the official documentation for precise details on your appliance’s coverage.

7.2 Contacting Kenmore Customer Service

For assistance with your Kenmore Dishwasher Model 665‚ contacting customer service is straightforward. Visit the official Kenmore website or Sears Parts Direct to find support options. You can reach them via phone‚ live chat‚ or email. Ensure to have your model number ready for efficient help. Representatives are available to address inquiries‚ troubleshooting‚ and repair needs. This service is accessible 24/7‚ providing convenience for users seeking guidance or resolving issues promptly. Utilize these resources to maximize your appliance’s performance and resolve any concerns effectively.

7.3 Finding Authorized Service Providers

To locate authorized service providers for your Kenmore Dishwasher Model 665‚ visit the official Kenmore website or Sears Parts Direct. Enter your model number in the service section to find nearby authorized centers. These providers ensure genuine parts and warranty-compliant repairs. For additional support‚ refer to the manual or contact Kenmore customer service for recommendations. Using authorized providers guarantees reliable service and maintains your appliance’s warranty. This ensures quality repairs and extends the lifespan of your dishwasher‚ keeping it in optimal condition for years to come.

Page 7 of 7

Powered by WordPress & Theme by Anders Norén