The 2018 Subaru Outback maintenance schedule PDF is a vital guide for ensuring optimal vehicle performance and longevity. Regular maintenance helps prevent issues, enhances safety, and preserves the vehicle’s value over time.
Overview of the Importance of Regular Maintenance

Regular maintenance is essential for ensuring the 2018 Subaru Outback operates at its best, providing optimal performance, safety, and longevity. By following the recommended schedule, owners can prevent potential mechanical issues, reduce repair costs, and maintain the vehicle’s reliability over time.
Proper upkeep also enhances fuel efficiency and ensures all systems function as intended. Regular checks and services, such as oil changes and tire rotations, are critical for maintaining the vehicle’s health and preventing unexpected breakdowns.
Additionally, adhering to the maintenance schedule helps preserve the vehicle’s resale value and ensures compliance with Subaru’s warranty terms. Owners who prioritize regular maintenance can enjoy a smoother driving experience and peace of mind knowing their Subaru Outback is in excellent condition.
Understanding the 2018 Subaru Outback Maintenance Schedule PDF
The 2018 Subaru Outback maintenance schedule PDF provides detailed guidelines for routine services, inspections, and replacements. It ensures optimal performance, safety, and longevity, tailored to the vehicle’s specific needs.
Key Components of the Maintenance Schedule
The 2018 Subaru Outback maintenance schedule PDF outlines essential services at specific intervals. It includes oil changes every 7,500 miles, tire rotations, and inspections of brakes, belts, and fluids. Additionally, it specifies replacements for air filters and spark plugs at designated mileages. The schedule also covers checks for suspension, exhaust, and cooling systems to ensure reliability. Seasonal tips and fluid checks are emphasized to adapt to varying driving conditions. By following this comprehensive plan, owners can maintain their vehicle’s performance, prevent costly repairs, and ensure long-term durability. Regular adherence to these guidelines is crucial for preserving the Subaru Outback’s renowned all-wheel-drive capabilities and overall efficiency.
How to Access the Official Maintenance Schedule PDF
To access the 2018 Subaru Outback maintenance schedule PDF, visit the official Subaru website. Navigate to the “Vehicle Resources” section, where you can select your vehicle’s model year and download the manual. Additionally, the PDF can be found through the Subaru owner’s portal or the MySubaru app. Authorized dealerships also provide access to the official maintenance schedule, ensuring you have the most accurate and up-to-date information. For convenience, the document is available in downloadable format, allowing you to refer to it anytime. This resource is essential for understanding the recommended services and intervals, ensuring your Subaru Outback remains in optimal condition. Always rely on official sources to guarantee the accuracy of the maintenance schedule for your vehicle.

Recommended Maintenance Intervals for the 2018 Subaru Outback
The 2018 Subaru Outback requires regular maintenance at specific intervals, such as every 3,750 miles or 3 months, 7,500 miles or 6 months, and 15,000 miles or 12 months, to ensure optimal performance and longevity.

3,750 Miles or 3 Months Interval
The 3,750-mile or 3-month maintenance interval for the 2018 Subaru Outback is designed to ensure the vehicle runs smoothly and prevent potential issues. This interval typically includes an oil change, tire pressure check, and a visual inspection of key components like brakes, belts, and fluids.
- Oil and filter replacement is essential to maintain engine health.
- Tire rotation helps even tread wear and improves safety.
- Brake inspection ensures proper stopping power.
- Fluid checks involve verifying coolant, transmission, and windshield washer levels.
- Wiper blades and lights are inspected for functionality.
Following this schedule helps maintain the vehicle’s reliability and performance, especially given the Outback’s all-wheel-drive capabilities and potential for off-road use.
7,500 Miles or 6 Months Interval
The 7,500-mile or 6-month maintenance interval for the 2018 Subaru Outback is a critical checkpoint to ensure the vehicle remains in optimal condition. This service typically includes synthetic oil replacement, tire rotation, and a comprehensive inspection of key components.
- Synthetic oil and filter replacement is performed to maintain engine performance and longevity.
- Tire rotation is done to ensure even tread wear and improve safety.
- Brake pads and rotors are inspected for wear and damage.
- Battery condition is checked to ensure reliable starting power.
- Cabin and air filters are inspected and replaced if necessary.
Adhering to this interval helps maintain the Outback’s all-wheel-drive system and overall performance, ensuring it remains reliable for both on-road and off-road adventures.
15,000 Miles or 12 Months Interval
The 15,000-mile or 12-month maintenance interval for the 2018 Subaru Outback is designed to address more comprehensive checks and replacements to ensure long-term reliability. This service includes:
- Differential fluid inspection and replacement to maintain the all-wheel-drive system’s performance.
- Spark plug replacement to ensure proper engine combustion and efficiency.
- Belt and hose inspections to identify potential wear or cracks.
- Brake system inspection, including rotors and calipers, for safety.
- Suspension and steering components check for alignment and damage.
This interval is crucial for maintaining the Outback’s durability, especially for drivers who frequently tow or drive in harsh conditions. Regular inspections at this stage help prevent costly repairs and ensure the vehicle continues to perform optimally. Adhering to this schedule is essential for preserving the Subaru Outback’s reliability and resale value.
Additional Maintenance Considerations

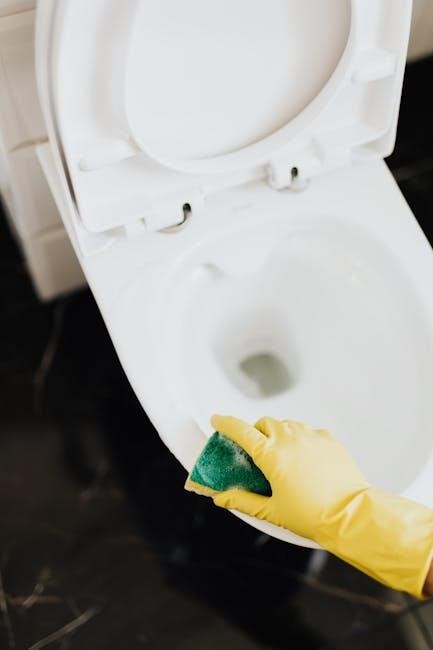
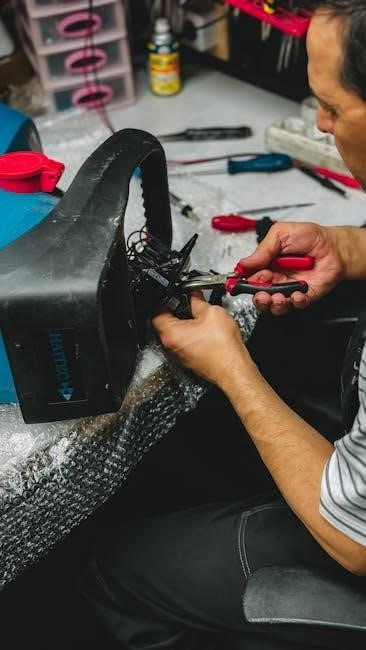
Regular checks of tire pressure, battery health, and wiper blades are essential. Inspect belts, hoses, and brakes for wear. Address any fluid leaks promptly. Consider driving conditions when scheduling extra services or inspections.
Seasonal Maintenance Tips for the Subaru Outback
Seasonal maintenance is crucial for the 2018 Subaru Outback to ensure it performs optimally in varying conditions. For winter, check the antifreeze levels, battery health, and tire pressure, as cold temperatures can affect performance. Consider installing winter tires for better traction on snowy or icy roads. In summer, inspect the cooling system to prevent overheating and ensure the air conditioning is functioning properly. For spring, clean the vehicle thoroughly, including the undercarriage, to remove dirt and salt buildup. Replace worn-out wiper blades and check the brakes for any damage. In fall, prepare for wet and leaf-covered roads by inspecting tread depth and ensuring proper tire pressure. Additionally, check the windshield washer fluid and lights for optimal visibility. Regular seasonal checks help maintain reliability and safety throughout the year;
Importance of Fluid Checks and Replacements

Fluid checks and replacements are essential for maintaining the 2018 Subaru Outback’s performance and longevity. Engine oil, coolant, transmission fluid, brake fluid, and power steering fluid must be inspected and replaced as per the maintenance schedule. Neglecting these can lead to overheating, reduced fuel efficiency, or even engine damage. Engine oil lubricates moving parts and prevents overheating, while coolant ensures proper temperature regulation. Transmission fluid maintains smooth gear shifting, and brake fluid is critical for reliable stopping power. Power steering fluid aids in effortless maneuverability. Regular fluid checks help identify leaks or contamination early, preventing costly repairs. The 2018 Subaru Outback maintenance schedule PDF outlines specific intervals for fluid replacements, typically every 7,500 to 15,000 miles, depending on driving conditions. Adhering to these guidelines ensures optimal vehicle operation and extends its lifespan. Always consult the official schedule for precise recommendations tailored to your vehicle.
Where to Find the 2018 Subaru Outback Maintenance Schedule PDF
The 2018 Subaru Outback maintenance schedule PDF can be accessed through Subaru’s official website, owners’ manual, or authorized dealerships, providing detailed guidelines for proper vehicle upkeep and service.
Official Subaru Website Resources
The Subaru website offers a comprehensive resource for accessing the 2018 Outback maintenance schedule PDF. By visiting the official Subaru website, owners can navigate to the “Vehicle Resources” section, where they can input their vehicle’s details, such as the model year and trim level, to download the specific maintenance schedule. This PDF document outlines recommended service intervals, routine checks, and necessary replacements to ensure the vehicle runs efficiently. Additionally, the website provides supplementary materials, including owner’s manuals and service guides, which complement the maintenance schedule. Subaru’s online platform is user-friendly, allowing owners to quickly find the information they need without hassle. This direct access ensures that owners can follow the manufacturer’s guidelines accurately, maintaining their vehicle’s performance and extending its lifespan. The official Subaru website is a trusted source for all maintenance-related documentation, making it an essential tool for 2018 Outback owners.
Authorized Subaru Dealership Support
Authorized Subaru dealerships provide exceptional support for maintaining your 2018 Outback. Their knowledgeable staff and certified technicians ensure that all maintenance is performed according to the factory-recommended schedule. By visiting a dealership, you can access the official 2018 Subaru Outback maintenance schedule PDF and receive personalized guidance tailored to your vehicle’s needs. Dealerships offer a wide range of services, from routine oil changes to complex repairs, using genuine Subaru parts. They also provide convenient online scheduling and service history tracking, making it easier to stay on top of your maintenance. Additionally, authorized dealerships often offer complimentary maintenance programs and promotions, enhancing the overall ownership experience. Their expertise ensures that your Outback runs at its best, preserving its performance, safety, and resale value. Trusting an authorized Subaru dealership guarantees peace of mind and adherence to the highest service standards.