Month: May 2025

cuisinart bread maker cbk-110 recipe book pdf

Welcome to the world of artisanal bread making with the Cuisinart CBK-110. This comprehensive recipe book is your go-to guide for mastering the bread maker’s full potential.

Featuring over 30 recipes‚ from classic breads to gluten-free options‚ it ensures every user can create delicious loaves at home. Available as a downloadable PDF‚ it’s perfect for easy access and inspiration.

With step-by-step instructions and expert tips‚ this booklet helps you achieve perfect results every time‚ making it an essential companion for your baking journey.

Overview of the CBK-110 Model

The Cuisinart CBK-110 is a compact automatic bread maker designed for ease and versatility. It features 12 pre-programmed menu options‚ a delay start timer up to 13 hours‚ and customizable settings for crust color and loaf size. Perfect for home bakers‚ it includes a non-stick bread pan with a kneading paddle‚ ensuring consistent results. Its user-friendly interface and robust features make it ideal for crafting a variety of breads‚ from classic white to artisanal loaves‚ while its compact design saves kitchen space.

Importance of the Recipe Book for Optimal Use

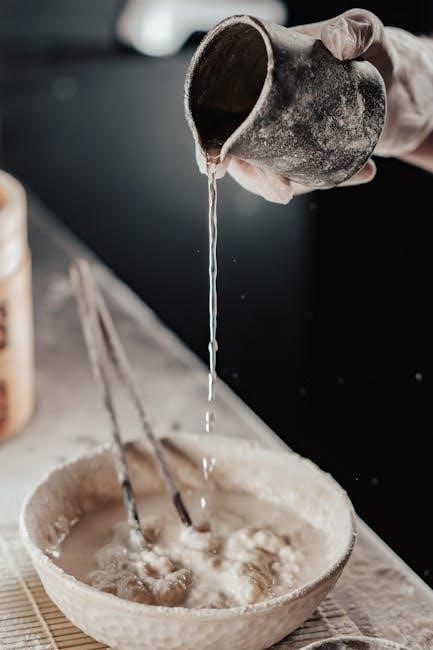
The recipe book is essential for maximizing the CBK-110’s capabilities. It provides detailed instructions and over 30 recipes‚ ensuring users can explore various bread types and customize ingredients. The guide offers step-by-step methods for perfect loaves‚ troubleshooting tips‚ and maintenance advice‚ making it a vital resource for both beginners and experienced bakers to achieve consistent‚ professional results and enjoy a seamless baking experience with their Cuisinart bread maker.

Key Features of the Cuisinart CBK-110 Bread Maker

The CBK-110 offers 12 pre-programmed settings‚ a 13-hour delay start timer‚ customizable crust color‚ and loaf size options‚ ensuring versatility for any baking preference or dietary need.

12 Pre-Programmed Menu Options

The CBK-110 features 12 pre-programmed menu options‚ including settings for white bread‚ whole wheat‚ gluten-free‚ artisan dough‚ jam‚ and cake. These options cater to various tastes and dietary needs‚ ensuring versatility. Users can effortlessly bake classic loaves‚ specialty breads‚ or prepare dough for pizza and rolls. The pre-set menus simplify the baking process‚ allowing for consistent results with minimal effort. This feature makes the CBK-110 ideal for both novice and experienced bakers seeking convenience and customization.

Delay Start Timer (Up to 13 Hours)

The CBK-110’s delay start timer allows users to program the bread maker up to 13 hours in advance. This convenient feature enables you to set the baking process to start at a later time‚ ensuring freshly baked bread is ready when you need it. Whether you prefer waking up to the aroma of fresh bread or having dough prepared for dinner‚ this timer offers unparalleled flexibility and ease of use‚ perfect for busy schedules and meal planning.

Customizable Settings for Crust Color and Loaf Size

The CBK-110 offers customizable settings for crust color and loaf size‚ allowing users to tailor their bread to personal preferences. Choose from light‚ medium‚ or dark crust options to achieve the perfect texture and appearance. Additionally‚ the bread maker accommodates loaf sizes of 1‚ 1.5‚ or 2 pounds‚ ensuring flexibility for small or large households. These adjustable features enhance the baking experience‚ providing precision and versatility for every recipe.

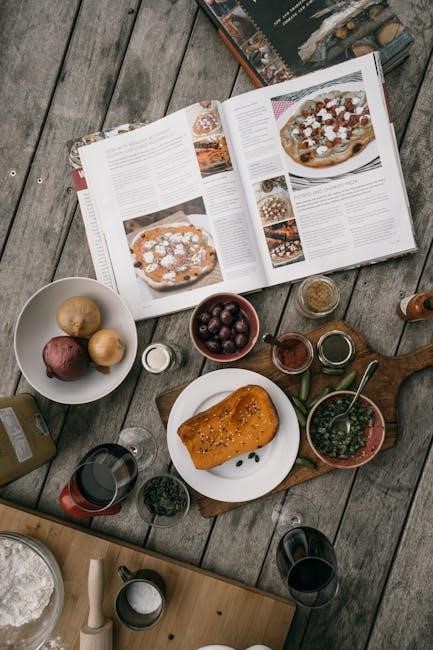
Types of Recipes Included in the CBK-110 Recipe Book

The CBK-110 recipe book features a diverse range of recipes‚ including basic breads‚ artisan loaves‚ gluten-free options‚ and dough for pizza‚ rolls‚ and other treats‚ catering to all preferences.

Basic Bread Recipes

The CBK-110 recipe book includes classic bread recipes perfect for everyday use. From simple white bread to hearty whole wheat‚ these recipes provide a foundation for mastering bread making. Each recipe is designed to highlight the bread maker’s capabilities‚ ensuring consistent results. With clear instructions‚ users can easily bake fresh loaves at home‚ enjoying the convenience of homemade bread without the hassle. These basic recipes are ideal for beginners and experienced bakers alike.

  • Classic white bread
  • Whole wheat bread
  • Crusty bread
  • Sandwich bread

Artisan and Specialty Breads

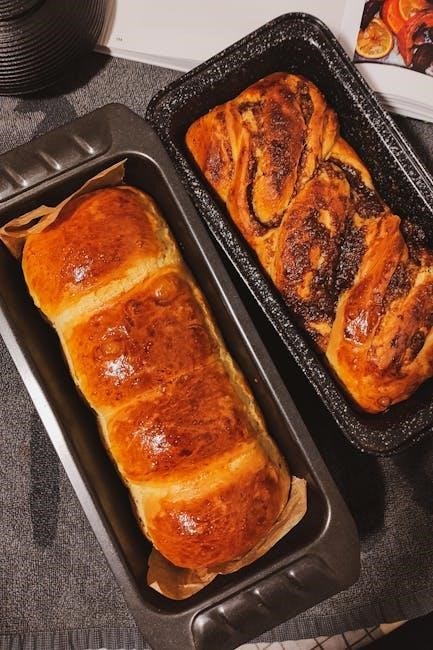
Elevate your bread-making skills with the CBK-110 recipe book’s artisan and specialty bread options. These recipes cater to diverse tastes‚ offering rustic bread‚ sourdough‚ Italian‚ and French baguette options. The bread maker’s customizable settings ensure perfect crust and texture‚ while the delay timer allows for freshly baked bread at any time. With detailed instructions‚ you can craft gourmet-quality loaves that impress. Explore new flavors and techniques to expand your baking repertoire effortlessly.

  • Rustic bread
  • Sourdough
  • Italian bread
  • French baguette

Gluten-Free and Custom Diet Options

The CBK-110 recipe book caters to diverse dietary needs with gluten-free and customizable options. It includes recipes tailored for gluten-free flours‚ ensuring delicious bread for those with dietary restrictions. From almond flour bread to paleo-friendly loaves‚ these options empower users to bake without compromising on taste. The bread maker’s adjustable settings also allow for personalizing recipes to suit specific dietary preferences‚ making it a versatile tool for all bakers.

  • Gluten-free bread recipes
  • Almond flour bread
  • Paleo-friendly options
  • Customizable settings for dietary needs

Dough Recipes for Pizza‚ Rolls‚ and More

Expand your baking repertoire with the CBK-110 recipe book’s dough recipes for pizza‚ rolls‚ and other treats. Perfect for family meals or gatherings‚ these recipes offer versatility and flavor. From classic pizza dough to soft dinner rolls and crispy breadsticks‚ the guide provides easy-to-follow instructions. The bread maker’s dough cycle ensures the perfect rise and texture‚ making homemade favorites a breeze to prepare and enjoy.

  • Pizza dough for homemade crusts
  • Soft and buttery dinner rolls
  • Crispy breadsticks and more

Programming and Customization Tips

Master the CBK-110 with pre-set menus and customizable options. Adjust crust color‚ loaf size‚ and delay start for personalized baking. The recipe book guides you to explore these features effortlessly for perfect results every time.

Using Pre-Set Menus for Easy Baking

The CBK-110 simplifies baking with 12 pre-programmed menu options‚ including settings for white‚ whole wheat‚ gluten-free‚ and artisan breads. Simply select your preferred menu‚ add ingredients in the specified order‚ and let the machine do the work. This feature ensures consistent results and caters to various dietary needs. With pre-set options‚ you can achieve professional-quality bread effortlessly‚ making it ideal for both beginners and experienced bakers alike. Customize further with crust color and loaf size adjustments for personalized perfection.

Adjusting Ingredients for Personal Preferences

Customize your bread recipes by adjusting ingredients to suit your taste preferences. For example‚ increase whole grain flour for a heartier texture or reduce yeast for slower fermentation. Add herbs‚ nuts‚ or seeds for unique flavors. The CBK-110’s customizable settings allow you to tweak recipes while maintaining optimal baking performance. Experiment with ratios and additions to create personalized bread varieties that align with your dietary needs and flavor preferences‚ ensuring every loaf is tailored to your liking. This flexibility enhances your baking experience and expands recipe possibilities.

Cleaning and Maintenance of the CBK-110

Regularly clean the bread pan and exterior with a damp cloth. Avoid abrasive cleaners to prevent damage. Dry thoroughly after cleaning to maintain longevity and performance.

Step-by-Step Cleaning Instructions

Unplug the bread maker before cleaning. Remove the bread pan and kneading paddle‚ washing them with warm soapy water. Wipe the exterior with a damp cloth. Dry thoroughly to prevent rust. Regular cleaning ensures optimal performance and longevity.

Maintenance Tips for Longevity

Regularly lubricate moving parts with food-safe silicone oil to ensure smooth operation. Avoid using abrasive cleaners‚ as they can damage the finish. Check and replace worn-out parts‚ like the kneading paddle‚ to prevent further damage. Descale the machine if you live in a hard-water area to remove mineral buildup. Store the bread maker in a dry place when not in use to prevent rust. Proper maintenance ensures years of reliable service.

Troubleshooting Common Issues

Common issues like jamming or uneven baking can be resolved by checking dough consistency‚ ensuring proper ingredient measurements‚ and cleaning the machine regularly for smooth operation.

Resolving Jamming or Sticking Issues

Jamming or sticking issues in the Cuisinart CBK-110 can often be resolved by ensuring proper cleaning and maintenance. Regularly wipe down the bread pan and paddles to prevent dough residue buildup. Check that ingredients are added in the correct order and measured accurately to avoid overworking the machine. If the dough sticks‚ gently pause the cycle‚ scrape the sides‚ and resume. Proper lubrication of moving parts can also prevent jams and ensure smooth operation. Always refer to the recipe book for specific troubleshooting tips tailored to your bread maker.

Addressing Uneven Baking or Crust Problems

Uneven baking or crust issues can often be resolved by adjusting the crust color setting or ensuring the bread pan is securely locked. Check ingredient measurements and order‚ as improper ratios may affect rise and texture. If the crust is too dark or light‚ tweak the settings accordingly. Ensure the machine is placed on a stable surface to prevent vibrations. For persistent issues‚ refer to the recipe book for troubleshooting tips or adjust yeast levels slightly to optimize results.

The Legacy of the Cuisinart CBK-110

The Cuisinart CBK-110 remains a beloved bread maker‚ celebrated for its reliability and versatility. Its enduring popularity stems from consistent performance and user-friendly design‚ making it a top choice for home bakers;

Why It Remains a Popular Choice

The Cuisinart CBK-110 remains a favorite due to its user-friendly design‚ 12 pre-programmed menu options‚ and customizable settings for crust color and loaf size. Its delay start timer allows up to 13 hours of programming‚ making it ideal for busy households. The inclusion of a comprehensive recipe book with over 30 recipes further enhances its appeal‚ offering versatility for both novice and experienced bakers. Its durability and consistent performance solidify its reputation as a trusted kitchen companion.

Comparisons with Other Cuisinart Models

The CBK-110 stands out among other Cuisinart models like the CBK-200 and CBK-100 due to its compact design and 12 pre-programmed menu options. While the CBK-200 offers a larger 2-pound loaf capacity‚ the CBK-110 is more affordable and space-efficient; The CBK-100‚ though similar‚ lacks the delay start timer and customizable crust settings. The CBK-110’s balance of features‚ size‚ and price makes it a preferred choice for many home bakers seeking versatility without compromise.

Availability of the CBK-110 Recipe Book in PDF

The CBK-110 recipe book is readily available as a downloadable PDF on the official Cuisinart website and trusted third-party sources like GuideDepot‚ ensuring easy access for all users.

Where to Download the Official PDF

The official Cuisinart CBK-110 recipe book in PDF format is available for download directly from Cuisinart’s website under the Warranties and Manuals section. Simply visit https://www.cuisinart.com‚ navigate to the Compact Automatic Bread Maker section‚ and locate the CBK-110 model. Additionally‚ trusted third-party sources like GuideDepot offer the PDF for easy access. Ensure to download from reputable sites to avoid unauthorized versions and maintain quality.

Alternative Sources for Additional Recipes

Beyond the official Cuisinart CBK-110 recipe book‚ enthusiasts can explore community-shared recipes and user-generated content online. Websites like BreadMakerManuals.com and forums dedicated to bread making often feature additional recipes tailored for the CBK-110. These resources provide creative variations and tips from experienced users‚ helping you expand your culinary repertoire beyond the original booklet.

User Reviews and Testimonials

The Cuisinart CBK-110 has received positive feedback for its ease of use and versatile features. Many users praise its ability to deliver consistent results‚ making it a favorite among home bakers.

Pros and Cons of the CBK-110

The CBK-110 is praised for its user-friendly design‚ 12 pre-programmed settings‚ and delay timer‚ making it ideal for home bakers. It also offers customizable crust color and loaf size options. However‚ some users find it slightly heavy and note occasional inconsistency in crust color. Cleaning can be a minor hassle‚ but overall‚ it remains a top choice for its reliability and versatility in producing high-quality bread.

Community-Shared Tips and Hacks

Bakers suggest measuring ingredients precisely for consistent results and using high-quality flour for better texture. Greasing the pan lightly before adding dough can prevent sticking. Some users recommend experimenting with recipes from the included PDF booklet to explore new flavors. For troubleshooting‚ ensuring yeast is fresh and placed correctly avoids rising issues. These tips enhance your baking experience with the CBK-110‚ making it even more enjoyable and efficient.

The Cuisinart CBK-110 bread maker‚ paired with its recipe book‚ transforms simple ingredients into perfectly crafted loaves. With pre-programmed settings and customizable options‚ it offers endless baking possibilities. Embrace the joy of homemade bread and experiment with new recipes to maximize your baking experience.

Maximizing the Potential of Your CBK-110

To fully utilize your CBK-110‚ explore all 12 pre-set programs and customize crust colors and loaf sizes for perfectly tailored results. Experiment with diverse recipes from the included booklet‚ from basic breads to artisanal and gluten-free options. Regularly clean and maintain your machine to ensure consistent performance and longevity. By understanding and leveraging these features‚ you can unlock the full potential of your bread maker and enjoy a wide variety of homemade breads with ease and precision.

Final Thoughts on the Recipe Book and Bread Maker

The Cuisinart CBK-110 and its accompanying recipe book are indispensable tools for bread enthusiasts. With a user-friendly design and versatile features‚ the bread maker simplifies the process of creating delicious‚ homemade bread. The recipe book‚ featuring over 30 diverse recipes‚ ensures endless creativity and experimentation. Together‚ they offer a seamless baking experience‚ making the CBK-110 a valuable addition to any kitchen‚ perfect for both novices and experienced bakers alike‚ ensuring satisfaction and culinary success.

plasma cutter troubleshooting guide

Troubleshooting a plasma cutter involves identifying and addressing common issues like inconsistent firing, poor cut quality, or damaged components. Proper maintenance and understanding of basic operation principles are essential for optimal performance and extending the lifespan of your equipment. This guide provides practical advice for diagnosing and resolving problems, ensuring efficient and precise cutting results.

Understanding Common Issues and Basic Maintenance

Plasma cutters can experience a variety of issues, including intermittent torch firing, poor cut quality, and damaged components. Regular maintenance is crucial to prevent these problems and ensure optimal performance. Basic checks include inspecting electrical connections, ensuring proper grounding, and verifying power supply stability. Additionally, operators should monitor consumable wear and replace them as needed. Proper gas flow and pressure settings are also essential for consistent cutting results. By addressing these factors early, users can avoid more severe issues and extend the lifespan of their plasma cutter. Routine maintenance not only improves efficiency but also enhances safety and precision in cutting operations.

Intermittent Torch Firing

Intermittent torch firing is a common issue that disrupts cutting performance. It often stems from incorrect 2T/4T mode settings or unstable power supply, requiring immediate attention to restore functionality.

Troubleshooting 2T/4T Mode Settings

Troubleshooting 2T/4T mode settings begins with understanding their functions. The 2T mode allows the torch to stay on after triggering, while 4T mode requires continuous activation. If the torch fires incorrectly, check the mode selection to ensure it matches the job requirements. Refer to the operator manual for guidance. Incorrect settings can lead to intermittent firing or failure to cut properly. Adjust the mode to optimize performance and maintain consistent operation during cutting tasks. This step is crucial for resolving issues related to torch functionality and ensuring precise control over the plasma cutter.

Checking Electrical Connections and Power Supply

Ensuring stable electrical connections and power supply is critical for proper plasma cutter operation. Start by verifying that all cables and connectors are securely attached and free from damage or corrosion. Loose connections can cause intermittent firing or complete system failure. Next, check the power supply to confirm it meets the plasma cutter’s voltage and amperage requirements. Inspect the circuit breaker or fuse box to ensure the circuit has not tripped or blown. If issues persist, consult the operator manual or contact a professional to assess the electrical system. Proper grounding and wiring are essential to prevent safety hazards and maintain reliable performance.

Poor Cut Quality

Poor cut quality can result from incorrect power settings, insufficient air flow, or worn consumables. Addressing these issues ensures precise cuts and maintains equipment performance effectively.

Addressing Cut Angularity and Dimensional Accuracy

Ensuring precise cut angularity and dimensional accuracy requires attention to torch alignment, operator technique, and equipment calibration. Misalignment or improper torch handling can lead to uneven cuts or beveling. Regularly inspecting and maintaining the plasma cutter’s mechanical components, such as rails and carriages, is crucial for consistent results. Additionally, material properties, like thickness and conductivity, influence cut quality. Adjusting power settings and gas flow can help achieve straighter, more accurate cuts. Proper consumable condition and correct nozzle-to-workpiece distance also play a significant role in maintaining precision. Addressing these factors ensures high-quality, dimensionally accurate cuts with minimal angularity issues.

Adjusting Power Settings and Air Flow

Optimizing power settings and air flow is crucial for achieving clean, precise cuts. Incorrect amperage can result in either too aggressive or insufficient cutting, affecting both speed and quality. Adjusting the power settings based on the material type and thickness ensures efficient cutting. Proper air flow is equally important, as it influences the plasma arc’s stability and cleanliness. Insufficient air pressure can lead to inconsistent cuts, while excessive pressure may cause turbulence. Regularly checking and calibrating these parameters ensures consistent results and prevents damage to the plasma cutter. Always consult the operator’s manual for specific recommendations tailored to your equipment and material requirements.

Inspecting and Replacing Consumables

Regular inspection of consumables, such as the nozzle, electrode, and swirl ring, is essential for maintaining plasma cutter performance. Over time, these components wear out, leading to poor cut quality or inconsistent arc behavior. Visible signs of wear include excessive erosion, discoloration, or irregularities on the nozzle or electrode surfaces. If these parts are damaged, replace them promptly to restore optimal cutting performance. Always use genuine or high-quality replacement parts to ensure compatibility and longevity. Refer to the operator’s manual for specific guidance on inspection intervals and replacement procedures. Proper maintenance of consumables prevents premature equipment failure and ensures precise, efficient cutting results. Regular checks can help extend the lifespan of your plasma cutter and maintain consistent performance.

Damaged Plasma Cutter Nozzle

A damaged nozzle can cause inconsistent cuts, reduced precision, and lower equipment efficiency. Regular inspection is crucial to identify wear or damage early, preventing further issues. Always use genuine replacement parts and follow manufacturer guidelines for repair or replacement to maintain optimal performance and extend the lifespan of your plasma cutter.

Identifying Signs of Nozzle Damage

Signs of nozzle damage include inconsistent cutting performance, visible wear or erosion, and unusual sparks or sounds during operation. Regularly inspect the nozzle for any physical damage, such as cracks, dents, or excessive wear. Check for improper gas flow, which can indicate a damaged or clogged nozzle. Additionally, if the cutter produces uneven or rough cuts, it may signal that the nozzle is compromised. Addressing these issues promptly prevents further damage and ensures optimal cutting results. Always refer to the manufacturer’s guidelines for inspection and maintenance procedures to maintain the longevity of your plasma cutter.

Repair and Replacement Procedures

When repairing or replacing a damaged plasma cutter nozzle, ensure the cutter is powered off and allowed to cool. Use specialized tools to remove the nozzle, following the manufacturer’s instructions. Inspect for wear or damage, and clean or replace components as needed. If the nozzle is severely damaged, replace it with a genuine part to maintain performance. Always consult the user manual for specific guidance, as improper installation can lead to further issues. Regular maintenance and timely replacements are crucial for optimal cutting results and extending the lifespan of your plasma cutter.

Blown Fuses or Tripped Circuits

Blown fuses or tripped circuits often result from overloaded systems or faulty wiring. Check the power supply, circuit capacity, and ensure proper grounding to resolve the issue.

Checking Power Supply and Circuit Capacity

Ensuring a stable power supply is crucial for plasma cutter operation. Verify that the voltage and current match the cutter’s specifications to prevent overloading. Check the circuit breaker or fuse box to confirm the circuit capacity can handle the plasma cutter’s power requirements. Overloaded circuits may trip or blow fuses, disrupting operation. Use a multimeter to measure the incoming power and ensure it aligns with the recommended settings. If the power supply fluctuates, consider using a voltage stabilizer. Additionally, check for any loose connections or damaged wiring that could interfere with power delivery. Proper electrical setup ensures safe and reliable plasma cutting performance.

Ensuring Proper Grounding and Wiring

Proper grounding and wiring are essential for safe and efficient plasma cutter operation. A faulty ground connection can lead to inconsistent performance or electrical hazards. Inspect all cables and connections for signs of damage or wear. Ensure the plasma cutter is correctly grounded according to the manufacturer’s instructions. Check for loose terminals and tighten them if necessary. Verify that the wiring matches the recommended gauge and rating for the cutter’s power requirements. Use a multimeter to test continuity and ensure there are no open circuits. Proper grounding prevents electrical shocks and ensures stable arc initiation, while correct wiring maintains consistent power delivery, crucial for precise cutting operations.

Incorrect Amp Settings

Incorrect amperage settings can lead to poor cut quality or equipment damage. Always refer to the material thickness and type to adjust the amp settings accurately for optimal results.

Adjusting Amperage for Specific Materials

Proper amperage adjustment is crucial for achieving clean, precise cuts. Different materials, such as steel, stainless steel, or aluminum, require specific amp settings to ensure optimal cutting performance. Always consult the operator’s manual for recommended amperage ranges based on material thickness and type. For thinner materials, lower amperage settings are typically sufficient, while thicker materials may require higher settings. Starting with a lower amperage and gradually increasing as needed can help prevent overheating or warping. Additionally, consider the plasma gas being used, as it can affect the cutting arc’s stability and effectiveness. Adjusting amperage correctly ensures efficient cutting and minimizes wear on consumables, leading to better overall results.

Monitoring and Maintaining Optimal Cutting Parameters

Monitoring cutting parameters ensures consistent and high-quality results. Regularly check the plasma cutter’s power output, air pressure, and gas flow to maintain stability. Adjustments may be needed based on material thickness and type. Keeping the torch at the correct distance from the workpiece is vital to prevent overheating or uneven cuts. Use the manufacturer’s guidelines for optimal settings and perform routine inspections of consumables like nozzles and electrodes; Proper maintenance, such as cleaning the torch and replacing worn parts, helps sustain performance. Continuous monitoring allows for quick identification of issues, ensuring efficient operation and extending the lifespan of the plasma cutter.

Incorrect Gas Usage

Using the wrong plasma gas or incorrect flow rates can lead to poor cut quality, reduced efficiency, and potential equipment damage. Always ensure proper gas selection and calibration for optimal performance.

Selecting the Right Plasma Gas for the Job

Selecting the appropriate plasma gas is crucial for achieving precise cuts and maintaining equipment longevity. Common plasma gases include compressed air, oxygen, and nitrogen, each suited for specific materials. Compressed air is ideal for cutting mild steel, while oxygen enhances cut quality and speed. Nitrogen is often used for stainless steel and non-ferrous metals to prevent oxidation. Always refer to your plasma cutter’s manual to ensure compatibility and optimal performance. Using the wrong gas can lead to poor cut quality, increased consumable wear, and potential damage to the cutter. Proper gas selection ensures efficiency and extends the life of your equipment.

Calibrating Gas Flow and Pressure

Calibrating gas flow and pressure is essential for consistent plasma cutting performance. Start by consulting your cutter’s manual for recommended settings based on material type and thickness. Use a high-quality pressure gauge to ensure accuracy. Adjust the regulator to match the specified pressure, then fine-tune the flow rate to achieve a stable, consistent arc. Proper calibration prevents issues like uneven cuts or excessive nozzle wear. Always test settings on scrap material before cutting your final piece. Regularly check and maintain gas supply lines and connections to avoid leaks or obstructions. Accurate gas flow and pressure calibration ensures optimal cutting results and extends the life of your plasma cutter.

Regular maintenance, proper techniques, and understanding settings and components are key to preventing issues. Safety guidelines ensure longevity and effective troubleshooting.

Best Practices for Preventative Maintenance

Regularly inspect and clean the plasma cutter’s torch and nozzle to prevent debris buildup; Check electrical connections and ensure proper grounding to avoid power issues. Replace worn or damaged consumables promptly, as they can affect cut quality and machine performance. Maintain appropriate gas flow and pressure settings specific to your material and project requirements. Refer to the operator’s manual for recommended maintenance schedules and guidelines. Proper storage and handling of the plasma cutter and its components can also prevent accidental damage. By following these practices, you can minimize downtime and ensure consistent, high-quality cuts.

start with the why pdf

Simon Sinek’s Start With Why explores the power of purpose in leadership and life, offering insights into inspiring action through understanding one’s core motivation. Available as a PDF, this book provides a framework for leaders to communicate their “why” effectively, fostering loyalty and engagement. Sinek’s approach, rooted in human biology and decision-making, emphasizes the importance of starting with purpose to drive success in business and personal growth. The Start With Why PDF is a valuable resource for those seeking to inspire others and find their own purpose. Through real-world examples and practical advice, Sinek reveals how aligning actions with a clear “why” leads to lasting impact and fulfillment.

Overview of the Book’s Core Message

Start With Why by Simon Sinek focuses on the importance of understanding and communicating one’s purpose or “why” in leadership and life. The book argues that knowing and sharing this “why” is essential for inspiring loyalty, trust, and action. Sinek introduces the Golden Circle framework, which emphasizes starting with “why” before addressing “how” and “what.” This approach, rooted in biology and human behavior, helps leaders and organizations create meaningful connections and drive long-term success. The PDF version of the book provides a clear, accessible guide to implementing these principles in both professional and personal contexts.

The Importance of Understanding “Why” in Leadership and Life

Understanding “why” is the foundation of effective leadership and personal fulfillment. It drives purpose, passion, and direction, enabling leaders to inspire loyalty and trust. Without a clear “why,” actions lack meaning and direction. In leadership, articulating “why” fosters connection and motivation, while in life, it brings clarity and satisfaction. The Start With Why PDF provides insights into harnessing this power, helping individuals and organizations align actions with purpose for lasting impact and success.

The Golden Circle Framework

The Golden Circle is a visual model starting with Why at the core, surrounded by How and What. It emphasizes purpose over practicality, aligning actions with meaning, rooted in biology.

What is the Golden Circle?

The Golden Circle is a concept introduced by Simon Sinek, consisting of three concentric circles. At the center is Why, representing purpose and belief. The middle circle is How, outlining the actions and strategies to realize the “Why.” The outer circle is What, detailing the tangible results and products. This framework emphasizes starting with the core purpose to inspire and align actions effectively, as discussed in the Start With Why PDF.

How Does the Golden Circle Apply to Business and Leadership?

The Golden Circle transforms business and leadership by prioritizing purpose over profit. By starting with Why, leaders inspire trust, loyalty, and innovation. This framework helps organizations align their mission, vision, and values, fostering a culture of purpose. Leaders who communicate their “why” effectively create meaningful connections with employees and customers, driving long-term success. The Start With Why PDF provides practical insights for leaders to operationalize this approach, ensuring their teams are motivated and united by a shared purpose.

The Biology of Decision-Making

The book explores how human biology influences decision-making, emphasizing the role of the limbic system in emotional and purpose-driven choices, aligning with the ‘Why’ concept effectively.

The Role of the Brain in Making Decisions

The brain plays a crucial role in decision-making, with the limbic system driving emotional and purpose-driven choices. Sinek explains how the Golden Circle framework aligns with this biology, emphasizing the importance of starting with “Why” to engage the limbic brain. This approach fosters trust, loyalty, and inspiration, as it resonates with the brain’s natural decision-making processes. By understanding this biological connection, leaders can more effectively communicate their purpose and inspire action. This insight is key to the book’s message.

How “Why” Aligns with Human Biology

Simon Sinek explains that “Why” aligns with human biology, particularly the limbic system, which drives emotions and decision-making. By appealing to this part of the brain, leaders can inspire trust and loyalty. The Golden Circle mirrors this biological structure, starting with “Why” to engage emotions, then “How” for trust, and finally “What” for action. This alignment fosters inspired actions and meaningful connections, reflecting how humans naturally process purpose and motivation;

Practical Applications of “Start With Why”

The book offers actionable strategies for leaders to inspire others by clarifying their purpose. By focusing on “Why,” individuals can create meaningful connections and drive motivated actions.

How Leaders Can Inspire Action

Leaders can inspire action by clearly communicating their purpose, fostering trust, and aligning their vision with the values of their audience. By starting with “why,” they create emotional connections, motivating others to take action. This approach, as outlined in the Start With Why PDF, encourages leaders to go beyond mere profit-driven goals, focusing instead on meaningful impact. Through authenticity and clarity, leaders can cultivate loyalty and drive collective success.

Case Studies of Successful “Why”-Driven Organizations

The Start With Why PDF highlights organizations like Apple and the Wright Brothers, showcasing how their clear “why” drove innovation and loyalty. Apple’s focus on challenging the status quo, rather than just selling computers, created a devoted customer base. Similarly, the Wright Brothers’ passion for flight, beyond mere technical achievement, inspired groundbreaking progress. These examples demonstrate how aligning actions with a core purpose fosters trust, innovation, and long-term success, reinforcing Sinek’s principles of leadership and inspiration.

The Difference Between “What” and “Why”

In “Start With Why,” Sinek distinguishes between “what” (actions) and “why” (purpose), emphasizing that “why” drives inspiration and loyalty, while “what” merely describes actions.

Why “What” is Not Enough

Focusing solely on “what” limits inspiration and connection. While “what” describes actions, it fails to ignite passion or loyalty. Sinek argues that without a clear “why,” even the most well-executed strategies lack the emotional resonance needed to truly engage others. The “Start With Why” PDF highlights how understanding and communicating “why” creates deeper connections, driving long-term success and fulfillment in both personal and professional realms.

How “Why” Creates Deeper Connections

Aligning actions with a clear “why” fosters trust and loyalty, creating meaningful relationships. The “Start With Why” PDF explains how communicating purpose builds emotional bonds, inspiring others to act with shared passion. This approach ensures that individuals and organizations connect on a deeper level, driving collaboration and long-term success. By prioritizing “why,” leaders unlock the potential for genuine engagement and lasting impact in both business and life.

Leadership Lessons from the Book

Simon Sinek’s Start With Why teaches leaders to communicate their purpose clearly, inspiring loyalty and alignment. The PDF highlights how understanding “why” fosters trust and shared direction.

How Great Leaders Communicate Their Purpose

Great leaders communicate their purpose by starting with “why,” as outlined in Simon Sinek’s Start With Why PDF. They articulate their core beliefs clearly, inspiring others to align with their vision. This approach, detailed in the PDF, fosters trust and loyalty, enabling organizations to move beyond mere transactions to meaningful relationships. By prioritizing purpose, leaders create a culture of shared direction and passion, driving long-term success.

The Impact of “Why” on Employee Engagement and Loyalty

When leaders communicate their “why,” it profoundly impacts employee engagement and loyalty. As detailed in the Start With Why PDF, understanding and aligning with a shared purpose fosters a sense of belonging and meaning. This connection inspires employees to go beyond tasks, driving passion and commitment. Organizations that prioritize their “why” often see higher retention rates and a more motivated workforce, creating a culture of trust and shared direction that fuels long-term success and satisfaction.

Personal Growth and Self-Discovery

The Start With Why PDF guides individuals in uncovering their core purpose, essential for personal growth and self-discovery. Sinek emphasizes that understanding one’s “why” leads to fulfillment and direction, empowering individuals to align their actions with their passions and values, fostering a more meaningful and purpose-driven life.

How Individuals Can Find Their “Why”

Finding your “why” involves introspection and self-reflection, focusing on passions, values, and the impact you wish to create. The Start With Why PDF encourages individuals to explore their core beliefs and align actions with purpose. Sinek suggests asking oneself about moments of fulfillment and identifying patterns that reveal one’s “why.” This process fosters clarity and direction, enabling individuals to pursue meaningful goals and live purposefully.

The Role of Purpose in Personal Satisfaction

Purpose plays a vital role in personal satisfaction, as it provides direction and meaning to life. The Start With Why PDF highlights how aligning actions with one’s “why” fosters fulfillment and happiness. When individuals understand their purpose, they make decisions that resonate with their core values, leading to a sense of alignment and satisfaction. This clarity reduces uncertainty and enhances overall well-being, making purpose the foundation of a fulfilling life.

Case Studies and Real-World Examples

The Start With Why PDF features case studies like Apple and Harley-Davidson, showcasing how companies thrived by aligning their actions with a clear purpose, driving loyalty and success.

Companies That Successfully Implemented the “Why” Concept

The Start With Why PDF highlights companies like Apple and Harley-Davidson, which thrived by aligning their missions with a clear “why.” Apple’s focus on innovation and Harley-Davidson’s emphasis on freedom exemplify how purpose-driven leadership fosters loyalty. These organizations, as discussed in the book, used the Golden Circle model to communicate their core beliefs, inspiring both employees and customers. Their success demonstrates how a strong “why” can drive long-term growth and engagement, making them standouts in their industries.

Lessons Learned from Failures in Communicating “Why”

Failures in communicating “why” often stem from a lack of genuine commitment to the purpose. Companies may struggle when their actions don’t align with their stated mission, undermining trust. Poor communication and inconsistent messaging can also lead to disengagement. Without leadership buy-in and clear articulation, the “why” remains uninspiring. These failures highlight the importance of authenticity, consistency, and effective communication in successfully implementing the “why” concept, as emphasized in the Start With Why PDF.

Availability and Access to the PDF

Where to Find the “Start With Why” PDF

How to Use the PDF for Maximum Benefit

To maximize the benefit of the Start With Why PDF, engage deeply with its content by highlighting key points and taking notes. Apply the Golden Circle framework to your personal or professional life, starting with your “why” and aligning it with your goals. Study the case studies to gain practical insights and create reflection questions. Discuss the concepts with others to enhance understanding and teach the ideas to reinforce learning. Watch related TED Talks and seek additional resources for a well-rounded perspective. Finally, implement an action plan to practice the principles, ensuring meaningful change in your life or leadership role.

Simon Sinek’s Start With Why leaves a lasting impact by challenging conventional leadership and offering a purpose-driven approach. Its insights inspire meaningful change in everyday life and leadership, fostering fulfillment and success.

The Lasting Impact of “Start With Why”

Simon Sinek’s Start With Why has profoundly influenced leadership and personal growth by emphasizing purpose over profit. The book’s Golden Circle framework has reshaped how organizations communicate, fostering trust and loyalty. By aligning actions with core beliefs, individuals and businesses achieve lasting fulfillment and success, making the Start With Why PDF a timeless resource for anyone seeking inspiration and meaningful impact.

How to Apply the Concepts in Everyday Life

Applying the principles from Start With Why involves identifying and aligning your actions with your core purpose. Start by reflecting on your personal “why” and ensure it guides your decisions. In relationships, communicate your purpose clearly to build trust and connection. At work, focus on meaningful goals that resonate with your values. Regularly revisiting your “why” helps maintain direction and fulfillment, making the Start With Why PDF a valuable guide for continuous growth and inspiration.

hip replacement exercises after 6 weeks pdf

Consistent exercise is crucial for restoring strength and mobility post-hip replacement. After 6 weeks, focus shifts to advanced activities, emphasizing safety and adherence to rehabilitation guidelines for optimal recovery.

Importance of Post-operative Rehabilitation

Post-operative rehabilitation is essential for restoring strength, mobility, and function after hip replacement surgery. It helps reduce pain and inflammation, prevents complications like dislocation, and promotes a faster return to daily activities. Regular exercises improve joint stability, strengthen surrounding muscles, and enhance overall physical conditioning. Rehabilitation also minimizes the risk of long-term limitations and ensures proper healing of the hip joint. Adhering to a structured program reduces recovery time and improves quality of life. Consistency in exercises and physical therapy sessions is key to achieving optimal results and ensuring the hip replacement’s longevity and success.

Overview of the Recovery Process

The recovery process after hip replacement surgery is structured into phases, each focusing on specific goals to restore strength, mobility, and function. The initial weeks emphasize pain management, basic mobility, and adherence to hip precautions. As progress is made, the focus shifts to strengthening exercises, weight-bearing activities, and gradually returning to daily tasks. Physical therapy plays a central role, guiding patients through personalized exercise programs tailored to their needs. The process ensures a safe transition from dependence on assistance to independent movement. By following a structured rehabilitation plan, patients can achieve long-term success, minimizing complications and maximizing the benefits of their hip replacement surgery.

Phase 1: Immediate Post-operative Recovery (0-2 Weeks)

Focuses on pain management, basic mobility, and adherence to hip precautions. Gentle exercises like ankle pumps and glute sets are introduced to promote healing and early movement.

Immediate Post-operative Instructions

After surgery, focus on pain management and gentle mobilization. Follow hip precautions to avoid dislocation, such as avoiding bending at the waist or crossing legs. Perform ankle pumps to improve circulation and reduce swelling. Begin with short periods of sitting or standing, gradually increasing duration. Use assistive devices like a walker or crutches for safe mobility. Prioritize wound care and monitor for signs of infection. Adhere to medication schedules to manage pain and inflammation. Early mobilization is key, but avoid overexertion. Follow the physical therapist’s guidance for safe exercises and activities during this critical healing phase. Consistency ensures proper recovery and minimizes complications.

Home Exercise Program (HEP)

A tailored home exercise program is essential for early recovery after hip replacement. Begin with gentle exercises like ankle pumps, glute sets, and quad sets to maintain circulation and prevent muscle atrophy. Perform these exercises 2-3 times daily, as prescribed by your physical therapist. Progress to seated or standing exercises, such as seated marching or standing hip extensions, to improve hip mobility and strength. Consistency is key to avoid complications and promote healing. Use ice to manage swelling and elevate the leg to reduce discomfort. Avoid any exercises that cause sharp pain or discomfort, and gradually increase intensity as tolerated. Adhere to your therapist’s guidelines for a safe and effective recovery. Early adherence ensures better long-term outcomes.

Phase 2: Early Mobilization (2-6 Weeks)

During weeks 2-6, focus on progressive strengthening and weight-bearing activities. Exercises include resisted hip movements and gentle mobilization to improve strength and mobility, guided by physical therapy.

Progression of Strengthening Exercises

During weeks 2-6, strengthening exercises progress to include resistance bands and weight-bearing activities. Focus on exercises like side-lying leg lifts, standing hip abductions, and step-ups to target gluteus medius and minimus muscles. These exercises improve hip stability and strength, reducing the risk of complications. Gradually increase resistance as tolerated, ensuring proper form to avoid injury. Weight-bearing activities, such as partial weight-bearing marches, help restore functional mobility. Consistency in these exercises is key to achieving optimal muscle activation and joint stability, preparing the patient for more advanced movements in later phases. Always perform exercises under the guidance of a physical therapist to ensure safety and effectiveness.

Weight-bearing activities are gradually introduced to restore functional mobility and strength. Starting with partial weight-bearing exercises like marches or heel-to-toe walking, patients progress to single-leg stance and balance tasks. These activities enhance hip stability and promote proper gait mechanics. Resistance bands and bodyweight exercises, such as step-ups and mini-squats, are incorporated to strengthen surrounding muscles. Physical therapists guide patients to ensure safe execution and gradual progression. Adherence to weight-bearing precautions, such as avoiding excessive bending or twisting, is emphasized to protect the hip joint. The goal is to transition patients toward full weight-bearing activities, preparing them for daily tasks and promoting long-term joint health.

Phase 3: Advanced Rehabilitation (After 6 Weeks)

Focus on restoring strength, mobility, and balance through dynamic exercises. Low-impact cardio, resistance training, and functional activities are introduced to enhance recovery and prepare for daily living.

Focus on Strengthening and Mobility

Post 6 weeks, exercises aim to enhance strength and mobility in the hip joint. Activities include resisted hip abduction, glute bridging, and heel raises to target key muscle groups. Patients progress to dynamic movements like step-ups and balance exercises to improve functional abilities. Low-impact aerobics, such as cycling or swimming, are introduced to boost endurance without stressing the joint. Physical therapists tailor programs to individual needs, ensuring safe and effective progression. Consistency in these exercises is vital for restoring pre-surgery mobility and preventing future complications.

Return to Everyday Activities

After 6 weeks, patients can gradually resume daily activities while adhering to safety guidelines. Light household chores, walking, and seated exercises are encouraged. Avoid heavy lifting or bending to prevent dislocation. Patients should use assistive devices for reaching or picking up items. Activities like cooking and light gardening can be reintroduced with caution. It’s important to avoid high-impact sports or repetitive twisting motions. A physical therapist can provide guidance on safely reintegrating activities, ensuring the hip joint remains stable. Consistency in exercise and adherence to precautions will help patients regain independence and confidence in performing everyday tasks.

Safety Precautions and Dislocation Prevention

Adhere to hip precautions to avoid dislocation, such as avoiding heavy lifting, bending, or repetitive twisting. Use assistive devices for reaching or picking up items to minimize risk.

General Safety Guidelines

Following general safety guidelines is essential to prevent complications and ensure a smooth recovery after hip replacement. Avoid heavy lifting, bending, or repetitive twisting, as these can dislocate the hip. Use assistive devices like reachers or grabbers to avoid reaching or stretching. Maintain proper posture to reduce strain on the hip joint. Avoid sitting in low chairs or crossing your legs, as this can increase the risk of dislocation. Always follow the hip precautions provided by your surgeon or physical therapist. Monitor for signs of instability or pain and report them immediately to your healthcare team. Adhering to these guidelines helps ensure long-term success and prevents setbacks.

Activity Modification and Precautions

Modifying daily activities is crucial to protect the hip joint and prevent dislocation after surgery. Avoid heavy lifting, bending, or repetitive twisting, as these can strain the hip. Use assistive devices like reachers or grabbers to avoid reaching or stretching. Sit in chairs with adequate height to avoid deep flexion, and avoid crossing your legs or ankles. When getting up from a sitting position, slide to the edge of the chair and use your arms for support. Avoid sleeping on the side of the surgical hip without a pillow between the knees. Always follow the specific precautions provided by your surgeon or physical therapist to ensure proper healing and prevent complications.

Role of Physical Therapy in Recovery

Physical therapy plays a vital role in post-hip replacement recovery, offering personalized exercise plans and focusing on strengthening, mobility, and safely guiding patients through the rehabilitation process.

Physical Therapist’s Role in Exercise Planning

A physical therapist plays a pivotal role in designing personalized exercise plans tailored to the patient’s recovery stage and goals. They assess the patient’s current mobility, strength, and functional abilities to create a structured program. The therapist ensures exercises are performed safely, with proper form, and progressively challenges the patient as they heal. They introduce activities like resisted hip abduction, glute bridging, and heel raises, adapting them based on patient progress. Education on proper techniques and adherence to safety guidelines is emphasized, fostering independence and confidence in the patient during their rehabilitation journey.

Components of a Comprehensive Therapy Program

A comprehensive therapy program after hip replacement incorporates strengthening exercises, mobility drills, and functional training. Strengthening focuses on muscles like glutes and hamstrings, using resistance bands and bodyweight exercises. Mobility exercises, such as hip flexion and extension, improve range of motion. Functional training includes activities like walking and stair climbing to enhance daily living skills. Pain management techniques and patient education on proper movement patterns are also key. Progression is gradual, with exercises adjusted to avoid discomfort. Regular assessments ensure the program evolves with the patient’s recovery, promoting long-term independence and reducing the risk of complications.

Consistent exercise and adherence to therapy protocols are vital for long-term recovery. Strengthening, mobility, and proper adherence reduce complications and enhance quality of life post-hip replacement.

Long-term Benefits of Consistent Exercise

Consistent exercise after hip replacement enhances joint stability, reduces pain, and improves mobility. Strengthening muscles like the glutes and hamstrings supports the hip, preventing future complications. Regular activity promotes long-term functionality, enabling patients to return to daily activities and hobbies with confidence. Over time, exercise fosters independence, reducing reliance on assistive devices. Additionally, it improves overall physical and mental well-being, contributing to a higher quality of life post-surgery.

Importance of Adherence to Rehab Protocols

Adhering to rehabilitation protocols is essential for optimal recovery after hip replacement. Consistent exercise and activity modification prevent complications like dislocation and ensure proper healing. Following guidelines set by healthcare providers minimizes risks and accelerates progress. Non-compliance may lead to prolonged recovery or setbacks. Proper technique in exercises and avoiding prohibited movements are critical. Regular follow-ups with physical therapists ensure adjustments are made to suit individual needs. Adherence fosters independence, reduces reliance on assistive devices, and enhances overall functionality. Compliance with rehab protocols is vital for achieving long-term benefits, improving quality of life, and ensuring the success of the hip replacement surgery.

width guide for shoes

Proper shoe width is crucial for comfort and performance․ This guide explores factors like foot shape, measurement tools, and systems to help you find the perfect fit․

1․1 Importance of Proper Shoe Width

Proper shoe width is essential for foot health and comfort․ Ill-fitting shoes can cause pain, blisters, and even long-term foot deformities․ Narrow shoes may restrict toe movement, while overly wide shoes can lead to poor support․ Ensuring the correct width promotes better blood circulation, reduces fatigue, and enhances performance in physical activities․ A well-fitting shoe width also prevents slipping or tightness, providing stability and support․ This guide emphasizes the significance of proper shoe width to maintain foot health and overall comfort throughout the day․

1․2 Overview of Shoe Width Systems

Shoe width systems vary by region and brand but generally categorize widths as Narrow, Standard, Wide, or Extra Wide․ Common labels include AAA (very narrow), AA, A, B (standard for women), C, D (standard for men), E, EE, and EEE (extra wide)․ The Brannock device, a standard tool, measures foot length and width to determine proper fit․ Standard widths differ slightly between men and women, with men’s shoes typically wider․ Understanding these systems helps consumers choose shoes that match their foot shape, ensuring comfort and support․ Proper width alignment is key to avoiding discomfort or mobility issues․

How Shoe Width is Measured

Shoe width is measured using tools like the Brannock device, categorizing feet as Narrow, Standard, or Wide based on precise measurements for optimal fit․

2․1 Tools for Measuring Foot Width

Accurate measurement of foot width is essential for proper shoe fit․ Common tools include the Brannock device, rulers, or even tracing the foot on paper․ The Brannock device, widely used in shoe stores, measures both length and width; For a DIY approach, place the foot against a wall, mark the widest point, and measure the distance․ Digital tools and apps are also available, offering precise calculations․ These methods ensure a comfortable fit by determining whether a narrow, standard, or wide shoe is needed․

2․2 Standard Shoe Width Categories

Shoe width categories vary to accommodate different foot shapes․ Common categories include Narrow, Standard, Wide, and Extra Wide․ In North America, widths are often labeled as AAA (very narrow), AA, A, B (standard), C, D (wide), E, EE, and EEE (extra wide)․ These categories help ensure proper fit and comfort․ Understanding your foot width is crucial for selecting the right shoe, as ill-fitting shoes can cause discomfort or health issues․ These standardized measurements guide consumers in finding shoes that match their foot shape precisely․

2․3 Difference Between Men’s and Women’s Shoe Width

Men’s and women’s shoe widths differ due to typical foot shapes․ Men’s feet are generally wider and longer, with a standard width of D, while women’s feet are narrower, with a standard width of B․ Women’s shoes often range from AAA (very narrow) to EE (extra wide), while men’s sizes range from A (narrow) to EEE (extra wide)․ These differences reflect average foot proportions, ensuring proper fit for comfort and support․ Manufacturers typically label widths only when they deviate from the standard size, helping consumers choose shoes tailored to their foot shape․

Understanding Shoe Width Charts

Shoe width charts are tools to determine proper fit by comparing foot measurements to standard shoe sizes․ They cover various widths, from narrow to extra-wide, for men and women․

3․1 Men’s Shoe Width Chart

A men’s shoe width chart categorizes widths from narrow to extra-wide, using designations like AAA (narrowest) to EEE (widest)․ Standard men’s width is D, with sizes increasing in letters․ Charts provide measurements for each width, helping men find their ideal fit․ For example, a size 10;5 D corresponds to a specific width, ensuring comfort․ This guide is essential for accurate sizing, especially for those with wider or narrower feet, offering a clear reference for selecting the right shoe width․

3․2 Women’s Shoe Width Chart

A women’s shoe width chart organizes sizes from narrow to extra-wide, typically labeled as AAA (narrowest) to EEE (widest)․ The standard width for women is B, with sizes incrementing in letters․ For example, a size 8 shoe might correspond to widths like 2․95 inches for narrow or 3․7 inches for wide․ This chart helps women determine their ideal fit, ensuring comfort and proper support․ By referencing the chart, individuals can easily match their foot width to the appropriate shoe size, enhancing both comfort and style in their footwear choices․

3․3 International Shoe Width Conversion

Understanding international shoe width conversion is essential for global shoppers․ Different regions use varying systems, with the US, UK, and EU having distinct size charts․ For example, a US women’s size 8 in medium width (B) may correspond to a UK size 6 (standard width) or EU size 38․ Width labels also vary, with some countries using letters (B, D) and others numerical or descriptive terms․ Conversion charts help bridge these differences, ensuring a consistent fit across borders․ This guide simplifies the process, making it easier to find the right width, no matter the region or brand․

How to Choose the Right Shoe Width

Measure your foot width using a Brannock device or ruler․ Try shoes in the afternoon, as feet swell during the day․ Ensure a snug, comfortable fit without pressure․

4․1 Measuring Your Foot for Width

To measure your foot width accurately, use a Brannock device or a ruler․ Place your foot flat on the floor, heel against a wall․ Measure the widest part of your foot, typically between the big toe and little toe․ Compare this measurement to a shoe width chart to determine your size․ For the most accurate results, measure both feet, as they may differ slightly․ Use this measurement to guide your shoe selection, ensuring a comfortable fit that aligns with your foot’s natural width․

4․2 Tips for Trying On Shoes

When trying on shoes, wear the same type of socks you plan to use with them․ Ensure there’s about a half-inch space between your longest toe and the shoe’s tip․ Check the width by pressing the sides gently; they should feel snug but not tight․ Try shoes in the afternoon, as feet tend to swell during the day․ Stand up and walk to ensure the fit remains comfortable․ Don’t rush; take time to assess how the shoe feels, as proper width is key to avoiding discomfort and potential foot issues․

4․3 Common Mistakes in Selecting Shoe Width

A common mistake is guessing shoe width without proper measurement․ Many people rely solely on length, ignoring how width affects comfort․ Others assume all brands use the same sizing standards, leading to inconsistent fits․ Some buyers neglect to try shoes in the afternoon when feet are slightly swollen, resulting in tight fits․ Additionally, not considering personal foot shape—narrow, average, or wide—can lead to poor choices․ Avoiding these errors ensures a more accurate and comfortable fit tailored to individual needs․

Special Considerations for Different Foot Shapes

Different foot shapes require tailored approaches․ Narrow feet need snug fits, while wide feet benefit from extra room․ Proper fit enhances comfort and performance for all foot types․

5․1 Narrow Feet and Shoe Width

Narrow feet often struggle with finding shoes that fit comfortably․ Look for widths labeled as AAA, AA, or A, which are designed for slimmer feet․ These sizes provide a snug fit without excessive room, reducing discomfort and potential blisters․ Some brands offer narrower options, while others may not explicitly label them․ Proper fit is crucial, as ill-fitting shoes can lead to foot issues․ Measure carefully and consider brands specializing in narrow widths for the best results․ Comfort and support are key for maintaining healthy, happy feet․

5․2 Wide Feet and Shoe Width

Wide feet require shoes with ample room to avoid discomfort and potential foot issues like hammertoes or bunions․ Opt for sizes labeled E, EE, or XXX-Wide for men, and C, D, or WW for women․ These widths provide the necessary space for toes to spread naturally․ Proper fit is essential, as tight shoes can cause pain and long-term damage․ If unsure, consider going half a size up or trying brands that specialize in wide widths․ Features like soft, flexible uppers and adjustable closures can also enhance comfort for wider feet․

5․3 Average Feet and Shoe Width

For individuals with average foot width, standard shoe widths (B for women and D for men) typically provide a comfortable fit․ These widths ensure toes have enough room to move without causing friction or discomfort․ Proper support and cushioning are essential to maintain foot health․ When trying shoes, ensure the fit isn’t too tight or too loose, as this can lead to issues like blisters or instability․ Opting for breathable materials and adjustable closures can further enhance comfort for average-width feet, ensuring optimal support and flexibility during daily activities or athletic pursuits․

Proper shoe width ensures comfort, performance, and foot health․ This guide helps you make informed choices, guaranteeing a perfect fit for every foot shape and activity․

6․1 Importance of Proper Fit

A proper fit is essential for comfort, performance, and foot health․ Ill-fitting shoes can cause blisters, discomfort, and long-term issues like bunions or calluses․ Ensuring the right width prevents these problems, allowing feet to function naturally․ Proper fit also enhances athletic performance and overall well-being․ Whether for daily wear or sports, prioritizing the correct shoe width guarantees optimal support and mobility; This guide emphasizes the significance of understanding and selecting the right fit for various foot shapes and activities․

6․2 Where to Find More Resources

For further guidance, explore reputable shoe websites like Clarks or specialized footwear guides․ Many brands offer detailed size charts and fitting tips․ Online tools, such as shoe size calculators, can also help determine your width․ Additionally, international conversion charts are available to compare sizes across regions․ Visit brannock․com or similar sites for precise measurements․ These resources provide comprehensive support for finding your ideal fit, ensuring comfort and confidence in your footwear choice․

Powered by WordPress & Theme by Anders Norén