Month: February 2025

nikon d5000 instruction manual

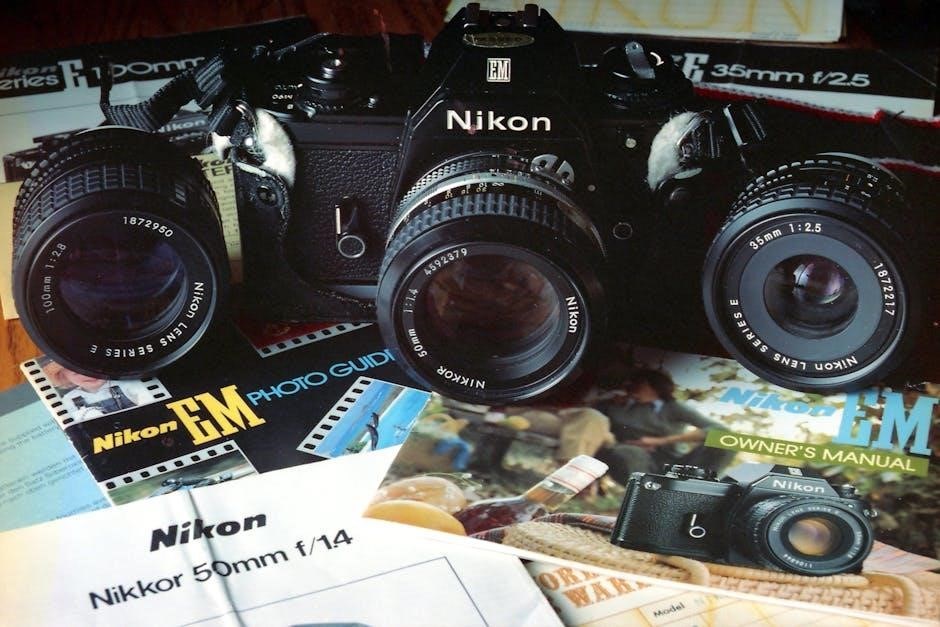
The Nikon D5000 is a lightweight DSLR camera featuring a 12.3MP CMOS sensor and EXPEED image processing for enhanced image quality.
Its ISO sensitivity ranges from 200-3200‚ expandable to 100 and 6400‚ ensuring exceptional performance in various lighting conditions.
The user manual provides detailed guidance on mastering shooting modes‚ menu systems‚ and custom settings to unlock the camera’s full potential.

1.1 Overview of the Nikon D5000 DSLR Camera

The Nikon D5000 is a versatile DSLR camera designed for both beginners and advanced photographers. It features a 12.3MP CMOS sensor‚ EXPEED image processing‚ and an ISO range of 200-3200 (expandable to 100 and 6400). This combination delivers high-quality images with minimal noise. The camera’s lightweight design and intuitive controls make it easy to handle‚ while its advanced features provide flexibility for creative photography.

1.2 Importance of Reading the Instruction Manual

Reading the Nikon D5000 instruction manual is essential for understanding its features‚ optimizing settings‚ and troubleshooting common issues. The manual provides detailed explanations of shooting modes‚ menu systems‚ and custom settings‚ ensuring users can unlock the camera’s full potential. It also covers safety precautions‚ maintenance tips‚ and firmware updates‚ helping photographers avoid errors and achieve the best results in various lighting conditions and creative scenarios.

Key Features and Specifications

The Nikon D5000 features a 12.3MP CMOS sensor with EXPEED processing‚ delivering sharp images and vibrant colors. Its ISO range of 200-3200‚ expandable to 100 and 6400‚ ensures excellent low-light performance with minimal noise.

2.1 12.3MP CMOS Sensor and EXPEED Image Processing

The Nikon D5000 is equipped with a 12.3-megapixel CMOS sensor‚ designed to capture high-resolution images with precise detail and vibrant colors. The EXPEED image processing engine enhances performance‚ delivering improved noise reduction and faster operation. Together‚ they ensure sharp‚ clear‚ and lifelike images in various lighting conditions.

This combination also supports the camera’s wide ISO range‚ from 200 to 3200‚ and expandable to 100 and 6400. It optimizes image quality‚ reducing grain and artifacts‚ making it ideal for both beginners and advanced photographers seeking professional-grade results.

2.2 ISO Sensitivity Range (200-3200‚ Expandable to 100 and 6400)

The Nikon D5000 features an ISO sensitivity range of 200-3200‚ expandable to 100 and 6400. This wide range allows for optimal performance in various lighting conditions‚ from bright daylight to low-light environments. The camera delivers minimal noise at higher ISO settings‚ ensuring sharp and clear images even in challenging situations‚ making it versatile for photographers of all levels.

Camera Setup and Initial Configuration

Begin by unboxing and inspecting the camera for damage. Charge the battery fully and insert memory cards. Ensure firmware is updated for optimal performance and functionality.

3.1 Unboxing and Physical Inspection

Start by carefully unboxing the Nikon D5000 DSLR camera and accessories. Inspect the camera body‚ lens‚ battery‚ charger‚ and straps for any visible damage or defects. Ensure all items are included as per the packaging list. If any damage is found‚ contact Nikon support immediately. This step ensures the camera is in perfect condition before initial use. Proper inspection helps prevent potential issues down the line.

3.2 Charging the Battery and Inserting Memory Cards

Insert the battery into the provided charger and charge it fully before first use. Once charged‚ insert the battery into the camera. Next‚ open the memory card slot and gently insert a compatible SD or SDHC card. Ensure the card is properly seated and formatted for optimal performance. Always use recommended memory cards to avoid compatibility issues and ensure smooth camera operation.

Understanding the Mode Dial

The mode dial allows photographers to conveniently switch between various shooting modes‚ including Auto‚ Manual‚ and scene modes‚ enabling quick adjustments to suit different creative needs effortlessly.

4.1 Auto Mode for Beginners

Auto Mode simplifies photography for newcomers by automatically adjusting settings like aperture‚ shutter speed‚ and ISO. It allows beginners to focus on composition while the camera handles technical aspects. The mode is ideal for quick shots‚ ensuring well-balanced images in various lighting conditions. Scene modes‚ accessible via the dial‚ further enhance creativity by optimizing settings for specific scenarios like portraits or landscapes.

4.2 Manual Mode for Advanced Users

Manual Mode offers full control over aperture‚ shutter speed‚ and ISO‚ allowing advanced users to tailor settings for precise creative control. By adjusting these parameters‚ photographers can achieve specific effects like shallow depth of field or motion blur. Customization options‚ such as assigning functions to buttons‚ enhance workflow efficiency. The manual provides detailed guidance to help users master these advanced techniques and unlock the camera’s full potential for professional-grade photography.

Navigating the Menu System

The Nikon D5000 features an intuitive menu system with Shooting‚ Custom Setting‚ and Playback & Setup options. Use the multi-selector to navigate and OK to select options‚ allowing quick adjustments to settings like image quality‚ autofocus modes‚ and playback functions.

5.1 Shooting Menu Options

The Shooting Menu offers essential settings for capturing images. Adjust Image Quality (JPEG‚ RAW‚ or RAW+JPEG)‚ White Balance for accurate colors‚ and ISO Sensitivity for optimal exposure. Access Autofocus Modes and Metering Modes to customize focus and exposure control. Additional options include Picture Controls for color profiles and Active D-Lighting to enhance contrast. Use the multi-selector to navigate and OK to select options‚ ensuring precise control over your shooting settings for improved results;

5.2 Custom Setting Menu Explained

The Custom Setting Menu allows users to tailor camera behavior to their preferences. Key options include Assigning Functions to buttons for quick access‚ Autofocus Modes (single or continuous)‚ and Metering Modes (matrix‚ center-weighted‚ or spot). Additionally‚ users can Customize Shooting Settings like exposure compensation and flash control. These settings enable personalized camera operation‚ enhancing efficiency and creativity during photo sessions. Use the multi-selector to navigate and set preferences for a customized shooting experience.

5.3 Playback and Setup Menus

The Playback Menu allows users to review and manage captured images. Features include Slide Shows‚ Protecting Files‚ and Deleting Images. The Setup Menu offers system-wide configurations‚ such as Language‚ Date and Time‚ and Auto Off Timers. These menus provide tools to organize and customize camera functions‚ ensuring efficient image management and personalized camera settings for optimal performance and convenience during photo sessions. Use the multi-selector to navigate and adjust settings as needed.

Customizing Camera Settings

Customizing the Nikon D5000’s settings allows users to assign functions to buttons and adjust autofocus modes for enhanced control. These settings ensure optimal image quality and personalized shooting experiences.

6.1 Assigning Functions to Buttons

The Nikon D5000 allows users to assign custom functions to buttons‚ enhancing workflow efficiency. Buttons like the AE-L/AF-L button can be programmed for specific tasks‚ such as toggling focus modes or bracketing; This feature ensures quick access to frequently used settings‚ streamlining the shooting process. Custom button assignments are detailed in the manual‚ enabling photographers to tailor their camera to personal preferences for improved control and convenience during shoots.

6.2 Adjusting Autofocus and Metering Modes

The Nikon D5000 offers autofocus modes like AF-S‚ AF-C‚ and AF-A‚ catering to different shooting scenarios. Users can adjust autofocus settings for precise subject tracking or stationary shots. Additionally‚ the camera features metering modes‚ including Matrix‚ Center-weighted‚ and Spot metering‚ allowing for accurate exposure control. The manual provides detailed guidance on optimizing these settings for enhanced image quality and tailored to various lighting conditions.

Shooting Techniques and Tips

Master various shooting modes‚ composition‚ and lighting techniques to enhance image quality. The manual provides tips for optimizing autofocus‚ metering‚ and noise reduction for stunning results.

7.1 Mastering Different Shooting Modes

Understanding the Nikon D5000’s shooting modes is essential for capturing stunning images. Auto Mode simplifies photography for beginners‚ while Manual Mode offers full creative control. Other modes like Aperture Priority and Shutter Priority allow for partial manual adjustments. The camera also features Scene Modes (e.g.‚ Portrait‚ Landscape) tailored for specific subjects. Experimenting with these modes enhances versatility and ensures optimal results in various lighting and compositional scenarios.

7.2 Optimizing Image Quality and Noise Reduction

For optimal image quality‚ use the lowest necessary ISO (200-3200) to minimize noise. The EXPEED image processor enhances detail and reduces grain. Enable in-camera noise reduction for high ISO shots. Shoot in RAW format for better post-processing control. Use a tripod in low light to avoid camera shake. Adjust settings like Active D-Lighting for balanced exposures and vibrant colors‚ ensuring crisp and professional-looking results in diverse lighting conditions.

Troubleshooting Common Issues

Address error messages by checking settings or updating firmware. Reset camera defaults if issues persist; Ensure proper memory card formatting and battery charging for optimal performance.

8.1 Resolving Error Messages

Common error messages like “ERR” or “CARD” indicate issues with settings or memory cards.
Check card compatibility and ensure proper formatting.
Clean the card contacts and reload to resolve “CARD” errors.
For firmware-related issues‚ update to the latest version.
Refer to the manual for specific solutions or contact Nikon support for assistance.

8.2 Firmware Updates and Maintenance

Regular firmware updates enhance camera performance and fix bugs.
Download the latest firmware from Nikon’s official website.
Follow on-screen instructions to update successfully.
Ensure the camera is fully charged and use a compatible memory card.
Refer to the manual for detailed update steps.
Proper maintenance includes cleaning the sensor and camera body for optimal functionality.

Accessories and Compatible Equipment

Recommended lenses‚ external flash units‚ and memory cards enhance the Nikon D5000’s functionality.
Ensure compatibility with Nikon accessories for optimal performance and reliability.

9.1 Recommended Lenses and External Flash Units

For optimal performance‚ use original Nikon lenses and accessories. The AF-S DX NIKKOR 18-55mm and 55-200mm lenses are ideal for versatility.
External flash units like the SB-500 enhance lighting control.
These accessories ensure compatibility and improve image quality‚ while maintaining the camera’s functionality and reliability in various shooting conditions.

9.2 Memory Cards and Storage Solutions

Use high-quality SD‚ SDHC‚ or SDXC memory cards for reliable performance.
The D5000 supports up to 64GB capacity cards for ample storage.
Regularly format cards in-camera to maintain optimal functionality.
Consider external hard drives or cloud storage for backing up photos.
Always ensure cards are securely stored to prevent data loss and damage.

Downloading and Updating Firmware

To ensure optimal performance‚ check the current firmware version and download updates from Nikon’s official website. Follow the step-by-step guide and verify the update post-installation.

10.1 Step-by-Step Firmware Update Guide

To update the Nikon D5000 firmware‚ visit Nikon’s official website and download the latest version. Connect the camera to your computer using a USB cable. Format a memory card and save the firmware file to it. Insert the card into the camera‚ go to the Setup menu‚ and select Firmware Version. Follow on-screen instructions to complete the update. Ensure the battery is fully charged or use an AC adapter to prevent interruptions during the process.

10.2 Verifying Firmware Version

To verify the firmware version on your Nikon D5000‚ go to the Setup menu and scroll down to Firmware Version. The current firmware version will be displayed on the screen. Ensure it matches the latest version downloaded from Nikon’s official website. If the version numbers do not match‚ restart the camera and repeat the update process. Always refer to the user manual for detailed instructions.

Additional Resources

Visit Nikon’s official website for user manuals‚ firmware updates‚ and online tutorials. Explore community forums and guides for troubleshooting and mastering your Nikon D5000 DSLR camera.

11.1 Online Tutorials and Guides

Access comprehensive online tutorials and user guides on Nikon’s official website and community forums. These resources offer step-by-step instructions‚ video tutorials‚ and troubleshooting tips to help you master the D5000’s features‚ including camera settings‚ shooting modes‚ and firmware updates. They are free‚ easy to access‚ and designed to enhance your photography skills and knowledge of the Nikon D5000 DSLR camera.

11.2 Nikon Support and Community Forums

Nikon provides extensive support resources and community forums where users can engage with experts and enthusiasts. These platforms offer troubleshooting tips‚ firmware update guidance‚ and user-generated content to enhance your D5000 experience. Visit Nikon’s official website or trusted forums like ManualsDir.com for detailed discussions‚ ensuring you maximize your camera’s capabilities with trusted insights and solutions from the Nikon community.

jacuzzi j 365 manual

Welcome to the Jacuzzi J-365 manual. This guide provides essential information for installation‚ operation‚ and maintenance. It ensures safe and efficient use‚ covering key features‚ safety instructions‚ and troubleshooting tips for optimal enjoyment;

1.1 Overview of the Jacuzzi J-365 Model

The Jacuzzi J-365 is a premium hot tub designed for ultimate relaxation and hydrotherapy. It features advanced jets‚ LED lighting‚ and a user-friendly control panel. Part of the J-300 collection‚ it offers a spacious design with ergonomic seating. The model includes an automatic blow-out function for maintenance and is available in 50Hz versions for international use. Its sleek design and innovative technology make it a top choice for both residential and commercial settings‚ ensuring a luxurious spa experience.

1.2 Importance of Reading the Manual

Reading the Jacuzzi J-365 manual is crucial for safe and optimal use. It provides detailed instructions for installation‚ operation‚ and maintenance‚ ensuring proper functionality and longevity. The manual highlights safety precautions‚ troubleshooting tips‚ and maintenance schedules. By following the guidelines‚ users can prevent accidents‚ avoid costly repairs‚ and enjoy a superior spa experience. It serves as a comprehensive guide to maximize the benefits of your Jacuzzi while minimizing potential issues.

Installation Guidelines

Proper installation ensures safe and efficient operation. Follow pre-installation checks‚ electrical and plumbing connections‚ leveling‚ and positioning guidelines. Adhere to safety protocols to avoid potential hazards and damage.

2.1 Pre-Installation Requirements

Before installing the Jacuzzi J-365‚ ensure the site is prepared. Check local building codes and regulations. The area must be level‚ stable‚ and drained properly. Verify electrical and plumbing connections meet specifications. Ensure proximity to a water supply and drainage system. Inspect all components for damage. Consult a qualified technician if necessary. Adhere to safety standards to avoid installation errors and ensure optimal performance.

2.2 Electrical and Plumbing Connections

Ensure the Jacuzzi J-365 is connected to a dedicated 230 VAC‚ 3-Wire (50Hz) electrical supply. Install a Ground Fault Circuit Interrupter (GFCI) for safety. Plumbing connections must be secure‚ using high-quality hoses and fittings. Verify water supply and drainage systems are compatible. Follow local electrical and plumbing codes. Use genuine Jacuzzi parts for all connections to maintain warranty and performance. Always consult a certified technician if unsure about any step to ensure compliance and safety standards are met. Proper connections are crucial for optimal functionality.

2.3 Leveling and Positioning the Hot Tub

Ensure the Jacuzzi J-365 is installed on a sturdy‚ level surface to prevent uneven weight distribution. Use a spirit level to verify the base is perfectly horizontal. Position the hot tub on a concrete pad or reinforced structure to support its weight. Ensure proper drainage and access to electrical and plumbing connections. Avoid placing the hot tub near flammable materials or overhead obstacles. Follow the manual’s guidelines for precise positioning to ensure safe operation and optimal performance. Consult a professional if needed for accurate leveling.

2.4 Safety Considerations During Installation

Ensure the area is clear of flammable materials and well-ventilated. Disconnect power before starting installation. Wear protective gear‚ including gloves and safety glasses. Follow all local electrical and plumbing codes. Ensure proper grounding of the hot tub to prevent electrical hazards. Keep children and pets away from the installation site. Verify all connections are secure and leak-free. Do not operate the Jacuzzi J-365 until installation is complete and safety checks are performed. Always refer to the manual for specific safety guidelines.

Control Panel Buttons and Display Symbols

The control panel is the command center of your Jacuzzi J-365‚ featuring buttons and symbols that control jets‚ temperature‚ and settings. Symbols indicate system status‚ while the display guides menu navigation for a seamless user experience.

3.1 Understanding the Control Panel Layout

The Jacuzzi J-365 control panel is designed for intuitive operation. It features a central display screen with buttons arranged around it. The layout includes temperature controls‚ jet selectors‚ and mode buttons. Each button corresponds to specific functions‚ such as powering the jets or adjusting the temperature. The display screen provides visual feedback‚ showing settings and system messages. The design ensures easy access to all functions‚ allowing users to customize their spa experience with minimal effort. Proper understanding enhances user experience and ensures safe operation.

3.2 Functions of Each Button and Symbol

The Jacuzzi J-365 control panel features buttons for jets‚ temperature‚ lighting‚ and mode selection. The Jets button controls pump speed‚ while the Temperature button adjusts heat settings. The Light button manages LED lighting‚ and the Mode button cycles through spa functions. Symbols on the display indicate active jets‚ temperature status‚ and system messages. Each button’s function is clearly labeled‚ ensuring easy navigation. Understanding these functions enhances user experience and allows for precise customization of spa settings. Proper use ensures safety and optimal performance.

3.3 Navigating the Display Menu

Navigating the Jacuzzi J-365 display menu is straightforward. Use the buttons to cycle through options like temperature‚ jet settings‚ and lighting. Press the Menu button to access advanced features. Select options using the Select button and adjust settings with the Up/Down arrows. The display will show current selections and status indicators. Save changes by holding the Select button. Refer to the symbols guide for clarity. This intuitive system ensures easy customization of your spa experience. Regular use of the menu enhances functionality and enjoyment.

Operating the Jacuzzi J-365

Turn on the power and adjust jets‚ temperature‚ and lighting via the control panel. Use the menu to customize settings and activate automatic functions for optimal performance.

4.1 Jets and Air Controls

The Jacuzzi J-365 features multiple jets and air controls for a personalized spa experience. Use the Jet Selector to direct water flow to specific jets‚ while the air buttons adjust bubble intensity. High-speed jets provide powerful massages‚ and the air control valve regulates airflow for a soothing atmosphere. These controls allow you to customize your hydrotherapy session‚ ensuring comfort and relaxation. Regular maintenance of jets and air systems ensures optimal performance and longevity of your hot tub.

4.2 Pump Operations and Functions

The Jacuzzi J-365 is equipped with advanced pumps designed for efficient water circulation and jet performance. The pumps operate in dual-speed modes‚ allowing for high or low flow rates. During operation‚ the pumps ensure consistent water pressure for optimal jet functionality. Additionally‚ the automatic blow-out function activates Pump 2 for five minutes to flush lines‚ maintaining system hygiene and efficiency. Regular inspection of pump operation is essential for long-term performance and to prevent potential issues.

4.3 Activating the Automatic Blow-Out Function

The automatic blow-out function on the Jacuzzi J-365 activates Pump 2 for five minutes to flush all water lines‚ ensuring system hygiene. This feature is essential for maintaining water quality and preventing mineral buildup. Activation occurs automatically‚ but manual override is possible through the control panel. Always ensure the spa is prepared for draining after this process. Consult the manual for specific activation steps and safety precautions to ensure proper function and longevity of your hot tub system.

Maintenance and Care

Regular maintenance ensures optimal performance and longevity of your Jacuzzi J-365. Clean the spa regularly‚ sanitize water‚ and maintain proper chemical balance. Check filters and replace them as needed. Monitor pump and jet function‚ addressing issues promptly. Refer to the manual for detailed care instructions to keep your hot tub in excellent condition and ensure a safe‚ enjoyable experience for years to come.

5.1 Regular Cleaning and Sanitizing

Regular cleaning and sanitizing are crucial for maintaining a hygienic and safe spa environment. Clean the hot tub surfaces and pillows every 1-2 weeks using recommended products. Sanitize the water regularly with chlorine or bromine to maintain proper chemical levels. Test the water weekly and adjust as needed. Ensure the filter is cleaned every 2-4 weeks and replaced annually. Proper maintenance prevents bacterial growth and keeps the system functioning efficiently. Always follow the manual’s guidelines for specific cleaning procedures and safety precautions.

5.2 Water Chemistry and Balance

Proper water chemistry and balance are essential for a safe and enjoyable spa experience. Maintain pH levels between 7.2 and 7.8 and alkalinity between 80-120 ppm. Regularly test and adjust sanitizer levels‚ such as chlorine or bromine‚ to ensure they are within the recommended range. Imbalanced water can cause skin irritation or damage to the spa system. Use test strips or automated systems for monitoring. Adjust chemicals as needed‚ and always follow the manual’s guidelines for safe and effective water care.

5.3 Filter Maintenance and Replacement

Regular maintenance of your Jacuzzi J-365 filters is crucial for optimal performance and water quality. Clean the filters every 1-2 weeks by rinsing with a garden hose and soaking in a filter cleaner. Inspect for tears or damage and replace them immediately if found. Filters should be replaced every 1-2 years or as recommended in the manual. Use genuine Jacuzzi replacement filters to ensure compatibility and efficiency. Always follow the manual’s guidelines for proper maintenance procedures.

Safety Instructions

Important Safety Instructions ─ Keep electrical appliances away‚ ensure the area is clear of obstacles‚ supervise children‚ follow health guidelines‚ and stay within the weight limit.

6.1 General Safety Precautions

Always supervise children and pets near the spa. Ensure the area is clear of obstacles and electrical appliances. Follow health guidelines and avoid excessive temperature exposure. Maintain proper water chemistry and balance to prevent skin irritation. Never use the spa while under the influence of alcohol or drugs. Keep the spa cover securely closed when not in use. Regularly inspect the spa and surrounding area for hazards. Adhere to weight limits and avoid overloading the hot tub.

6.2 Emergency Procedures

In case of an emergency‚ immediately shut off the power to the spa using the emergency shut-off switch. Never enter the spa if experiencing dizziness or discomfort. Provide first aid if needed and seek medical attention promptly. If a malfunction occurs‚ contact a certified Jacuzzi technician. Do not attempt repairs yourself. Keep a phone nearby for quick access to emergency services. Ensure all users are aware of these procedures to prevent accidents and ensure a safe experience.

6.3 Troubleshooting Common Issues

If the spa fails to heat‚ check the temperature settings and ensure the heater is activated. For jet malfunctions‚ inspect the jet selectors and ensure they are fully open. If error messages appear‚ refer to the manual or contact a certified technician. Regular maintenance‚ such as cleaning filters and checking water chemistry‚ can prevent many issues. Always use genuine Jacuzzi parts for repairs to ensure optimal performance and safety. Addressing problems promptly helps maintain your spa’s efficiency and longevity.

Congratulations on completing the Jacuzzi J-365 manual! This guide has provided essential information for safe and efficient usage‚ maintenance‚ and troubleshooting. By following the outlined steps and recommendations‚ you can ensure optimal performance and longevity of your hot tub. Regular maintenance and adherence to safety guidelines are crucial for a enjoyable and relaxing experience. Refer to this manual for any future questions or concerns. Happy soaking!

face guide

A face guide is a comprehensive resource designed to help individuals understand and enhance their facial features. It explores the significance of facial symmetry, expressions, and skincare, providing insights into maintaining a healthy and attractive appearance. This guide serves as a foundation for self-confidence and social interaction, offering practical tips and expert advice.

1.1 What is a Face Guide?

A face guide is a detailed manual or resource that provides insights into understanding and enhancing facial features. It covers aspects such as facial symmetry, expressions, skincare routines, and makeup techniques tailored to different face shapes. Designed to help individuals improve their appearance, a face guide serves as a practical tool for self-improvement and confidence-building, offering expert advice and tips for a healthy, radiant face.

1.2 Importance of Understanding Facial Features

Understanding facial features is essential for self-awareness and confidence. It helps individuals appreciate their unique traits and make informed decisions about skincare, makeup, and grooming. Recognizing facial characteristics enhances self-perception, enabling personal growth and a positive self-image. This knowledge also aids in addressing specific skin or structural concerns, fostering a healthier and more radiant appearance. It empowers individuals to embrace their natural beauty and make intentional choices for their face care routine.

1.3 Key Components of a Comprehensive Face Guide

A comprehensive face guide includes understanding facial symmetry, expressions, and skincare routines. It covers makeup tips tailored to face shapes and explores cultural perceptions of beauty. The guide also addresses the science of facial recognition, emotional expressions, and maintaining a healthy complexion. These components provide a holistic approach to enhancing one’s appearance and confidence, ensuring a well-rounded understanding of facial care and aesthetics.

Understanding Facial Symmetry

Facial symmetry refers to the balance and proportion of facial features, enhancing attractiveness and perceived health. Understanding symmetry helps in appreciating its role in facial aesthetics, overall appeal, and harmony.

2.1 What is Facial Symmetry?

Facial symmetry is the balanced arrangement of facial features, where the left and right sides mirror each other. It enhances attractiveness by creating a sense of harmony and structural balance. Symmetry is often linked to genetic health and perceived beauty, making it a key aspect of facial aesthetics and overall visual appeal.

2.2 The Role of Symmetry in Facial Attractiveness

Facial symmetry plays a crucial role in perceived attractiveness, as it is often associated with health and genetic fitness. Symmetrical features create a sense of harmony, making the face more visually appealing. Studies suggest that people naturally find symmetrical faces more attractive, as they subconsciously signal balance and well-being. However, perfect symmetry is rare, and minor asymmetries can still contribute to a unique and attractive appearance.

2.3 How to Assess Your Facial Symmetry

To assess facial symmetry, start by standing in front of a mirror and drawing an imaginary vertical line down the center of your face. Compare the alignment of your eyes, eyebrows, nose, and mouth on both sides. Use a grid or symmetry tool for accuracy. Natural asymmetry is common, but significant imbalances may indicate areas for enhancement. Embrace your unique features while understanding their alignment.

The Science of Facial Expressions

Faces convey emotions through expressions, revealing feelings like happiness, sadness, or surprise. Cultural perceptions influence interpretation, but universal signals exist, aiding communication and emotional understanding across boundaries.

3.1 Types of Facial Expressions and Their Meanings

Facial expressions are universal signals that convey emotions like happiness, sadness, anger, surprise, fear, and neutral states. Each expression has distinct features, such as raised eyebrows for surprise or furrowed brows for concern. Cultural differences can influence interpretation, but many expressions, like smiles for joy or frowns for displeasure, remain consistent across cultures. Understanding these signals enhances communication and emotional connection, bridging gaps in human interaction effectively.

3.2 How to Read Facial Emotions Accurately

Reading facial emotions accurately involves observing micro-expressions, understanding context, and recognizing inconsistencies between verbal and non-verbal cues. Pay attention to eyebrow movements, lip shapes, and eye contact; Cultural differences may influence expressions, but universal emotions like joy or sadness often share common traits. Practice active listening and empathy to better interpret facial signals, enhancing your ability to decode emotions effectively in various social interactions.

3.3 The Impact of Facial Expressions on Communication

Facial expressions significantly influence communication by conveying emotions and intentions. A smile can signal friendliness, while a furrowed brow may indicate skepticism. These non-verbal cues enhance or contradict verbal messages, affecting how others interpret meaning. Accurate interpretation fosters understanding, while misreading can lead to misunderstandings. Universal expressions, like joy or sadness, transcend language barriers, making them powerful tools in both personal and professional interactions.

Makeup Tips for Different Face Shapes

Understanding your face shape is key to enhancing your features. Oval, round, square, or heart-shaped faces benefit from tailored techniques to balance and highlight naturally, ensuring harmony.

4.1 Determining Your Face Shape

To determine your face shape, start by measuring your forehead, cheekbones, and jawline. Oval faces are longer than wide, with balanced features. Round faces are equal in length and width, with full cheeks. Square faces have a strong jawline and equal proportions. Heart-shaped faces have a broad forehead and temples, narrowing to a pointed chin. Diamond faces are narrow at the forehead and jawline, with wide cheekbones. Use a mirror and measure carefully to identify your shape accurately.

4.2 Best Makeup Practices for Each Face Shape

For oval faces, emphasize balanced features with subtle blush and defined brows. Round faces benefit from lengthening techniques, like vertical stripes or highlighting the center. Square faces soften with rounded contours and soft lip colors. Heart-shaped faces balance with lighter makeup on the forehead and bolder lips. Diamond faces highlight cheekbones and temples. Each shape has unique techniques to enhance natural beauty and create a polished look.

4.3 Common Makeup Mistakes to Avoid

Over-contouring and harsh lines can create an unnatural look. Avoid using too much product, as it can cake and accentuate flaws. Not blending properly is another mistake, leading to visible edges. Incorrect color matching, like mismatched foundation, can disrupt the overall appearance. Heavy makeup on sensitive areas, such as the under-eye, can cause irritation. These mistakes can detract from your natural beauty, so focus on balance and subtlety for a polished look.

The Role of Skincare in Maintaining a Healthy Face

Skincare is essential for maintaining a healthy face, promoting a glowing complexion, and preventing premature aging. A consistent routine helps protect and rejuvenate the skin effectively.

5.1 Essential Skincare Routine Steps

A proper skincare routine involves cleansing, toning, exfoliating, and moisturizing. Cleansing removes impurities, while toning balances pH and tightens pores. Exfoliating once or twice a week helps remove dead skin cells. Serums target specific concerns like acne or aging. Moisturizing hydrates and protects the skin. Sunscreen is crucial for daily protection against UV damage. Consistency and customization based on skin type are key for optimal results and a healthy glow.

5.2 Ingredients to Look for in Skincare Products

Key ingredients in skincare products include hyaluronic acid for hydration, salicylic acid for exfoliation, niacinamide to brighten skin, and vitamin C for antioxidant protection. Ceramides strengthen the skin barrier, while retinol addresses aging. Look for soothing agents like aloe vera or chamomile for sensitive skin. Avoid harsh chemicals like artificial fragrances or dyes. Choosing products with these ingredients ensures effectiveness and suitability for your skin type and concerns.

5.3 How to Protect Your Skin from Environmental Damage

To shield your skin from environmental stressors, use a broad-spectrum sunscreen with at least SPF 30 daily. Wear protective hats and sunglasses outdoors. Incorporate antioxidants like vitamin C or ferulic acid into your routine to combat pollution. Maintain a consistent cleansing regimen to remove impurities. Stay hydrated and include omega-rich foods in your diet to support skin health. Avoid smoking and limit exposure to harsh environmental conditions.

The Psychology of Facial Recognition

Facial recognition is the process by which humans identify and interpret facial features, enabling emotional understanding and social interaction. It is crucial for recognizing emotions and intentions, helping us navigate interactions effectively. The brain processes faces automatically, linking them to memories and emotions, making it a vital aspect of human communication and connection.

6.1 How Facial Recognition Works

Facial recognition is a biological and psychological process where individuals identify and interpret facial features. The brain processes facial structures, linking them to emotions, memories, and identities. This ability is innate, helping humans understand expressions and intentions. Facial recognition involves both conscious awareness and subconscious processing, making it essential for social interactions and emotional connections. It is a complex cognitive function that enhances communication and relationship-building skills.

6.2 The Role of Facial Recognition in Social Interactions

Facial recognition plays a crucial role in social interactions by enabling individuals to interpret emotions and intentions. It helps in understanding expressions, fostering empathy, and building trust. Accurate recognition enhances communication, allowing people to respond appropriately to others’ emotional cues. This ability strengthens relationships and facilitates smoother interactions, making it a vital skill for effective social engagement and emotional intelligence in various cultural and interpersonal contexts.

6.3 How Technology Uses Facial Recognition

Facial recognition technology is widely used in various applications, including security systems, retail, and healthcare. It enables identity verification, emotion analysis, and personalized services. For instance, smartphones use facial recognition for biometric authentication, while retailers employ it for tailored marketing. Additionally, healthcare leverages it for patient analysis, and social media platforms use it for tagging photos. This technology enhances efficiency but also raises concerns about privacy and data security, requiring ethical considerations in its deployment and use.

Cultural Perceptions of Facial Features

Cultural perceptions of facial features vary globally, reflecting diverse beauty standards. Media influences these perceptions, shaping ideals that often differ across regions and societies, fostering diversity in trends.

7.1 How Different Cultures View Beauty

Beauty standards vary significantly across cultures, reflecting unique values and histories. In some societies, symmetry and natural features are prized, while others celebrate distinct facial structures. For instance, certain cultures admire high cheekbones, while others value expressive eyebrows. These perceptions are shaped by historical, social, and media influences, creating a diverse tapestry of beauty ideals worldwide that continually evolve over time.

7.2 The Evolution of Beauty Standards

Beauty standards have transformed significantly over time, reflecting societal values and cultural shifts. Historically, ideals often emphasized natural features and symmetry, while modern trends embrace diversity and inclusivity. The Renaissance celebrated rounded faces, while the 20th century popularized contoured looks. Today, global beauty standards continue to evolve, influenced by media, technology, and globalization, promoting a broader definition of attractiveness and individuality.

7.3 The Impact of Media on Facial Beauty Perceptions

Media significantly shapes perceptions of facial beauty, often promoting unattainable standards. Through edited images and curated content, media creates ideals that influence self-image and consumer behavior. Social platforms amplify these effects, fostering trends and normalizing specific features. This constant exposure can lead to unrealistic expectations, affecting self-esteem and driving demand for cosmetic procedures, while also sparking conversations about diversity and representation in the beauty industry.

Maintaining a Healthy and Attractive Face

Maintaining a healthy face involves proper hydration, a balanced diet, and regular skincare. Exercise and stress management also play crucial roles in preserving a radiant appearance.

8.1 The Importance of Hydration and Diet

Hydration is essential for maintaining skin elasticity and flushing out toxins, while a balanced diet rich in vitamins, minerals, and antioxidants nourishes the skin. Foods like berries, nuts, and leafy greens promote collagen production and protect against environmental damage. Avoiding processed foods and excessive sugar helps prevent skin issues like acne and dullness, ensuring a radiant and healthy complexion.

8.2 Exercise and Its Impact on Facial Health

Regular exercise enhances blood circulation, promoting a healthy, glowing complexion. It boosts oxygen delivery to facial tissues, reducing puffiness and improving skin elasticity. Physical activity also stimulates detoxification through sweating, purging impurities and preventing acne. Additionally, facial exercises can tone muscles, reducing fine lines and wrinkles, while overall fitness contributes to a youthful, vibrant appearance by maintaining a balanced and radiant face.

8.3 Managing Stress for a Radiant Face

Chronic stress causes tension in facial muscles, leading to visible signs of aging like wrinkles and fine lines. High stress levels increase cortisol, which can cause breakouts and dullness. Techniques like meditation, deep breathing, and yoga help relax facial muscles, improving skin tone. A stress-free lifestyle promotes better sleep, essential for skin regeneration, ensuring a radiant and youthful appearance by reducing inflammation and enhancing natural glow.

maxi cosi pria instruction manual

The Maxi-Cosi Pria instruction manual is your guide to safe and proper car seat usage. It ensures correct installation, harnessing, and adjustments for your child’s safety. Reading it thoroughly is essential to understanding all features and modes, guaranteeing proper use every time.

1.1 Overview of the Maxi-Cosi Pria Car Seat

The Maxi-Cosi Pria is a versatile, convertible car seat designed for safety and comfort. It accommodates rear-facing (14-40 lb, 6.4-18 kg) and forward-facing (22-85 lb, 10.1-38 kg) modes, ensuring extended use. Featuring G-Cell technology for enhanced side impact protection, it combines style with functionality. The seat is built for durability and ease of adjustment, catering to growing children. The manual provides detailed guidance on installation, harnessing, and mode transitions, ensuring optimal safety and usability.

1.2 Importance of Following the Instruction Manual

Adhering to the Maxi-Cosi Pria instruction manual is crucial for ensuring your child’s safety. Failure to follow guidelines can lead to severe consequences, including injury or death. The manual provides essential steps for proper installation, harnessing, and mode adjustments. It also outlines critical safety precautions and warnings. By following the manual, you ensure the car seat functions as intended, protecting your child in various driving conditions. Always keep the manual for future reference and updates on safe usage practices.

Safety Information and WARNINGS

The manual highlights critical safety measures to prevent serious injury or death. Always follow installation and usage guidelines to ensure your child’s protection in all driving conditions.

2.1 General Safety Precautions

Always read the manual before using the Maxi-Cosi Pria car seat to ensure proper installation and usage. Failure to follow instructions can result in serious injury or death. Keep the manual for future reference and refer to it for guidance on weight and height limits, installation modes, and harness adjustments. Regularly inspect the seat for damage and ensure all parts are securely fastened. Never alter the seat or use unauthorized accessories, as this can compromise safety. Proper usage is critical to protect your child in all driving conditions.

2.2 Consequences of Not Following Instructions

Ignoring the Maxi-Cosi Pria manual can lead to improper installation, increasing the risk of injury or death in an accident. Misuse may result in harness maladjustment, leaving your child unprotected. Failure to adhere to weight and height limits can cause the seat to fail during impact. Always follow guidelines to ensure optimal safety and protection for your child. Proper use is crucial for the car seat’s effectiveness in safeguarding your child’s well-being during travel. Compliance with instructions is non-negotiable for your child’s safety.

Installation Instructions

The Maxi-Cosi Pria installation guide provides step-by-step instructions for rear-facing and forward-facing setups. Follow the manual carefully to ensure a secure and correct installation every time.

3.1 Rear-Facing Installation Guidelines

The Maxi-Cosi Pria rear-facing installation requires careful attention to weight and height limits (14-40 lb and up to 40 inches). Use the seatbelt or LATCH system, ensuring the base is level and securely tightened. The manual emphasizes proper leveling and tightness to prevent movement. Always check the level indicator and ensure the harness is correctly positioned. Failure to follow these steps can compromise safety, risking serious injury. Refer to the manual for detailed diagrams and step-by-step guidance to ensure a safe and correct rear-facing setup for your child.

3.2 Forward-Facing Installation Guidelines

For forward-facing installation, the Maxi-Cosi Pria is suitable for children weighing 22-85 lbs (10.1-38 kg) and measuring 29-52 inches (73.6-132.1 cm), with a minimum age of one year. Use the seatbelt or LATCH system to secure the seat, ensuring the harness is snug and the top of the child’s head stays below the seat’s top edge. The manual stresses proper belt routing and tightness to prevent excessive movement. Always verify the seat’s stability and reinstallation instructions if moving it to another vehicle for consistent safety.

3.3 Step-by-Step Video Guidance

Maxi-Cosi provides step-by-step video tutorials to simplify the installation process. These videos guide users through rear-facing and forward-facing setups, ensuring proper seatbelt or LATCH system usage. Available online, they complement the manual, offering visual clarity for better understanding. Each video covers key steps like belt routing, leveling, and tightening, helping parents achieve a secure fit. This resource is ideal for visual learners, making complex instructions more accessible and ensuring safety for your child. Visit the official website or support page to access these helpful guides.

Usage Instructions

Proper harnessing and seat adjustments ensure your child’s safety. Always follow guidelines for rear-facing and forward-facing modes, securing your child snugly with correct belt positioning and tightness.

4.1 Proper Harnessing Techniques

Proper harnessing is crucial for your child’s safety. Ensure the harness is snug, with no excess material, and the chest clip is at armpit level. Avoid twisting the straps and secure the buckle firmly. Regularly check the fit as your child grows, using the manual’s visual guides for reference. This ensures optimal protection and ease of use.

4;2 Adjusting the Seat for Different Modes

The Maxi-Cosi Pria allows seamless transitions between rear-facing and forward-facing modes. For rear-facing, ensure the seat is reclined appropriately and the harness is snug. When switching to forward-facing, adjust the headrest and harness height to fit your child’s growing needs. Always refer to the manual for specific weight and height limits, and verify the correct recline angle using the built-in level indicator. Regular adjustments ensure optimal safety and comfort as your child grows.

Maintenance and Care

Regular cleaning and proper storage are essential for maintaining the Maxi-Cosi Pria’s quality. Spot-clean stains with mild soap and water, avoiding harsh chemicals. Store the seat in a dry, cool place when not in use to preserve its integrity and safety features.

5.1 Cleaning the Car Seat

Regular cleaning ensures the Maxi-Cosi Pria remains hygienic and safe. Spot-clean stains with mild soap and water, avoiding harsh chemicals. For tougher stains, dampen a soft cloth and gently scrub. Allow the seat to air-dry thoroughly to prevent moisture buildup. Do not machine wash or submerge any components. Fabric covers can be removed and hand-washed if necessary, but always follow the manual’s specific instructions to maintain warranty and safety standards. Cleaning properly extends the seat’s lifespan and keeps it in optimal condition.

5.2 Storage and Handling Tips

When not in use, store the Maxi-Cosi Pria in a dry, cool place away from direct sunlight. Avoid exposure to extreme temperatures or moisture. Handle the seat with care to prevent damage. Store the instruction manual separately for easy access. Before reusing the seat after storage, inspect for any signs of wear or damage. Ensure all components are securely attached and functional. Proper storage and handling maintain the seat’s integrity and ensure it remains safe for your child.

Troubleshooting Common Issues

This section addresses common problems like installation difficulties or harness malfunctions. It provides step-by-step solutions and tips to resolve issues quickly and ensure safe usage.

6.1 Addressing Installation Problems

Common installation issues include incorrect seatbelt routing or base leveling. Check the manual for step-by-step guidance. Ensure the base is securely locked and the seatbelt is tightly fastened. If problems persist, refer to the troubleshooting section or consult the video guides provided; Proper installation is crucial for safety, so double-check all connections and adjustments before use. If unsure, revisit the installation manual or contact customer support for assistance. Always verify stability and alignment for optimal protection.

6.2 Solving Harness and Buckle Issues

Common harness issues include loose straps or improper adjustment. Ensure the harness is snug, with the chest clip at armpit level. For buckles, clean any debris and check alignment. If the buckle doesn’t click, refer to the manual for resetting instructions. Adjust straps by pulling the harness tight and checking fit. Proper harnessing ensures safety, so address any issues promptly. If problems persist, consult the troubleshooting guide or contact customer support for assistance. Always verify the harness and buckle are secure before use.

Understanding the Instruction Manual

The manual provides clear, structured guidance for safe car seat use. It includes detailed instructions, symbols, and labels to ensure proper installation and adjustment. Access the PDF online for easy navigation and reference, ensuring all safety features are understood and applied correctly. The manual supports multiple languages and is regularly updated for accuracy and compliance with safety standards. Always refer to the official Maxi-Cosi website for the most current version.

7.1 Navigating the PDF Manual

The Maxi-Cosi Pria instruction manual is available as a downloadable PDF, offering easy access to detailed guidance. The document is structured with clear sections, making it simple to navigate. Users can quickly locate specific information using the table of contents or search functionality. The PDF includes visual guides, such as diagrams and step-by-step instructions, to aid understanding. It is available in multiple languages and is regularly updated to ensure accuracy. Visit the official Maxi-Cosi website or authorized platforms to download the latest version of the manual.

7.2 Interpreting Symbols and Labels

The Maxi-Cosi Pria manual uses symbols and labels to convey critical information. Common symbols include checkmarks for correct usage and X marks for incorrect practices. Warning labels highlight potential hazards, such as improper installation or misuse. These symbols are standardized to ensure clarity. Always refer to the manual’s legend or glossary for precise interpretations. Ignoring these labels can lead to serious safety risks, so understanding them is essential for proper car seat usage and your child’s protection.

Additional Features of the Maxi-Cosi Pria

The Maxi-Cosi Pria includes G-Cell Technology for enhanced side impact protection and a lightweight design for easy transfer between vehicles. It also features an adjustable headrest and washable fabrics, ensuring comfort, safety, and convenience for your child.

8;1 G-Cell Technology Explained

G-Cell Technology is a innovative safety feature in the Maxi-Cosi Pria, designed to provide superior side impact protection. This advanced material absorbs and distributes crash forces, reducing the risk of injury. It works alongside the seat’s structural design to enhance overall safety. The technology ensures maximum energy absorption in the event of a collision, offering peace of mind for parents. This feature is a key component of the Pria’s commitment to protecting your child in various crash scenarios.

8.2 Other Advanced Safety Features

Beyond G-Cell Technology, the Maxi-Cosi Pria boasts additional advanced safety features. The seat includes a robust shell design for enhanced protection, energy-absorbing materials to reduce crash forces, and a flexible brace for added stability. The 3D canopy provides superior side impact defense, while the integrated rebound bar minimizes movement during collisions. These features collectively create a comprehensive safety system, ensuring optimal protection for your child in various crash scenarios. The Pria’s design prioritizes both safety and comfort, offering peace of mind for parents.

Resources and Support

The Maxi-Cosi Pria manual is available online, offering detailed guides and troubleshooting tips. Customer support is accessible for assistance, ensuring your questions are answered promptly and effectively.

9.1 Accessing the Online Manual

The Maxi-Cosi Pria instruction manual is readily available online in PDF format. Visit ManualsLib or the official Maxi-Cosi website to download it for free. The manual provides detailed installation guides, safety tips, and troubleshooting steps. It also includes step-by-step videos for visual guidance. Accessing the online manual ensures you have the latest updates and can refer to it anytime, making it a convenient resource for proper car seat usage and maintenance. Regularly checking for updates is recommended to stay informed.

9.2 Contacting Customer Service

Maxi-Cosi offers dedicated customer support to address any questions or concerns about the Pria car seat. You can reach their team via phone, email, or live chat through their official website. For assistance, visit the Maxi-Cosi website and navigate to the “Contact Us” section. Their support team is available to provide guidance on installation, troubleshooting, and maintenance. Additionally, online resources like ManualsLib offer access to the PDF manual and user reviews, ensuring comprehensive support for optimal car seat usage and safety.

The Maxi-Cosi Pria instruction manual provides comprehensive guidance for safe and effective use. Refer back regularly to ensure your child’s safety and optimal car seat performance always.

10.1 Final Tips for Safe and Effective Use

Always read the manual thoroughly before using the Maxi-Cosi Pria. Ensure correct installation and proper harnessing techniques for your child’s safety. Regularly check the seat’s tightness and harness fit. Refer back to the manual for guidance on adjustments and mode changes. Keep the manual handy for future reference. By following these tips, you ensure optimal safety and performance of the car seat, protecting your child during every journey. Proper use is key to maximizing the seat’s safety features and benefits.

10.2 Encouragement to Refer Back to the Manual

Referencing the manual regularly ensures you stay informed about safety updates and proper usage. It’s a valuable resource for troubleshooting and understanding advanced features. Always keep it handy for future adjustments or mode changes. Regularly reviewing the manual helps maintain your child’s safety and maximizes the car seat’s performance. By revisiting the guide, you ensure compliance with safety standards and optimal use of the Maxi-Cosi Pria’s features. Your child’s safety depends on it.

pdf when breath becomes air

When Breath Becomes Air is a poignant memoir by Paul Kalanithi, exploring his journey as a neurosurgeon diagnosed with terminal lung cancer. The book delves into themes of mortality, purpose, and the meaning of life, offering a profound reflection on the transition from doctor to patient. Available as a PDF, it has resonated deeply with readers worldwide.

1.1 Book Overview

When Breath Becomes Air is a deeply moving memoir by Paul Kalanithi, a neurosurgeon who faced a terminal lung cancer diagnosis at the age of 36. The book chronicles his journey from being a medical student obsessed with understanding the meaning of life to becoming a patient grappling with his own mortality. Kalanithi’s writing is both philosophical and personal, offering a unique perspective on the intersection of medicine, identity, and existence.

Published posthumously in 2016 by Random House, the memoir captures Kalanithi’s transformation from a doctor who treated patients to a patient who had to confront the fragility of life. The book is structured to reflect his medical and emotional journey, blending scientific precision with poetic introspection. It explores themes of purpose, hope, and the search for meaning in the face of death.

Kalanithi’s narrative is enriched by his wife Lucy’s epilogue, which provides a poignant conclusion to their shared story. The book has been widely acclaimed for its emotional depth and intellectual honesty, resonating with readers from diverse backgrounds. Available in PDF format, When Breath Becomes Air remains a powerful exploration of what it means to live and die with grace and purpose.

Through his writing, Kalanithi challenges readers to reflect on their own lives and priorities, offering a profound meditation on the human condition. His story serves as a reminder of the importance of empathy and understanding in both medicine and life.

1.2 Historical Context

When Breath Becomes Air is set against the backdrop of modern medicine and the evolving understanding of life, death, and human identity. The memoir, published in 2016, reflects the advancements in medical science and the complex ethical dilemmas faced by healthcare professionals. Kalanithi’s narrative highlights the intersection of personal and professional struggles, offering a unique lens through which to view the medical field.

The book emerges from a period marked by significant progress in oncology and palliative care, yet it also underscores the limitations of medical interventions in the face of terminal illness. Kalanithi’s journey as a neurosurgeon and a cancer patient bridges the gap between the scientific and the deeply personal, providing a nuanced perspective on the human experience.

Historically, the memoir aligns with a growing trend of medical professionals sharing their stories, fostering empathy and understanding between patients and caregivers. Kalanithi’s work resonates with readers in an era where discussions about mortality, end-of-life care, and the meaning of life are becoming more open and introspective.

The book’s release in 2016 also coincided with a cultural shift toward greater awareness of the emotional and psychological challenges faced by medical professionals. Kalanithi’s story, though deeply personal, speaks to universal themes, making it a significant contribution to the literary landscape of its time.

Ultimately, When Breath Becomes Air serves as a powerful reminder of the fragility of life and the enduring search for meaning in the face of uncertainty. Its historical context is marked by both medical progress and philosophical introspection, offering readers a profound exploration of what it means to live and die with purpose;

Background of the Author

Paul Kalanithi was a neurosurgeon and writer, born in 1977 in Arizona. He earned degrees in English and biology from Stanford, later attending medical school at the University of Cambridge. His residency at Stanford was nearing completion when he was diagnosed with lung cancer. Kalanithi’s experiences as both a doctor and patient shaped his reflections on life, identity, and mortality, culminating in his memoir.

2.1 Education and Career

Paul Kalanithi’s academic and professional journey was marked by excellence and dedication. He completed his undergraduate studies at Stanford University, earning degrees in both English Literature and Biology. This dual interest in the humanities and science laid the foundation for his nuanced perspective on medicine and life. He then pursued his medical training at the University of Cambridge, where he earned his medical degree. Following this, Kalanithi returned to Stanford for his neurosurgery residency, a rigorous and demanding program that required immense focus and skill. During his residency, he developed a reputation for his technical proficiency and compassionate patient care. Kalanithi’s career was nearing its peak when, at the age of 36, he was diagnosed with stage IV lung cancer. This diagnosis profoundly altered his trajectory, shifting his perspective from that of a healer to that of a patient. Despite this, he continued to write and reflect on his experiences, blending his medical expertise with philosophical introspection. His memoir, When Breath Becomes Air, is a testament to his intellectual curiosity and his quest to find meaning in the face of mortality. Kalanithi’s work has left an indelible mark on the literary and medical worlds, inspiring countless readers to contemplate the deeper questions of life and purpose.

2.2 Personal Life and Influences

Paul Kalanithi’s personal life was deeply intertwined with his intellectual and professional pursuits. Born in Kingman, Arizona, he grew up in a family that valued education and intellectual curiosity. His parents, both dedicated to their faith and academic endeavors, instilled in him a love for learning and a desire to understand the human condition. Kalanithi’s early years were marked by a fascination with literature and philosophy, which later influenced his approach to medicine. He met his wife, Lucy Kalanithi, during his medical training, and their relationship became a cornerstone of his life. Lucy, also a physician, shared his passion for medicine and supported him through the challenges of his career and his eventual illness.

Kalanithi’s diagnosis with stage IV lung cancer at the age of 36 profoundly impacted his personal life. The couple faced the reality of his mortality together, and Lucy became his primary caregiver. Despite the devastating prognosis, Kalanithi remained committed to his writing and his reflections on life, death, and meaning. His memoir, When Breath Becomes Air, was completed posthumously by Lucy, who wrote a heartfelt epilogue that offered her perspective on their journey. Kalanithi’s personal life was characterized by resilience, love, and a deep commitment to exploring the intersection of science and humanity. His story continues to inspire readers worldwide, offering a poignant reminder of the fragility and beauty of life.

The Diagnosis and Its Impact

Paul Kalanithi’s life was abruptly altered when he was diagnosed with stage IV lung cancer at 36, just as he was completing his neurosurgical residency. The diagnosis shattered his vision of the future, forcing him to confront mortality and reevaluate his identity. This profound shift transformed his perspective on life, medicine, and meaning, inspiring his poignant memoir.

3.1 Medical Journey

Paul Kalanithi’s medical journey began with subtle symptoms that eventually led to a life-altering diagnosis. At 36, in his final year of neurosurgical residency at Stanford University, Kalanithi noticed weight loss and fatigue. Initial tests revealed stage IV metastatic lung cancer, a devastating diagnosis that upended his career and future plans. As a neurosurgeon dedicated to preserving life and function, he suddenly found himself on the other side of the medical equation, grappling with the fragility of his own body.

His treatment involved rigorous chemotherapy, radiation, and multiple hospitalizations, all while he sought to maintain a sense of normalcy and purpose. Kalanithi’s unique perspective as both a doctor and a patient allowed him to reflect deeply on the medical system, the doctor-patient relationship, and the ethical dilemmas inherent in end-of-life care. Despite the physical and emotional toll of his illness, he remained committed to writing, using the process as a way to make sense of his experience and leave a legacy for his family.

Kalanithi’s wife, Lucy, played a crucial role in supporting him through this journey, both emotionally and practically. Together, they navigated the complexities of his treatment while cherishing the time they had left. Though his prognosis was dire, Kalanithi’s resilience and introspection inspired those around him, including his medical team. His story, as chronicled in When Breath Becomes Air, offers a raw yet hopeful account of facing mortality with grace and intellectual curiosity.

bananagrams rules pdf

Bananagrams is a fast-paced, portable word game where players race to create a grid of interconnected words. The rules are simple, making it family-friendly and accessible to all ages. Download the official PDF for detailed instructions, ensuring quick setup and exciting simultaneous play;

Overview of the Game

Bananagrams is a fast-paced, portable word game played with 144 letter tiles stored in a banana-shaped pouch. Players simultaneously create interconnected word grids, racing to use all their tiles first. The game combines elements of Scrabble and Boggle, offering a fun, mentally stimulating experience for all ages. Its quick setup and lack of downtime make it an excellent choice for casual or competitive play.

Importance of Understanding the Rules

Understanding the rules is essential for fair and enjoyable gameplay. Bananagrams is a fast-paced game with specific mechanics, such as peeling, dumping, and calling out “BANANAS!” Knowing these ensures smooth play and prevents disputes. The official PDF provides clear guidelines, making it a valuable resource for new and experienced players alike. Adhering to the rules enhances the overall experience.

Objective of the Game

The objective is to be the first player to use all your letters by creating a grid of connected words. Race to arrange your tiles and shout “BANANAS!”

Goal: Be the First to Use All Letters

The primary goal in Bananagrams is to be the first player to use all your letter tiles by arranging them into a connected grid of valid words. Players race to create a crossword-like structure, ensuring words are interconnected horizontally or vertically. The game emphasizes speed and efficiency, with the winner being the one who exhausts their tiles first and calls out “BANANAS!” to claim victory. This fast-paced nature makes it both challenging and exhilarating for participants of all ages.

Calling Out “BANANAS!”

The excitement peaks when a player uses all their tiles and calls out “BANANAS!” to signal their victory. This declaration ends the game immediately, and the caller is declared the winner. The winning grid must be valid and fully interconnected, ensuring all words are correctly formed. This thrilling conclusion captures the essence of Bananagrams’ fast-paced and strategic gameplay, making it a memorable moment for all participants.

Setup and Initial Play

All 144 letter tiles are placed face-down in the center, forming the “bunch.” The banana-shaped pouch remains at the game’s center, ensuring easy access for all players.

Placing Tiles and Preparing the Pouch

All 144 letter tiles are placed face-down in the center of the table, forming the “bunch.” The banana-shaped pouch is placed nearby, holding the remaining tiles. Each player takes 21 tiles to begin, ensuring the pouch stays accessible for drawing additional tiles as needed during gameplay. This setup ensures quick access and maintains the game’s fast-paced nature.

Dealing Tiles to Players

Each player takes 21 facedown tiles from the pouch, ensuring an equal start. The remaining tiles stay in the pouch for drawing during the game. This method guarantees a fair distribution and prepares players for simultaneous play.

Gameplay Variations

Bananagrams offers exciting variations like “Best Of…” for multiple rounds and “Banana Smoothie” for a less hectic experience, catering to different playstyles and preferences.

Best Of…: Playing Multiple Rounds

“Best Of…” is an optional mode for extended fun. Each round is quick, lasting about 5 minutes. Players can agree to play “Best of 5” or “Best of 10,” competing in multiple rounds. The first to win the agreed number of rounds is declared the champion, adding a competitive edge to the game.

Banana Smoothie: A Less Hectic Option

For a calmer experience, try “Banana Smoothie.” All 144 tiles are placed face down and divided equally among players. The game proceeds without peeling, allowing players to focus on word-building without the rush. This variation is perfect for those seeking a relaxed yet engaging way to enjoy Bananagrams, making it ideal for casual or learning sessions.

Solitaire Mode

In solitaire mode, place all 144 tiles face down, take 21, and race to use all letters. Aim to beat your personal best time or create the fewest words to win, perfect for solo practice and relaxation.

Playing Bananagrams Alone

To enjoy Bananagrams solo, place all 144 tiles face down and take 21. Race to arrange them into a crossword grid, using all letters. Challenge yourself to beat your personal best time or create the fewest words possible. This mode is ideal for sharpening skills, relaxing, or practicing strategies without opponents.

Beating Personal Best Time

Challenge yourself to improve speed and efficiency in solitaire mode. Focus on arranging all 144 tiles into a complete grid as quickly as possible. Aim to minimize the number of words used while ensuring every letter is utilized. Track your progress and strive to beat your previous records, enhancing your strategy and reflexes with each attempt.

Advanced Rules and Features

Explore additional gameplay dynamics like Bombastic and Peel mechanics. These features introduce strategic twists, enhancing competition and replayability for experienced players seeking new challenges and excitement.

Bombastic: The Power of Bomb Tiles

Bombastic introduces two unique bomb tiles that add a strategic twist. Drawing one has no effect, but drawing both activates their power, allowing a player to demolish another’s grid, forcing them to rebuild. This feature adds unpredictability and excitement, as players must be cautious not to provoke retaliation. Use bombs wisely to gain an advantage or defend your position in the game.

Peel and Dump Mechanics

Peel and Dump mechanics enhance gameplay dynamics. When a player uses all their tiles, they call “Peel!” and take a tile from the pouch, forcing others to do the same. Dumping allows discarding a tile, but incurs a penalty. These rules accelerate the game, ensuring quick thinking and strategic decisions, while maintaining the fast-paced and competitive nature of Bananagrams.

Common Questions and Clarifications

Players often ask about word validity and penalties. Words must be at least two letters, and proper nouns are allowed. If a word is incorrect, penalties apply. Understanding these clarifications ensures smooth gameplay and fair competition for all players involved in Bananagrams.

Using All Tiles Effectively

Efficiently using all tiles is crucial for victory in Bananagrams. Players must strategically arrange their letters into a connected word grid. The goal is to minimize leftover tiles while maximizing word length and connections. Proper planning ensures quick usage of tiles, helping players achieve the objective of being the first to use all their letters and call out “BANANAS!”

Word Validity and Definitions

Words in Bananagrams must be at least two letters long and follow standard English spelling. Proper nouns, abbreviations, and words requiring hyphens or apostrophes are not allowed. Players do not need to know word definitions to play. Words can be arranged horizontally or vertically, from left to right or top to bottom. This ensures quick, fair gameplay and avoids disputes over word legitimacy.

Winning the Game

Victory is achieved by being the first player to use all your letters and call out “BANANAS!” Penalties for invalid words can hinder your path to winning.

Conditions for Victory

To win, a player must use all their tiles in a connected word grid and declare “BANANAS!” This fast-paced game rewards speed and accuracy, ending immediately when one player meets these conditions. Strategic thinking and quick reflexes are essential to emerge victorious, as the first to exhausting their letters claims the win.

Penalties for Incorrect Words

If a player uses an incorrect word, they receive a penalty, such as losing a turn or returning tiles to the pouch. This setback can hinder their progress, allowing others to gain an advantage. Correct word usage is crucial to avoid penalties and maintain momentum in the game. Misplaced or invalid words can cost valuable time and reduce chances of victory.

House Rules and Customizations

House rules allow players to customize gameplay, enhancing versatility. Examples include alternate winning conditions, modified penalties, or unique scoring systems, letting players tailor the game to their preferences.

Creating Personalized Variations

Players can customize Bananagrams by introducing unique twists, such as themed rounds or timed challenges. For example, a “Best Of…” series allows multiple rounds for a fairer competition, while “Banana Smoothie” offers a relaxed pace. Additionally, house rules like double-letter penalties or word-length restrictions can add variety. These variations ensure the game stays fresh and adaptable to different player preferences and skill levels.

Expanding Gameplay Options

Bananagrams offers versatile gameplay through optional variations like “Bombastic” and solitaire modes. The “Bombastic” feature introduces special bomb tiles that can reset opponents’ grids, adding a strategic twist. Solitaire mode challenges players to beat personal records, enhancing skill-building. These expansions ensure the game remains dynamic and engaging for diverse player preferences while maintaining its core word-building excitement and portability.

Resources and Downloads

The official Bananagrams rules PDF is a quick reference guide perfect for teaching others. Download it along with additional guides and tutorials for enhanced gameplay.

Accessing Official Rules PDF

The official Bananagrams rules PDF is easily downloadable from the game’s website. This concise guide includes setup instructions, gameplay rules, and clarifications. Perfect for quick reference or teaching new players, it ensures everyone understands the game. Additional guides and tutorials are also available, offering tips for mastering the game or customizing play. Download now and start your Bananagrams journey with confidence!

Additional Guides and Tutorials

Beyond the official rules, numerous additional guides and tutorials are available to enhance your Bananagrams experience. These resources offer tips for improving speed, strategies for word placement, and ideas for house rules. Video tutorials provide visual learners with step-by-step gameplay examples, while blogs share expert advice for mastering the game. Explore these materials to refine your skills and enjoy a more rewarding gameplay experience.

dacor oven manual

Welcome to the Dacor Oven Manual, your comprehensive guide to understanding and utilizing your appliance effectively. This manual covers installation, operation, maintenance, and troubleshooting, ensuring optimal performance and safety. By following the instructions, you can unlock your oven’s full potential, from basic cooking to advanced features like convection cooking. Familiarize yourself with the controls, safety precautions, and warranty details to enhance your cooking experience. This resource is designed to help you make the most of your Dacor oven, providing clear, step-by-step guidance for every aspect of its use and care.

1.1 Understanding the Importance of the Manual

The Dacor Oven Manual is essential for safe and effective use of your appliance. It provides detailed guidance on installation, operation, and maintenance, ensuring optimal performance. Understanding the manual helps you navigate advanced features like convection cooking and troubleshooting common issues. It also outlines safety precautions to prevent accidents and warranty details for protection. By following the manual, you can maximize your oven’s capabilities, extend its lifespan, and enjoy a seamless cooking experience. This guide is your key to unlocking all the benefits your Dacor oven has to offer, making it an indispensable resource for every user.

1.2 Familiarizing Yourself with Dacor Oven Features

Your Dacor oven is designed with advanced features to enhance your cooking experience. Key components include the GlideRack oven racks, which allow easy access to dishes, and a intuitive control panel for precise temperature and mode adjustments. The oven also offers preset settings for various food types, ensuring optimal cooking results. Additional features like convection cooking and Wi-Fi connectivity provide versatility and convenience. Familiarize yourself with these elements to maximize your oven’s capabilities and enjoy a seamless cooking process. For detailed descriptions, refer to the specific sections in this manual or visit the Dacor website for additional resources.

Safety Instructions and Precautions

Always follow safety guidelines to prevent accidents. Read the manual thoroughly and adhere to all warnings and precautions for safe installation and operation of your Dacor oven.

2.1 General Safety Guidelines for Installation and Use

Ensure safe installation and operation by following these guidelines. Only qualified professionals should install the oven, adhering to local codes and manufacturer instructions. Keep flammable materials away from the oven and avoid using it as storage. Always use oven racks correctly, and never leave cooking unattended. Proper ventilation is essential to prevent hazardous fumes. Avoid overheating cookware and follow electrical safety standards. Read all warnings and instructions in this manual carefully to prevent accidents and ensure compliance with safety regulations. Regular maintenance is also crucial for safe and efficient operation.

2.2 Important Warnings and Cautions

Adhere to these critical warnings to ensure safe operation. Never touch hot surfaces or allow children near the oven while in use. Always use oven mitts or tongs to handle hot cookware. Ensure racks are properly positioned to avoid accidents. Do not leave cooking unattended, especially when using convection or high-temperature settings. Keep flammable materials away from the oven. Avoid overheating cookware, as it may cause damage or fire hazards. Follow all electrical safety guidelines and ensure the oven is installed on a stable, heat-resistant surface. Only authorized users should operate the oven, and always keep children at a safe distance.

Installation and Setup of Your Dacor Oven

Ensure proper installation by following the manufacturer’s guidelines. Verify electrical connections, leveling, and ventilation requirements. Install the oven in a stable, heat-resistant location, adhering to safety codes. Complete all setup steps carefully to ensure optimal performance and longevity of your appliance.

3.1 Pre-Installation Requirements

Before installing your Dacor oven, ensure the installation site meets all specifications. Verify the dimensions of the space to accommodate the oven model. Check electrical connections, ensuring they match the oven’s voltage and power requirements. Proper ventilation is crucial; install vents as per local building codes. Ensure the area is level and heat-resistant. Review the manufacturer’s guidelines for any additional structural needs. Gather all necessary tools and accessories, such as the GlideRack oven racks, to complete the setup efficiently. Follow safety protocols and consult professionals if unsure about any step to avoid installation errors.

3.2 Step-by-Step Installation Guide

Begin by carefully placing the oven in its designated space, ensuring it aligns with surrounding cabinetry. Use the leveling feet to adjust the oven’s position for even installation. Secure the oven to the adjacent surfaces using the provided mounting hardware to prevent movement. Install the GlideRack oven racks according to the manual’s instructions. Connect the electrical and gas lines, ensuring all connections are tight and meet safety standards. Finally, test the oven’s basic functions to confirm proper installation. Refer to the manual for specific torque and connection requirements to ensure a safe and efficient setup.

Operating Your Dacor Oven

Explore the full potential of your Dacor oven with easy-to-use controls and advanced features. Select food types for automatic temperature and mode settings, ensuring precise cooking results. The oven’s intuitive interface guides you through tasks, from basic baking to convection cooking, offering flexibility and convenience for every culinary need.

4.1 Basic Oven Functions and Modes

Your Dacor oven offers a variety of basic functions and modes to simplify cooking. These include standard baking, roasting, and broiling options, allowing you to achieve perfect results for various dishes. The oven features an intuitive control panel that lets you easily select modes and adjust settings. For added convenience, the oven automatically sets the temperature and cooking time based on the type of food you select. This eliminates guesswork and ensures consistent outcomes. Additionally, the oven includes features like the GlideRack system for easy rack adjustments and even cooking. Always refer to the manual for detailed guidance on using these functions effectively.

4.2 Advanced Cooking Features (e.g., Convection Cooking)

Your Dacor oven offers advanced cooking features designed to enhance your culinary experience. The convection cooking mode uses dual fans to circulate hot air evenly, ensuring faster and more uniform cooking results. This feature is ideal for roasting, baking, and achieving a perfect golden-brown finish. Additionally, the oven includes specialized modes like Pure Convection, which optimizes performance for precise temperature control. These advanced functions are easily accessible via the user-friendly control panel, allowing you to explore a wide range of cooking techniques with confidence. Refer to the manual for detailed instructions on utilizing these features effectively.

4.3 Using the Control Panel and Settings

The control panel on your Dacor oven is designed for intuitive operation, offering a user-friendly interface to access various cooking functions and settings. The high-resolution display provides clear feedback, while the ergonomic buttons and knobs allow for precise adjustments. Navigate through modes, set temperatures, and select cooking times with ease. The panel also features advanced options for convection cooking, delayed start, and Sabbath mode, ensuring versatility for any recipe or preference.

Use the touchscreen or physical controls to adjust settings, monitor cooking progress, and access additional features like brightness adjustment. Refer to the manual for detailed guidance on optimizing your control panel experience and exploring all available settings.

Maintenance and Cleaning Tips

Regular cleaning and proper care are essential to maintain your Dacor oven’s performance. Use the GlideRack oven racks for easy cleaning and follow the manual’s guidelines for optimal results.

5.1 Regular Cleaning and Care

Regular cleaning is essential to maintain your Dacor oven’s performance and safety. Use a damp cloth to wipe the exterior and interior surfaces, avoiding abrasive cleaners. The GlideRack oven racks can be easily removed for cleaning. For tough stains, mix baking soda and water to create a paste, apply it, and let it sit overnight before wiping clean. Avoid using harsh chemicals or scouring pads, as they may damage the finish. Always refer to the manual for specific cleaning recommendations tailored to your Dacor oven model. Regular maintenance ensures optimal functionality and extends the lifespan of your appliance.

5.2 Troubleshooting Common Issues

If your Dacor oven experiences issues, start by checking error codes displayed on the control panel. Common problems include uneven cooking, which may indicate incorrect rack positioning or faulty sensors. Power issues could result from improper electrical connections or tripped circuit breakers. Malfunctioning racks or doors may require alignment or lubrication. Refer to the manual for specific troubleshooting steps. For unresolved issues, contact Dacor customer support or a certified technician. Regular maintenance and adherence to cleaning guidelines can prevent many of these problems, ensuring your oven operates efficiently and safely over time.

Warranty and Customer Support

Understand your warranty coverage and access customer support for assistance. Dacor offers comprehensive support, including online resources and expert help for your oven needs.

6.1 Understanding Your Warranty Coverage

Your Dacor oven is backed by a comprehensive warranty program, ensuring protection for parts and labor. The warranty period varies by component, with most covering one year for labor and up to five years for major parts. This coverage includes repairs and replacements for defective components, providing peace of mind. For detailed terms, refer to your warranty document or visit Dacor’s official website. Proper maintenance and adherence to guidelines are essential to uphold warranty validity. Contact Dacor customer service for clarification or claims assistance.

6.2 Contacting Dacor Customer Service

For assistance with your Dacor oven, contact customer service via phone at 1-866-384-5722 or email through the official Dacor website. Support is available Monday–Friday, 7:00 AM–7:00 PM CT. Visit www.dacor.com for live chat, FAQs, and downloadable resources. Representatives are ready to address inquiries, troubleshooting, and warranty claims. Ensure to have your model and serial number handy for efficient service. Dacor’s dedicated team is committed to resolving issues promptly, ensuring your cooking experience remains seamless and enjoyable.

Additional Resources and Downloads

Visit Dacor’s official website at www.dacor.com to access the latest manuals, installation guides, and FAQs. Download PDF manuals, product specifications, and technical documents for your oven model.

7.1 Accessing the Latest Manual Updates

To ensure you have the most up-to-date information for your Dacor oven, visit the official Dacor website at www.dacor.com. Here, you can search for your specific oven model and download the latest version of the user manual in PDF format. Regular updates may include new features, troubleshooting guides, and improved instructions. Additionally, the website offers technical specifications, installation guides, and FAQs to assist with any questions or concerns. By accessing the latest manual updates, you can ensure optimal performance and safety for your appliance.

7.2 Online Support and FAQs

For convenient assistance, visit the official Dacor website to explore a wealth of online support resources. The site offers detailed FAQs, troubleshooting guides, and product specifications to address common questions and concerns. You can also access user manuals, installation guides, and technical documents to ensure proper use and maintenance of your oven. Additionally, the online support section provides step-by-step solutions for resolving issues, helping you maximize your appliance’s performance. If further assistance is needed, the website offers contact information for Dacor’s customer service team, ensuring comprehensive support whenever you need it.

Page 2 of 2

Powered by WordPress & Theme by Anders Norén