Month: July 2024

vinayaka ashtothram pdf

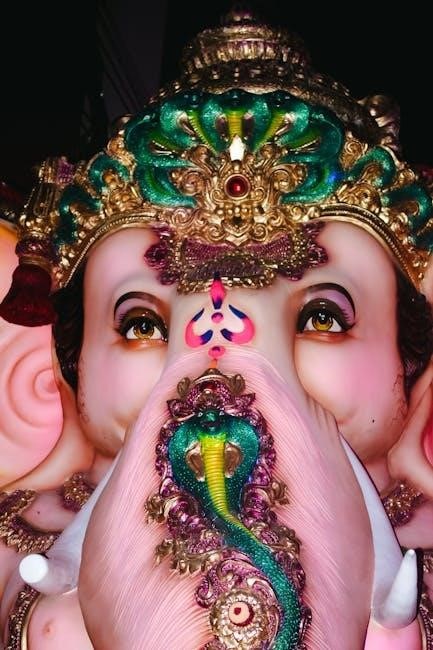
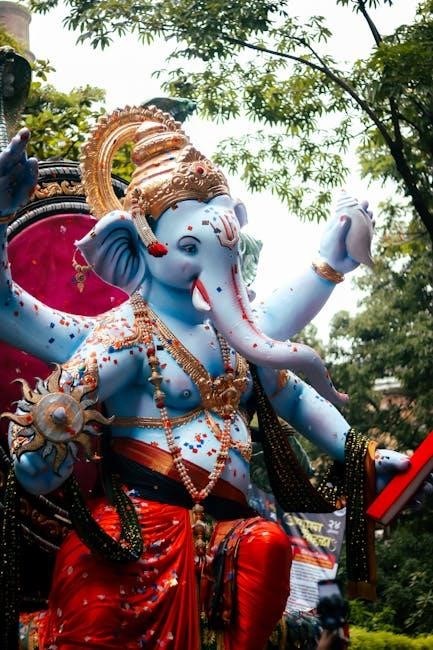
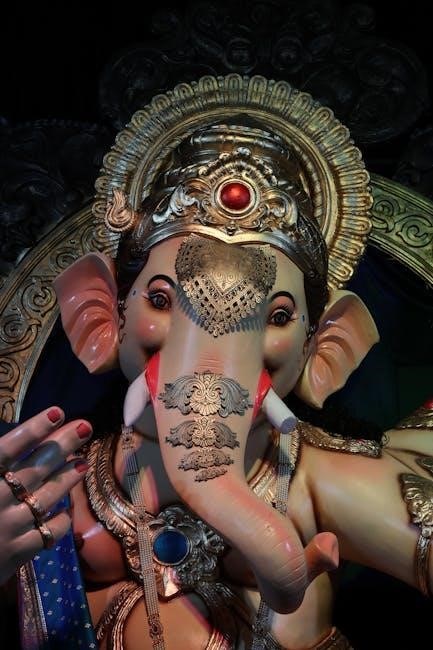
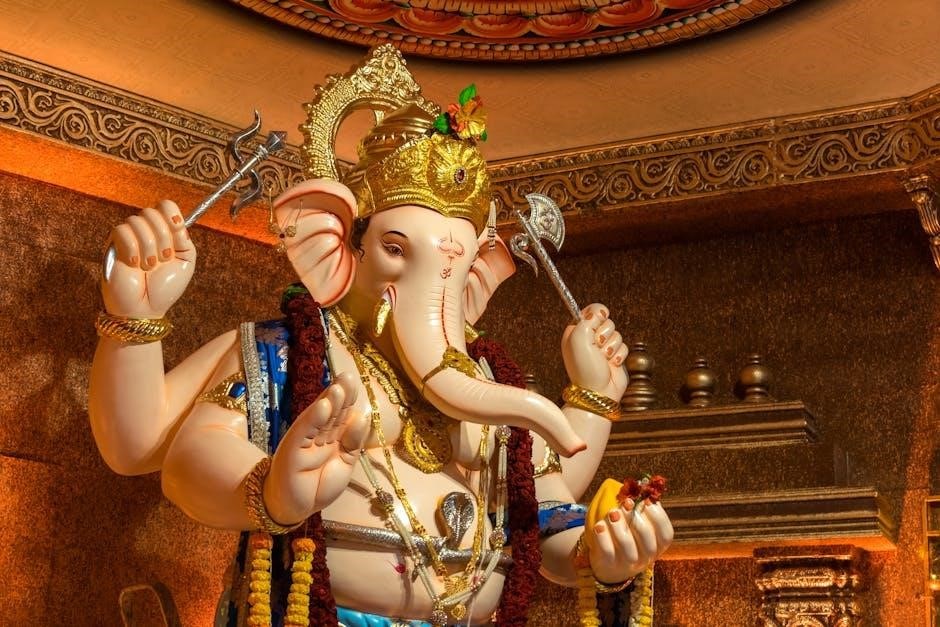
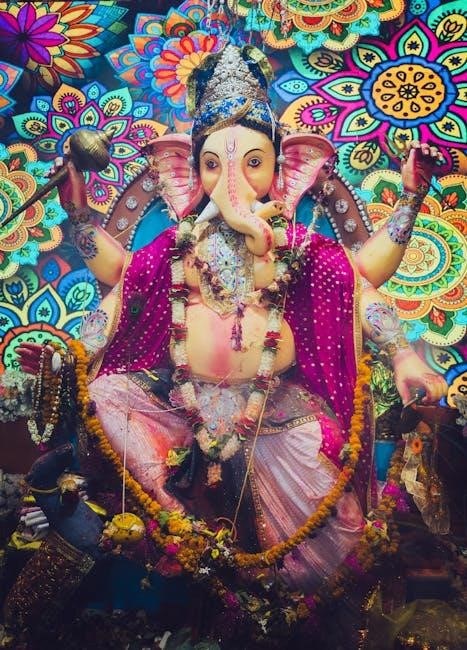
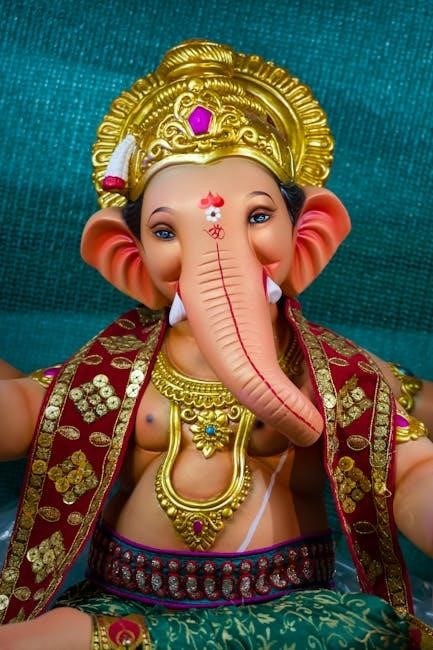
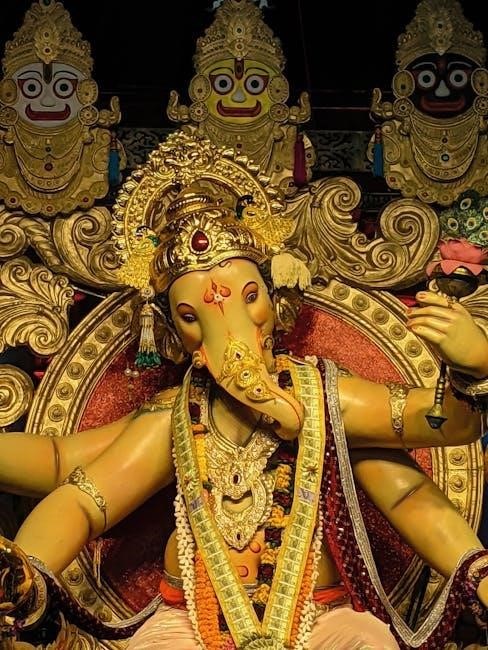
Vinayaka Ashtothram is a sacred Hindu hymn dedicated to Lord Ganesha, consisting of 108 divine names that embody his virtues and attributes. This revered chant is a cornerstone in Hindu devotion, offering spiritual solace, material prosperity, and a profound connection to the divine. The Vinayaka Ashtothram PDF serves as a comprehensive guide, detailing the hymn’s significance, structure, and recitation methods, making it an essential resource for devotees seeking spiritual growth and harmony.

Significance of Vinayaka Ashtothram in Hindu Devotion

Vinayaka Ashtothram holds immense significance in Hindu devotion as a powerful hymn dedicated to Lord Ganesha, the remover of obstacles. Comprising 108 sacred names, it embodies his divine attributes and virtues, symbolizing completeness and spiritual perfection. Devotees recite it during pujas, ceremonies, and daily worship to seek blessings, wisdom, and prosperity. The hymn is believed to ward off negativity, grant material success, and deepen spiritual connection. Its recitation is a testament to unwavering faith and devotion, fostering inner peace and divine grace in the lives of those who chant it sincerely.

Structure and Composition of the Hymn

Vinayaka Ashtothram is a meticulously structured hymn comprising 108 sacred names of Lord Ganesha, each highlighting his divine attributes and virtues. The number 108 symbolizes completeness and spiritual perfection in Hindu tradition. Each verse is a devotionally charged invocation, crafted to evoke reverence and connection with the divine. The hymn follows a rhythmic pattern, making it easy to recite and chant during pujas or personal worship. Its composition reflects the richness of Vedic tradition, blending spiritual depth with poetic elegance, ensuring its timeless appeal and universal acceptance among devotees.

Benefits of Chanting Vinayaka Ashtothram

Chanting Vinayaka Ashtothram brings spiritual peace, prosperity, and obstacle removal, fostering harmony and divine grace in one’s life, while enhancing overall well-being with positive energy and balance.

Spiritual Benefits: Inner Peace and Divine Grace

Chanting Vinayaka Ashtothram cultivates profound inner peace by calming the mind and soothing the soul. It invokes divine grace, fostering a deep connection with Lord Ganesha, the remover of obstacles. Through recitation, devotees experience spiritual upliftment, clarity of thought, and emotional balance. The hymn’s vibrations align the heart and mind, promoting harmony and positivity. Regular chanting strengthens faith, enhances devotion, and grants solace in times of turmoil. Many testimonies highlight its transformative power, revealing how it brings stability, hope, and a sense of divine presence in one’s life, enriching the spiritual journey and fostering lasting inner tranquility.

Material Benefits: Prosperity and Obstacle Removal

Vinayaka Ashtothram is renowned for its ability to attract prosperity and eliminate life’s challenges. By invoking Lord Ganesha, devotees seek removal of obstacles, ensuring smooth progress in endeavors. The hymn is believed to enhance wealth, career success, and overall well-being. Many testimonies share stories of financial recovery, improved relationships, and overcoming adversity through its recitation. Chanting the Ashtothram is also said to grant clarity in decision-making and protect against negative influences. Its vibrations are thought to create an auspicious environment, fostering growth and abundance. Faithful practice of this hymn is often credited with transforming lives and bringing tangible, positive change.

How to Use the Vinayaka Ashtothram PDF

Download the Vinayaka Ashtothram PDF for easy access to the hymn. Use it during puja or meditation, following proper guidelines for recitation and rituals to enhance its benefits.

Downloading and Accessing the PDF

The Vinayaka Ashtothram PDF can be easily downloaded from trusted spiritual websites or platforms offering Hindu scriptures. Ensure to verify the source for authenticity. Once downloaded, save it to your device for offline access. The PDF is typically formatted for readability, featuring the 108 names of Lord Ganesha in Sanskrit with optional translations. It can be accessed on smartphones, tablets, or computers, making it convenient for daily recitation or reference. Some versions may include transliterations or guidance for proper pronunciation, enhancing its usability for devotees worldwide.

Guidelines for Recitation and Puja

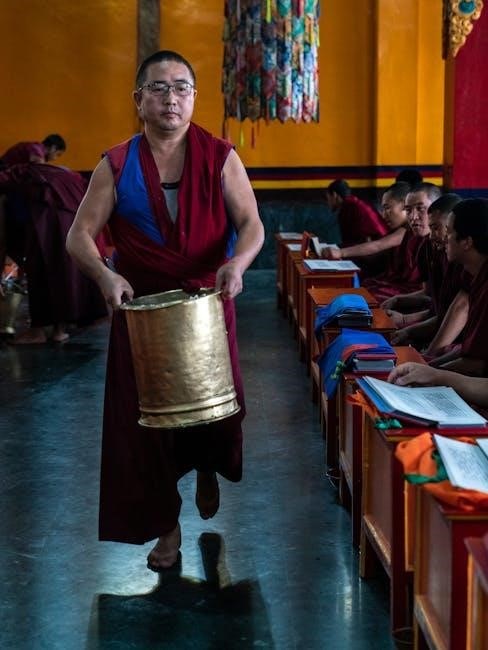
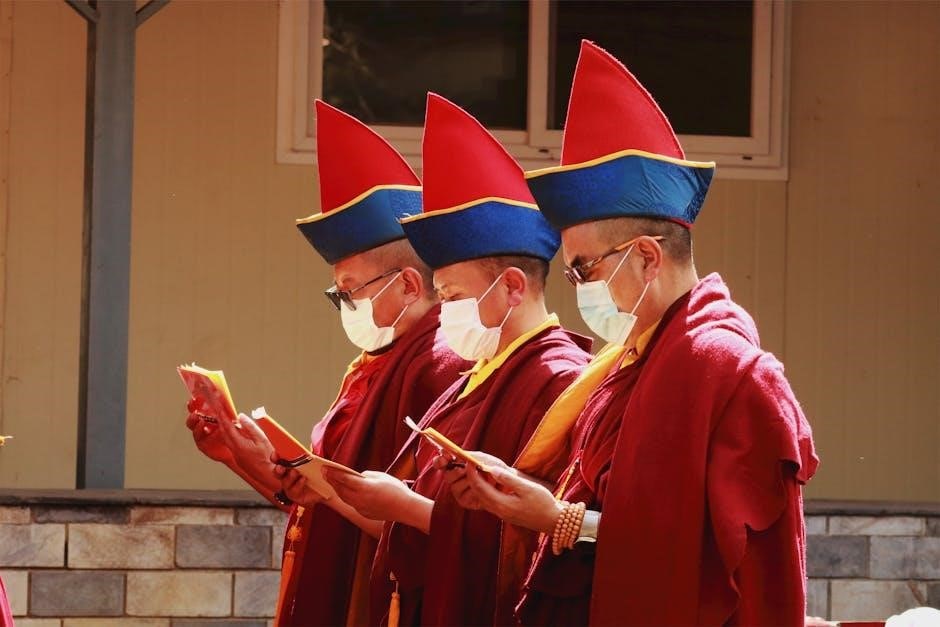
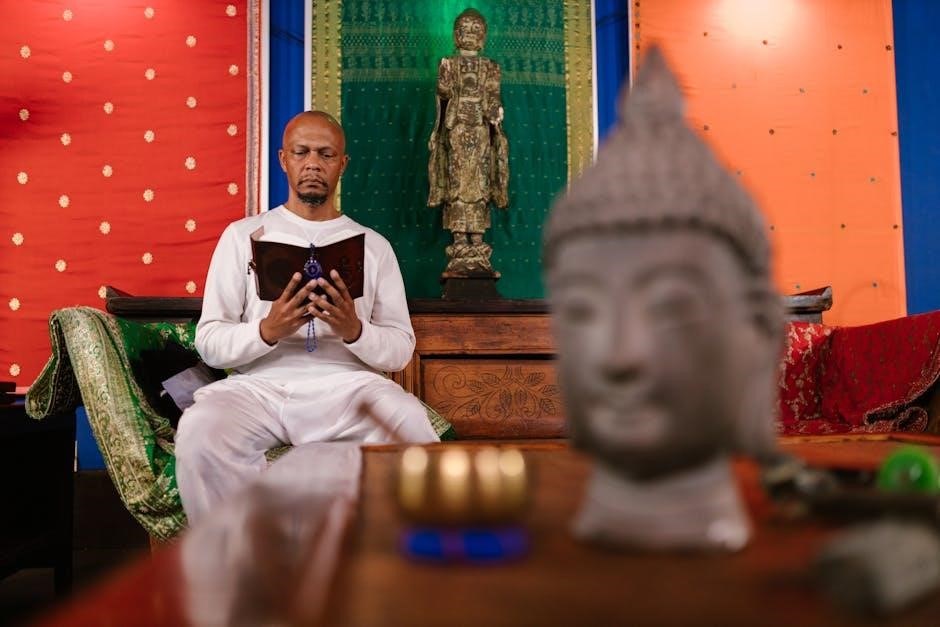
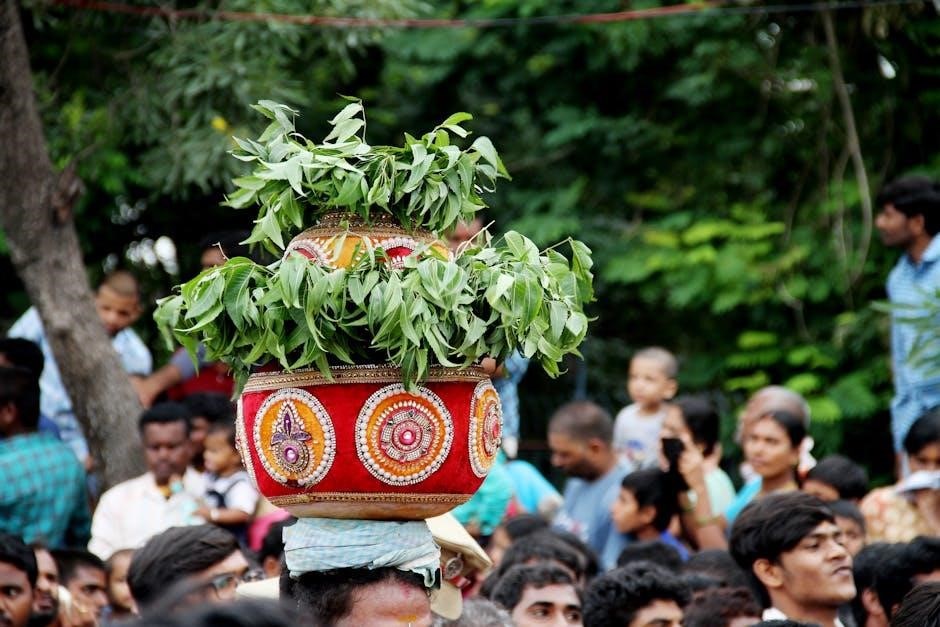
Recitation of Vinayaka Ashtothram should be performed with dedication and purity of heart. Begin by cleansing the space and offering prayers to Lord Ganesha. Sit comfortably in a cross-legged posture on a mat, facing east or north. Light incense and lamps to create a sacred ambiance. Use the PDF as a guide, chanting each name clearly and with devotion. Offer flowers and prasad (sacred offerings) during the recitation. Avoid distractions and maintain focus. Conclude the puja by seeking forgiveness for any errors and expressing gratitude. Regular and sincere recitation enhances spiritual growth and divine connection.
Consistency and faith are key to experiencing its benefits fully.

The Role of Faith and Devotion

Faith and devotion are the cornerstone of Vinayaka Ashtothram, amplifying its spiritual impact. Sincere recitation with unwavering belief fosters a deep connection to Lord Ganesha, ensuring divine grace and fulfillment.

Importance of Faith in Spiritual Practices

Faith is the cornerstone of spiritual practices, including the recitation of Vinayaka Ashtothram. It strengthens the connection to the divine, amplifying the hymn’s transformative power. Sincere devotion and belief in Lord Ganesha’s grace are essential for experiencing the profound benefits of the Ashtothram. Faith fosters a deeper understanding of the hymn’s meaning, allowing practitioners to immerse themselves in its spiritual significance. Without faith, the recitation remains mere words; with faith, it becomes a powerful tool for self-realization and divine connection. Thus, faith is not just a belief but a lived experience that enhances spiritual growth.

Connecting with the Divine Through Ashtothram

Reciting Vinayaka Ashtothram is a powerful way to connect with the divine, fostering a deep sense of reverence and closeness to Lord Ganesha. The hymn’s 108 names create a sacred space for devotion, allowing practitioners to transcend worldly concerns and align their energy with divine vibrations. By chanting with sincerity, one experiences a profound spiritual connection, leading to inner peace and harmony. Faith and devotion amplify this connection, transforming the recitation into a meaningful dialogue with the divine. Through Ashtothram, the boundaries between the self and the divine dissolve, enabling a heartfelt communion with Lord Ganesha.

Scientific and Philosophical Insights

Vinayaka Ashtothram’s 108 names reflect philosophical depth, symbolizing cosmic cycles and divine order. Scientifically, sound vibrations in mantras impact consciousness, harmonizing mind and universe through sacred resonance.

The Significance of 108 Names in Ashtothram

The 108 names in Vinayaka Ashtothram hold profound spiritual and numerical significance. Each name represents a unique attribute of Lord Ganesha, symbolizing his multifaceted nature. The number 108 is sacred in Hinduism, often associated with cosmic cycles and the universe’s structure. This numerical significance enhances the hymn’s potency, making it a comprehensive invocation for devotees seeking spiritual growth and divine connection. The repetition of these names during recitation is believed to align the chanter’s consciousness with the divine, fostering inner peace and material prosperity.

The Power of Sound and Vibration in Mantras

The rhythmic chanting of Vinayaka Ashtothram harnesses the transformative power of sound and vibration, deeply influencing the mind, body, and spirit. Each syllable resonates with cosmic energy, creating a meditative state that aligns the chanter with divine frequencies. The vibrations from these sacred sounds are believed to dispel negativity, purify the environment, and attract positive energy. This ancient practice, rooted in Vedic wisdom, emphasizes how sound can transcend language barriers, connecting devotees to Lord Ganesha on a profound, intuitive level, fostering spiritual harmony and inner transformation.

Testimonials and Experiences

Devotees share heartfelt stories of transformation, citing Vinayaka Ashtothram as a source of comfort and strength. Many report overcoming obstacles and finding peace after reciting the hymn with faith.

Real-Life Stories of Transformation

Many devotees have shared inspiring accounts of how Vinayaka Ashtothram transformed their lives. Marina, who lost her husband, found solace in reciting the hymn, gaining strength to rebuild her life. Another devotee, struggling with unemployment, reported finding a stable job after chanting the Ashtothram with faith; These stories highlight the hymn’s power to bring peace, prosperity, and hope during challenging times, embodying its divine grace and transformative potential for those who recite it sincerely.

Community Feedback and Shared Experiences

The community has shared heartfelt experiences about the Vinayaka Ashtothram, praising its profound impact on their lives. Devotees often mention how the hymn brings a sense of peace and clarity, helping them navigate life’s challenges. Many have reported feeling empowered and inspired after reciting it regularly. The shared experiences highlight a strong sense of faith and connection among practitioners, creating a collective energy that strengthens their spiritual journeys. These testimonials underscore the hymn’s ability to foster hope, resilience, and a deeper bond with the divine.

Vinayaka Ashtothram is a timeless hymn offering profound spiritual and material benefits. Its 108 names encapsulate Lord Ganesha’s divine grace, guiding devotees toward peace, prosperity, and fulfillment. Embrace the PDF as a sacred tool for daily worship and reflection, deepening your connection to the divine and transforming your life journey with faith and devotion.

The Lasting Impact of Vinayaka Ashtothram

Vinayaka Ashtothram leaves a profound and enduring impact on devotees, fostering spiritual growth and inner transformation. By reciting the 108 sacred names of Lord Ganesha, individuals experience lasting peace, prosperity, and divine grace. The hymn’s vibrations resonate deeply, removing obstacles and nurturing a sense of connection to the divine. Many testimonials highlight its transformative power, with devotees reporting positive life changes and emotional healing. The Vinayaka Ashtothram PDF serves as a timeless guide, enabling continuous worship and reflection, ensuring its blessings remain a constant source of inspiration and strength for generations.

A Call to Action for Spiritual Growth

Embark on a transformative journey with the Vinayaka Ashtothram, a powerful tool for spiritual evolution. Embrace its divine verses to cultivate inner peace, prosperity, and a deeper connection with Lord Ganesha. Whether you seek personal growth, emotional healing, or material success, this sacred hymn offers guidance and inspiration. Download the Vinayaka Ashtothram PDF to begin your path, recite it with faith, and integrate its teachings into your daily life. Let the wisdom of this ancient tradition illuminate your soul and empower you to achieve harmony and fulfillment in all aspects of life.

linear ak-11 keypad manual pdf

The Linear AK-11 Keypad is a digital keyless entry system designed for access control, featuring a rugged cast aluminum enclosure and 12-24VAC/DC compatibility. This manual is crucial for proper setup and use.

1.1 Overview of the Linear AK-11 Keypad

The Linear AK-11 Keypad is a digital keyless entry system designed for access control applications. It features a rugged cast aluminum enclosure, voltage compatibility (12-24VAC/DC), and LED indicators for status feedback. Ideal for gates, locks, and secure entry points, it offers reliable operation and customizable settings for enhanced security and convenience.

1.2 Importance of the Manual for Installation and Operation

The manual is essential for proper installation, programming, and operation of the Linear AK-11 Keypad. It provides step-by-step instructions, troubleshooting tips, and maintenance guidelines, ensuring optimal performance and security. Reading the manual thoroughly helps users avoid errors and fully utilize the keypad’s advanced features, guaranteeing a smooth and secure access control experience.

Key Features of the Linear AK-11 Keypad

The Linear AK-11 Keypad offers a digital keyless entry system, rugged cast aluminum enclosure, 12-24VAC/DC voltage compatibility, and LED indicators for status and user feedback, ensuring durability and reliability;

2.1 Digital Keyless Entry System

The Linear AK-11 Keypad provides a secure digital keyless entry system, allowing authorized access through programmable codes. It ensures convenience and enhanced security for gates, doors, and other access points, eliminating the need for physical keys while maintaining reliable operation and user-friendly functionality.

2.2 Rugged Cast Aluminum Enclosure

The Linear AK-11 Keypad features a durable cast aluminum enclosure, designed to withstand harsh outdoor conditions and heavy use. This robust housing ensures long-lasting performance, protecting internal components from environmental factors like moisture and extreme temperatures, while maintaining a sleek and professional appearance for any installation setting.

2.3 Voltage Compatibility (12-24VAC/DC)

The Linear AK-11 Keypad supports a wide voltage range of 12-24VAC/DC, ensuring compatibility with various power sources. This flexibility allows seamless integration into existing systems, whether powered by alternating or direct current, making it adaptable for different installations and reducing the need for additional voltage conversion equipment.

2.4 LED Indicators for Status and Feedback

The Linear AK-11 Keypad features LED indicators that provide real-time status and feedback. These LEDs illuminate to confirm user input, indicate programming mode, and show system status. During programming, LEDs turn off until an option is entered, with the yellow LED blinking to confirm selection, ensuring clear visual communication for seamless operation and troubleshooting.

Installation Requirements and Preparation

Ensure proper tools and materials are available. Verify voltage compatibility (12-24VAC/DC) and follow installation guidelines for mounting, wiring, and power supply connections to guarantee safe and effective setup.

3.1 Tools and Materials Needed

To install the Linear AK-11 Keypad, you will need a drill, screws, wire connectors, and a voltage-compatible power supply. Ensure all materials are readily available to streamline the installation process and avoid delays.

3.2 Mounting and Placement Guidelines

Mount the Linear AK-11 Keypad near the gate or entry point, ensuring visibility and accessibility. Install it on a flat surface, protected from direct sunlight and harsh weather. Use the provided screws to secure it firmly. Ensure proper alignment and consider installing under an overhang for added weather protection.

3.3 Power Supply and Wiring Connections

Connect the Linear AK-11 Keypad to a 12-24VAC/DC power supply. Ensure wiring is secure and follows the manual’s circuit diagram. Connect positive and negative terminals correctly, avoiding reversed polarity. Use weather-resistant connectors for outdoor installations. Test the keypad after wiring to confirm proper functionality before finalizing the installation.

3.4 Locking the Keypad (Keylock Feature)

To secure the Linear AK-11 Keypad, use the keylock feature. Insert the key and turn it clockwise to lock. This prevents unauthorized access or accidental programming changes. Remove the jumper JP1 to reduce keypad tones if desired. Locking ensures system integrity and prevents tampering during installation or operation. Follow manual instructions for proper keylock engagement.

Programming the Linear AK-11 Keypad

Programming the Linear AK-11 Keypad is a straightforward process that involves entering specific codes and configurations to set up access control and customize features, as detailed in the manual for easy setup and customization.

4.1 Entering Programming Mode

To enter programming mode on the Linear AK-11 Keypad, press and hold the program button until the LEDs deactivate. Once activated, the yellow LED will blink to confirm entry. Ensure the jumper (JP1) is set correctly for reduced sound levels during programming. Follow the manual for step-by-step guidance on accessing and navigating this mode effectively.

4.2 Setting Up Access Codes

Enter programming mode, then press the program button. Input a new access code using the keypad and confirm. Repeat the code to ensure accuracy. Press the program button again to save. The yellow LED will flash to confirm the code is stored. Follow the manual for additional codes or modifications. Ensure all codes are secure and unique.

4.3 Advanced Features (Customizable Alerts, Remote Access)

The Linear AK-11 keypad offers customizable alerts for entry attempts and system status updates. Remote access enables monitoring and code management via compatible systems. These features enhance security and convenience, allowing users to receive notifications and control access from a distance. Refer to the manual for detailed setup instructions and compatibility requirements.

4.4 Saving and Exiting Programming Mode

To exit programming mode, ensure all settings are saved. Press and hold the “0” key until the LEDs confirm the exit. The keypad will revert to normal operation, and the keylock feature can be engaged for security. Refer to the manual for specific exit procedures to avoid losing programmed data.

Operation and User Interface

The Linear AK-11 Keypad offers intuitive operation with audible tones and LED feedback, ensuring user-friendly navigation; The status bar and indicators provide clear visual cues for seamless functionality and monitoring.

5.1 Keypad Tones and Audible Feedback

The Linear AK-11 Keypad features audible tones that provide feedback for button presses, confirming user input. Sound levels can be adjusted by removing the jumper, ensuring clear communication. This enhances user experience by offering immediate confirmation of actions, simplifying operation in various environments.

5.2 User-Friendly Design and Navigation

The Linear AK-11 Keypad boasts a user-friendly design with an intuitive interface, ensuring easy navigation. Its backlit display and clearly labeled buttons provide excellent visibility. The system offers customizable tones and LED feedback, making it simple for users to interact with the keypad confidently and efficiently in various lighting conditions.

5.3 Status Bar and LED Indications

The Linear AK-11 Keypad features LED indicators for real-time status updates. LEDs display power status, programming mode, and access notifications, while the status bar provides visual feedback for user inputs and system responses, ensuring clarity and ease of monitoring during operation or programming.

Troubleshooting Common Issues

Common issues include connectivity problems, power supply malfunctions, and programming errors. The manual provides diagnostic procedures and solutions to address these problems effectively.

6.1 Diagnostic Procedures

The manual outlines diagnostic procedures to identify and resolve issues. Check LED indicators for status feedback, verify power supply connections, and ensure proper wiring. For connectivity problems, test the keypad’s communication with the gate opener. Review programming settings to address errors and follow troubleshooting steps to restore functionality.

6.2 Resolving Connectivity and Power Issues

To resolve connectivity issues, ensure the keypad is properly connected to the gate opener and accessories. Check power connections, verifying the voltage matches the 12-24VAC/DC requirement. Inspect wiring for damage or loose connections. If problems persist, consult the manual or contact technical support for further assistance.

6.3 Addressing Programming Errors

If programming errors occur, check LED indicators for error codes. The red LED flashes to signal invalid entries. Refer to the manual for correct programming sequences. Re-enter codes carefully, ensuring accuracy. If issues persist, reset the keypad by removing power or using the keylock feature, then restart the programming process.

Maintenance and Care

Regularly clean the keypad with a soft cloth and mild detergent. Inspect wiring for damage and ensure connections are secure. Replace worn keys promptly for optimal performance.

7.1 Cleaning the Keypad

Use a soft, dry cloth to wipe the keypad surface. For stubborn stains, dampen the cloth with mild detergent, but avoid harsh chemicals or excessive moisture. Regular cleaning ensures optimal functionality and prevents dust buildup. Avoid spraying liquids directly on the keypad to protect internal electronics and maintain durability.

7.2 Regular Maintenance Checks

Regularly inspect the keypad’s power supply and wiring connections for stability. Check LED indicators to ensure proper functionality. Verify the mounting stability to prevent loose attachments. Test all buttons for responsiveness and accuracy. Schedule periodic checks to confirm firmware updates and system compatibility. Address any environmental factors affecting performance, like moisture or extreme temperatures.

7.3 Upgrading Firmware (If Applicable)

Download the latest firmware from the official Linear website. Disconnect power before starting the update to avoid system corruption. Use a compatible computer or device to transfer the firmware to the keypad. Follow the on-screen instructions carefully to ensure a successful upgrade. After completion, reboot the keypad and test its functionality to confirm the update was applied correctly. Always verify that the firmware version matches your device’s specifications to maintain optimal performance. If unsure, consult the manual or contact technical support for assistance. Regular firmware updates ensure compatibility, security, and access to new features. Ensure the update process is uninterrupted to prevent errors. If issues arise, restore default settings or reinstall the previous firmware version. Keep the keypad powered on during the update process. Failure to follow instructions may result in system malfunctions. Contact Linear support if the keypad does not recognize the firmware update. Some firmware updates may require additional hardware or software tools. Always backup settings before performing a firmware upgrade. The firmware update process typically takes a few minutes. Once completed, the keypad will automatically restart. Verify the new firmware version in the system settings to confirm success. If the keypad does not function properly after the update, reset it to factory settings and retry the process. Ensure the firmware file is compatible with your specific Linear AK-11 model. Avoid using third-party firmware sources to prevent potential security risks. If the update fails, check the power supply and connections before retrying. The firmware update may improve performance, add features, or fix known issues. Always refer to the official Linear documentation for detailed instructions. The firmware update process is designed to enhance the keypad’s functionality and security. If you encounter errors, ensure the firmware file is not corrupted. Contact Linear support for assistance with corrupted files. The firmware update process is essential for maintaining the keypad’s performance and compatibility with other systems. Regularly check for firmware updates to ensure your keypad operates at peak efficiency. The firmware update process is straightforward but requires careful attention to instructions. If you are unsure about any step, seek professional assistance to avoid damaging the device. The firmware update process is a critical part of maintaining your Linear AK-11 Keypad’s optimal performance and security. Always follow the recommended steps to ensure a successful upgrade. If the keypad becomes unresponsive during the update, do not disconnect power. Wait for the process to complete or until the keypad restarts. The firmware update process is designed to be user-friendly, but it requires adherence to the provided instructions. If the update fails, restart the process and ensure all steps are followed accurately. The firmware update process is a routine maintenance task that should be performed as needed to keep your Linear AK-11 Keypad up-to-date. Always use the latest firmware version to ensure compatibility with other devices and systems. If you experience issues after the update, refer to the troubleshooting section of the manual. The firmware update process is a vital part of maintaining the security and functionality of your Linear AK-11 Keypad. Always prioritize regular updates to protect your system and ensure uninterrupted access control. If the update process seems stalled, check the progress indicator or status bar for updates. The firmware update process is a necessary step to keep your Linear AK-11 Keypad running smoothly and securely. Always perform updates in a stable environment to minimize the risk of interruptions. If the keypad’s LEDs indicate an error during the update, consult the manual for troubleshooting steps. The firmware update process is a straightforward procedure that requires careful execution. Always download firmware from trusted sources to avoid malware or corrupted files. If the update fails, retry the process with a stable internet connection and uninterrupted power supply. The firmware update process is essential for maintaining the Linear AK-11 Keypad’s performance and security. Always follow the manufacturer’s instructions to ensure a successful upgrade. If you encounter persistent issues, contact Linear technical support for further assistance. The firmware update process is a routine part of maintaining your Linear AK-11 Keypad. Always check for updates periodically to ensure your system remains secure and functional. If the update process is interrupted, restart it once the power is restored. The firmware update process is a critical task that should be performed carefully. Always ensure the keypad is properly powered and connected during the update. If the update fails, check for any error messages or indicators on the keypad. The firmware update process is designed to enhance your Linear AK-11 Keypad’s capabilities. Always follow the recommended steps to ensure a smooth and successful upgrade. If you are unsure about any part of the process, consult the manual or contact support. The firmware update process is a necessary step to keep your Linear AK-11 Keypad up-to-date. Always use the latest firmware version to ensure compatibility and optimal performance. If the update process seems complicated, consider seeking assistance from a qualified technician. The firmware update process is a routine maintenance task for your Linear AK-11 Keypad. Always download updates from official sources to ensure authenticity and security. If the update fails, check for any obstructions or interference during the process. The firmware update process is essential for maintaining the functionality and security of your Linear AK-11 Keypad. Always follow the instructions provided by the manufacturer to ensure a successful upgrade. If you encounter any issues, refer to the troubleshooting section of the manual for guidance. The firmware update process is a straightforward procedure that requires attention to detail. Always ensure the keypad is properly prepared and powered before starting the update. If the update fails, check the power supply and connections before retrying. The firmware update process is a critical part of maintaining your Linear

Accessing the Linear AK-11 Manual PDF

Access the Linear AK-11 keypad manual PDF by visiting the official Linear website or authorized distributors for detailed setup, programming, and essential troubleshooting instructions.

8.1 Downloading the Manual from Official Sources

To download the Linear AK-11 keypad manual, visit the official Linear Systems website or authorized distributors. Navigate to the support or documentation section, locate the AK-11 model, and click the provided hyperlink to access the PDF. Ensure you use official sources to avoid counterfeit or outdated documents.

optoma projector user manual

Welcome to the Optoma Projector User Manual! This guide provides essential information for setting up‚ operating‚ and maintaining your projector. It covers key features‚ troubleshooting‚ and safety precautions to ensure optimal performance and longevity. Designed for both beginners and advanced users‚ this manual helps you maximize your viewing experience. Let’s get started!

Overview of the Optoma Projector

The Optoma projector is a high-performance device designed to deliver exceptional image quality for home entertainment‚ gaming‚ and professional presentations. With advanced features like 4K resolution‚ HDR support‚ and high brightness‚ it ensures vivid and lifelike visuals. The projector is equipped with a user-friendly interface and comes with essential accessories like a remote control‚ power lead‚ and lens cap. Its compact design and portability make it ideal for various settings. Optoma projectors are known for their reliability and versatility‚ catering to both casual users and enthusiasts. This overview highlights the key features and technologies that make the Optoma projector a standout choice for immersive viewing experiences.

Importance of Reading the User Manual

Reading the Optoma Projector User Manual is crucial for unlocking its full potential and ensuring safe‚ efficient operation. The manual provides detailed guidance on setup‚ features‚ and troubleshooting‚ helping users avoid common mistakes. It outlines safety precautions‚ such as avoiding liquid exposure and proper lens care‚ to prevent damage. Understanding warranty information and maintenance tips‚ like cleaning the lens and filter‚ is also essential for longevity. By following the manual‚ users can optimize image quality‚ connect devices correctly‚ and resolve issues quickly. Whether you’re a first-time user or a seasoned pro‚ the manual serves as an indispensable resource for maximizing your projector’s performance and enjoying a seamless viewing experience.

Installation and Setup

Begin by carefully unboxing and inventorying all components. Connect external devices‚ power on the projector‚ and follow on-screen prompts for initial setup and adjustments.

Unboxing and Components

Start by carefully unboxing your Optoma projector and verifying all included components. The package typically contains the projector‚ remote control‚ power cord‚ HDMI cable‚ lens cap‚ and documentation such as the user manual and quick start guide. Ensure no items are missing or damaged. Familiarize yourself with each component’s purpose to ensure proper setup. The projector itself features a compact design with intuitive controls‚ while the remote provides convenient operation. Additional accessories like batteries for the remote may also be included. Properly organizing these components will streamline the installation process and ensure a smooth experience. Take your time to inspect and prepare each item before proceeding to the next step.

First-Time Setup and Initialization

Begin by connecting the projector to a power source and turning it on. Follow the on-screen instructions to complete the initial setup‚ including language selection and display settings. Ensure the lens cap is removed before powering on. Connect external devices like gaming consoles or PCs using HDMI cables. The projector will automatically detect and configure input sources. Adjust the focus and keystone settings for optimal image alignment. Test the remote control to ensure it functions correctly. If prompted‚ install any firmware updates to ensure the latest features and performance. Proper initialization ensures smooth operation and optimal image quality. Take your time to carefully follow each step for a seamless setup experience. This process lays the foundation for enjoying your projector’s full capabilities.

Operating the Projector

Operating the Optoma projector involves using the control panel and remote for menu navigation‚ adjusting focus‚ and managing power efficiently for smooth operation and optimal performance.

Understanding the Control Panel

The Optoma projector control panel offers easy access to essential functions. It features buttons for power‚ menu navigation‚ focus adjustment‚ and input selection. The Menu button allows you to access settings like brightness‚ contrast‚ and color calibration. The Focus button ensures sharp images by adjusting the lens. Input buttons let you switch between connected devices. Additional buttons provide quick access to common settings like Aspect Ratio and Keystone Correction. Using the control panel‚ you can customize your viewing experience efficiently. Familiarize yourself with these controls to optimize your projector’s performance and enjoy high-quality visuals effortlessly. Proper use of the control panel enhances your overall experience with the Optoma projector.

Using the Remote Control

The Optoma projector remote control provides convenient operation from a distance. It includes buttons for power‚ menu navigation‚ input selection‚ and volume control. The Menu button accesses settings like picture mode and brightness. Input buttons let you switch between connected devices. The Focus button adjusts the lens for sharp images. Additional buttons allow quick access to features like Aspect Ratio and Keystone Correction. The remote is pre-paired with the projector and requires AAA batteries for operation. For optimal performance‚ replace batteries when the remote’s range or responsiveness decreases. Regularly clean the remote’s buttons to maintain functionality. Using the remote control ensures easy and efficient operation of your Optoma projector for a seamless viewing experience.

Adjusting Image Quality

Adjusting image quality on your Optoma projector involves focusing the lens‚ calibrating color‚ and brightness. Use the remote to access settings and optimize the picture for sharp‚ vivid images.

Focusing the Lens

Focusing the lens on your Optoma projector ensures sharp and clear images. Locate the focus ring on the lens and adjust it manually while viewing the image. Turn the ring gently clockwise or counterclockwise until the image appears sharp and defined. For optimal results‚ adjust the focus while the projector is displaying content. If the image remains blurry‚ check the lens for cleanliness and ensure the projector is at the correct distance from the screen. Proper focus enhances clarity and overall viewing experience‚ making it a crucial step in setting up your projector.

Calibrating Color and Brightness

Calibrating the color and brightness of your Optoma projector ensures accurate image representation and optimal viewing experience. Begin by accessing the on-screen menu and navigating to the color calibration section. Adjust the brightness and contrast settings based on the ambient light in the room. Use the color temperature options to customize the image to your preference‚ such as selecting “Movie” mode for cinematic tones. For precise calibration‚ use the built-in test patterns or external calibration tools. Fine-tune the RGB levels to achieve balanced colors. Regular calibration ensures consistent image quality and prevents eye strain. Follow the manual for detailed steps to enhance your projector’s performance and enjoy vibrant‚ lifelike visuals.

Connectivity Options

Your Optoma projector offers versatile connectivity options‚ including HDMI‚ USB‚ and LAN ports‚ enabling seamless wired connections to devices like Blu-ray players‚ gaming consoles‚ and laptops. Wireless connectivity is also supported for hassle-free linking to smartphones and tablets. The projector is compatible with a wide range of external devices‚ ensuring flexibility for diverse multimedia needs. This section provides detailed guidance on connecting your projector to various devices for a smooth and enhanced viewing experience.

Connecting External Devices

Your Optoma projector offers a variety of ports to connect external devices‚ ensuring compatibility with a wide range of multimedia sources. HDMI ports allow for high-definition connections to devices like Blu-ray players‚ gaming consoles‚ and laptops. USB ports enable direct playback of media from flash drives or external hard drives. Additionally‚ the LAN port supports wired network connections for stable data transfer. For older devices‚ VGA and composite AV inputs are also available. Wireless connectivity options‚ such as Wi-Fi and Bluetooth‚ provide flexibility for streaming content from smartphones or tablets. Ensure all cables are securely connected and compatible with your projector’s specifications for optimal performance. Refer to the user manual for detailed instructions on configuring these connections.

Wireless and Networking Features

Your Optoma projector is equipped with advanced wireless and networking capabilities‚ enhancing connectivity and convenience. Built-in Wi-Fi allows seamless streaming from devices like smartphones‚ tablets‚ and laptops. Bluetooth connectivity enables wireless audio transmission to compatible speakers or soundbars. The LAN port supports wired network connections for stable and high-speed data transfer. These features make it easy to integrate your projector into a smart home system or corporate network. For troubleshooting‚ the projector offers network configuration options and reset features to ensure smooth connectivity. Refer to the user manual for detailed instructions on setting up and managing these wireless and networking features to maximize your multimedia experience.

Maintenance and Troubleshooting

Regularly clean the lens and air filter to prevent dust buildup. Check for firmware updates to ensure optimal performance. Refer to the manual for solutions to common issues.

Cleaning the Lens and Filter

Regular cleaning of the lens and filter is essential to maintain your Optoma projector’s image quality and performance. Use a soft‚ dry cloth to gently wipe the lens‚ avoiding any abrasive materials or liquids that could cause damage. For the air filter‚ turn off the projector‚ unplug it‚ and carefully remove the filter. Clean it with compressed air or a soft brush‚ ensuring no dust or debris remains. If the filter is damaged‚ replace it immediately to prevent overheating. Cleaning these components regularly will help ensure sharp‚ clear images and prolong the lifespan of your projector. Always refer to the user manual for specific cleaning instructions tailored to your model.

Common Issues and Solutions

If your Optoma projector isn’t functioning properly‚ there are several common issues you can troubleshoot; First‚ ensure the lens cap is removed‚ as it can block the projection. If the image appears blurry‚ check the focus adjustment on the lens or ensure the projector is at the correct distance from the screen. For connectivity issues‚ verify that all cables are securely connected and that the correct input is selected. If the projector doesn’t turn on‚ check the power cord and ensure it’s properly plugged in. Additionally‚ clean the air filter regularly to prevent overheating. For more specific problems‚ refer to the user manual or contact Optoma support for assistance. Regular maintenance and troubleshooting can help resolve most issues quickly.

Congratulations! You’ve completed the Optoma Projector User Manual. By following these guidelines‚ you’ll ensure optimal performance and longevity. Regular maintenance and troubleshooting will enhance your viewing experience. For further assistance‚ visit the Optoma support page or contact customer service. Happy projecting!

Final Tips for Optimal Performance

To ensure your Optoma projector performs at its best‚ always clean the lens and filter regularly to maintain image clarity. Keep the projector in a well-ventilated area to prevent overheating. Regularly update the software to access the latest features and improvements. For gaming and movies‚ adjust brightness and color settings according to the content. Use a stable power supply to avoid sudden shutdowns. Replace the lamp with genuine Optoma parts when necessary. Finally‚ calibrate the focus and keystone correction for a crisp‚ distortion-free image. By following these tips‚ you’ll enjoy a seamless and immersive viewing experience with your Optoma projector.

catholic confession guide printable

This guide provides a comprehensive resource for Catholics to understand and prepare for confession‚ offering reflections‚ prayers‚ and practical steps to foster spiritual growth and reconciliation.

Purpose and Scope of the Guide

This guide aims to assist Catholics in preparing for the Sacrament of Reconciliation through prayer‚ self-reflection‚ and clear instructions. It offers printable resources‚ including examinations of conscience tailored for different age groups‚ to help individuals identify and articulate their sins. The guide also provides step-by-step directions for the confession process‚ from the initial greeting to receiving absolution. Its scope extends to fostering a deeper understanding of the sacrament‚ encouraging regular participation‚ and helping individuals grow in holiness. It serves as a practical tool for spiritual renewal and healing.

Importance of Regular Confession in Catholic Faith

Regular confession is vital for spiritual growth and healing in the Catholic faith. It allows believers to acknowledge their sins‚ seek forgiveness‚ and reconcile with God and the Church. Through confession‚ individuals receive grace to overcome weaknesses and grow in holiness. The sacrament fosters self-reflection‚ accountability‚ and humility‚ while also providing spiritual renewal. By participating regularly‚ Catholics deepen their relationship with Christ and strengthen their commitment to living according to His teachings. This practice is rooted in scripture and tradition‚ emphasizing God’s mercy and the transformative power of repentance.

Understanding the Sacrament of Reconciliation

The Sacrament of Reconciliation‚ also known as confession‚ is a sacred ritual where Catholics seek forgiveness for sins‚ restoring their relationship with God and the Church.

What is Confession and Its Significance

Confession‚ or the Sacrament of Reconciliation‚ is a sacred ritual where Catholics confess their sins to a priest‚ seeking forgiveness and healing. It involves acknowledging wrongdoing‚ expressing remorse‚ and receiving absolution. This sacrament restores one’s relationship with God and the Church‚ offering spiritual renewal and peace. By confessing sins‚ individuals take responsibility for their actions‚ demonstrate repentance‚ and open themselves to God’s mercy. Regular confession fosters personal growth‚ strengthens faith‚ and deepens one’s commitment to living a virtuous life. It is a powerful means to encounter God’s forgiveness and grace.

Scriptural and Theological Foundations of Confession

The sacrament of confession is rooted in Scripture and Catholic theology. Jesus entrusted the apostles with the power to forgive sins (John 20:21-23)‚ establishing the Church’s role in reconciliation. Theologically‚ confession reflects God’s mercy and humanity’s need for redemption. It emphasizes the importance of acknowledging sin‚ seeking forgiveness‚ and restoring relationships with God and the Church. This sacrament is a divine gift‚ enabling believers to experience healing‚ peace‚ and spiritual renewal through heartfelt repentance and absolution. Its foundation in Scripture and tradition underscores its enduring significance in Catholic faith and practice.

Preparing for Confession

Preparing for confession involves prayer‚ self-reflection‚ and examining one’s conscience. Making a list of sins helps ensure clarity and honesty during the sacrament.

Examination of Conscience: Reflecting on Your Sins

An examination of conscience is a vital step in preparing for confession. It involves prayerfully reflecting on your actions‚ thoughts‚ and omissions to identify sins. Start by asking the Holy Spirit for guidance and honesty. Review your life in light of the Ten Commandments‚ Beatitudes‚ and virtues. Consider specific areas such as respect for life‚ honoring others‚ and practicing charity. Make a list of sins to ensure clarity and honesty during confession. This reflection helps you acknowledge your weaknesses and grow in holiness‚ fostering a sincere and fruitful confession. Regular examination deepens self-awareness and spiritual growth.

Prayer Before Confession: Asking for Grace and Guidance

Prayer before confession is essential to seek God’s grace and guidance. Begin by asking the Holy Spirit to illuminate your conscience and grant you sincerity. A simple prayer might be: “Lord‚ help me to see my sins and be truly sorry. Guide me to make a good confession.” This prayer prepares your heart to acknowledge your faults humbly and seek forgiveness. It also strengthens your resolve to amend your life and grow in holiness. Prayer fosters a spirit of contrition‚ making your confession more meaningful and fruitful. Regular prayer before confession deepens your relationship with God.

Creating a List of Sins: Tips for Clarity and Honesty

Creating a list of sins before confession helps ensure clarity and honesty. Start by reflecting on specific actions‚ thoughts‚ or omissions that contradict God’s teachings. Be brief and concise‚ focusing on the nature of the sin rather than unnecessary details. Avoid generalizations; instead‚ list sins clearly‚ such as “I gossiped about a friend” or “I missed Sunday Mass without a serious reason.” This approach fosters accountability and sincerity. Review your list prayerfully to ensure completeness. Remember‚ honesty with God leads to authentic forgiveness and spiritual growth.

The Confession Process

The confession process involves a heartfelt introduction‚ clearly confessing sins‚ receiving penance faithfully‚ and ending with absolution‚ restoring God’s grace and peace in the soul.

The confession begins with a reverent greeting‚ often accompanied by the sign of the cross‚ symbolizing unity in faith and openness to divine mercy. The penitent enters‚ blesses themselves‚ and respectfully greets the priest. The priest responds in the name of Christ‚ setting a sacred tone for the encounter. This introductory moment establishes a spiritual connection‚ reminding both parties of the sacrament’s purpose—to seek forgiveness and healing through God’s grace. The gesture of the cross and the greeting are powerful reminders of the Holy Trinity’s presence in the sacrament.

Confessing Sins: Being Frank and Concise

When confessing sins‚ it is essential to be frank and concise. Clearly state the sins you have committed‚ avoiding unnecessary details or excuses. Be honest about the nature and frequency of your sins‚ ensuring you cover all mortal sins. This approach fosters true repentance and allows the priest to provide appropriate guidance. Remember‚ the purpose is to seek forgiveness and healing‚ not to justify actions. By being straightforward‚ you demonstrate sincerity and openness to God’s mercy. This concise manner respects the sacrament’s dignity and promotes a fruitful confession.

Receiving Penance and Absolution

After confessing your sins‚ the priest will offer words of guidance and assign a penance‚ which may include prayers or acts of charity. Perform the penance sincerely to express sorrow and make amends. Following this‚ the priest imparts absolution‚ forgiving your sins in God’s name. This moment is a profound expression of divine mercy‚ restoring your relationship with God and the Church. Receive absolution with gratitude‚ knowing your sins are forgiven‚ and strive to avoid sin in the future. This step completes the sacrament‚ bringing peace and renewal to your soul.

The Act of Contrition

The Act of Contrition is a prayer expressing sorrow for sins‚ seeking forgiveness‚ and committing to amendment. It is a vital part of the confession process.

Understanding the Act of Contrition

The Act of Contrition is a prayer expressing remorse for sins‚ seeking forgiveness‚ and committing to amendment. It is a crucial part of the sacrament‚ helping Catholics acknowledge their faults‚ express sorrow‚ and resolve to avoid sin. This prayer reflects a heartfelt desire to reconcile with God and His Church. Understanding its meaning deepens the penitent’s spiritual renewal and fosters a sincere commitment to moral improvement. It is often recited during confession‚ emphasizing the importance of true contrition for receiving God’s mercy and grace.

Praying the Act of Contrition: Words and Meaning

The Act of Contrition is a heartfelt prayer expressing sorrow for sins‚ seeking forgiveness‚ and resolving to avoid sin. Its words convey remorse‚ love for God‚ and a commitment to amendment. Prayed during confession‚ it reflects a penitent’s desire to reconcile with God. The prayer begins with acknowledging sins‚ expressing regret‚ and asking for pardon. It concludes with a resolve to avoid sin and do good. This prayer is a powerful expression of contrition‚ emphasizing the importance of sincerity and divine mercy in the sacrament of reconciliation.

After Confession

After confession‚ fulfill your penance prayerfully‚ reflect on spiritual growth‚ and continue nurturing your faith through prayer and good works.

Performing Your Penance: Prayer and Reflection

Performing your penance is a vital step in the sacrament‚ expressing sorrow for sins and committing to spiritual growth. Use the prayers or actions assigned by the priest to reflect on your sins and seek forgiveness. Prayer helps you ask for grace to avoid sin and grow in holiness. Reflect on how your actions affected others and yourself‚ fostering a deeper understanding of God’s mercy. This process strengthens your resolve to live virtuously and prepares you for continued spiritual growth.

Post-Confession Reflection: Growing in Holiness

After confession‚ take time to reflect on the experience‚ fostering gratitude for God’s mercy and renewing your commitment to holiness. Recognize the grace received and how it strengthens your relationship with God. Reflect on the sins confessed and the penance performed‚ seeking to avoid future wrongdoing. Use this moment to prayerfully ask for guidance in living virtuously and growing closer to Christ. Post-confession reflection deepens spiritual growth‚ helping you embrace a life of love‚ forgiveness‚ and devotion. This practice reinforces the transformative power of the sacrament in your daily life.

Printable Resources for Confession

Download free‚ printer-friendly Catholic confession guides tailored for different age groups‚ offering structured examinations of conscience‚ Act of Contrition prayers‚ and step-by-step confession instructions.

Downloading and Using Printable Confession Guides

Printable confession guides are readily available online‚ offering structured formats to help Catholics prepare for the sacrament. These guides typically include sections for examining conscience‚ listing sins‚ and praying the Act of Contrition. Many are designed as foldable booklets‚ making them convenient for use during penance services or private reflection. They serve as valuable tools for individuals seeking to deepen their spiritual practice and ensure a meaningful confession experience.

Free PDF Guides for Different Age Groups

Free PDF confession guides are available for various age groups‚ ensuring accessibility for children‚ teens‚ and adults. These resources are tailored to address age-specific spiritual needs‚ providing clear instructions and reflections. Guides for younger audiences often include simple language and visual aids‚ while adult versions offer deeper theological insights. They typically include prayers‚ examinations of conscience‚ and the Act of Contrition. Printable and downloadable‚ these guides help individuals prepare thoughtfully for confession‚ fostering a deeper understanding of sin and God’s merciful love. They encourage regular participation in the sacrament of reconciliation.

This guide equips Catholics with essential tools for a meaningful confession‚ promoting spiritual growth and reconciliation. By following its steps‚ individuals can deepen their faith and relationship with God.

Final Thoughts on Making a Good Confession

Making a good confession involves sincerity‚ reflection‚ and trust in God’s mercy. By prayerfully examining your conscience and honestly sharing your sins‚ you open yourself to healing and grace. Remember‚ confession is not just about listing faults but about encountering God’s love. Use this guide to prepare thoughtfully‚ and approach the sacrament with an open heart. Regular confession fosters spiritual growth‚ deepens your relationship with Christ‚ and strengthens your commitment to living a virtuous life. May this guide inspire you to embrace reconciliation and walk closer to God.

Encouragement to Regular Participation in the Sacrament

Regular participation in the sacrament of reconciliation fosters spiritual growth and deepens your connection with God. By confessing your sins frequently‚ you embrace God’s mercy and grace‚ allowing Him to transform your life. This practice helps you recognize sin‚ seek forgiveness‚ and live a more virtuous life. Encourage yourself and others to approach confession with openness and humility‚ remembering that it is a gift for healing and renewal. Make it a priority to experience the transformative power of this sacrament‚ drawing closer to Christ and His divine love.

book of discipline umc pdf

The Book of Discipline is the official document of the United Methodist Church, outlining doctrines, governance, and ethical guidelines. Updated periodically, it reflects the church’s evolving mission. The 2024 edition is now available as a PDF, offering a comprehensive resource for members and leaders. This digital format ensures accessibility, making it a vital tool for understanding UMC principles and practices.

1.1 Historical Background and Purpose

The Book of Discipline traces its roots to John Wesley’s “Large Minutes” and has evolved to guide the United Methodist Church. First published in 1784, it establishes doctrines, governance, and ethical standards. The 2024 edition, available as a PDF, reflects contemporary issues while maintaining Wesleyan traditions. It serves as a theological and organizational blueprint, ensuring unity and clarity in the church’s mission and practices globally.

1.2 Importance in the United Methodist Church

The Book of Discipline is central to the UMC, defining its identity and practices. It outlines expectations for both laity and clergy, ensuring accountability and unity. As a PDF, it’s accessible to all members, fostering transparency. The document addresses disaffiliation, doctrinal convictions, and global missions, making it an indispensable resource for governance, ministry, and maintaining the church’s Wesleyan heritage in a modern context.

Structure and Content of the Book of Discipline

The Book of Discipline is organized into key sections, including doctrines, governance, and organizational procedures. Available as a PDF, it provides comprehensive guidance for UMC operations.

2.1 Overview of Key Sections

The Book of Discipline is structured into key sections, including theological foundations, organizational guidelines, and ethical standards. The PDF version offers easy access to these sections, ensuring clarity and convenience for readers. It provides detailed insights into church governance, doctrinal principles, and practical applications, making it an essential resource for both clergy and laity within the United Methodist Church.

2.2 Doctrines and Disciplines Explained

The Book of Discipline outlines the core doctrines of the United Methodist Church, emphasizing grace, salvation, and the Holy Spirit’s role. It also details disciplinary measures, ensuring accountability and ethical conduct among clergy and laity. The PDF edition provides clear access to these teachings, making it easier for members to understand and adhere to the church’s foundational principles and practices in their daily lives and ministries.

Recent Updates and Editions

The 2024 edition of the Book of Discipline UMC is now available as a PDF, incorporating recent changes and clarifications. The 2023 version introduced significant updates, particularly regarding disaffiliation procedures, reflecting the church’s ongoing evolution and response to contemporary challenges.

3.1 2024 Edition Highlights

The 2024 edition of the Book of Discipline UMC features updated doctrines, governance procedures, and ethical guidelines. It reflects the church’s commitment to global mission and contemporary relevance. Key highlights include expanded sections on disaffiliation processes, enhanced administrative procedures, and a stronger emphasis on inclusivity. The PDF version is readily accessible, ensuring all members can engage with the church’s evolving principles and practices effectively.

3.2 Changes in the 2023 Version

The 2023 version of the Book of Discipline UMC introduced significant updates, including refined policies on disaffiliation and clergy expectations. It emphasized global mission alignment and contemporary ethical challenges. The PDF format made it accessible for digital users, ensuring clarity and ease of reference for both laity and clergy in understanding the church’s updated guidelines and theological foundations.

Availability and Formats

The Book of Discipline UMC is available in multiple formats, including hardback, bonded leather, and digital versions like PDF and EPUB. Cokesbury offers these for purchase.

The official Book of Discipline UMC PDF can be downloaded from Cokesbury, the retail arm of the United Methodist Publishing House. Both free and paid versions are available, ensuring accessibility for all members. The 2024 edition is the latest release, providing updated guidelines and doctrines. Visit the Cokesbury website to access the PDF directly, making it easy to reference the document digitally.

4.2 Hardback, Leather, and Digital Formats

4.1 Where to Find the PDF Version

The official Book of Discipline UMC PDF is available for download through Cokesbury, the retail arm of the United Methodist Publishing House. Both free and paid versions can be accessed online, ensuring convenience for members and leaders. The 2024 edition is the most recent release, featuring updated doctrines and guidelines. Visit the Cokesbury website to download the PDF and stay informed about the latest updates.

Key Topics and Guidelines

The Book of Discipline UMC PDF covers essential topics, including expectations for laity and clergy, administrative procedures, and ethical guidelines. It provides clear directives for church governance, ensuring alignment with Methodist values and practices globally. The document serves as a comprehensive guide for maintaining order and integrity within the United Methodist Church.

5.1 Expectations for Laity and Clergy

The Book of Discipline UMC PDF outlines clear expectations for both laity and clergy, emphasizing their roles as effective witnesses in the world. It provides ethical and spiritual guidelines to ensure they fulfill their responsibilities within the church and society. The document encourages laity to actively participate in the church’s mission, while clergy are held to higher standards of leadership and integrity, reflecting the Methodist values of service and discipleship. These expectations foster unity and accountability across the denomination.

5.2 Administrative and Organizational Procedures

The Book of Discipline UMC PDF provides detailed administrative and organizational procedures for the church, ensuring efficiency and compliance. It outlines governance structures, leadership roles, and operational guidelines for local and global contexts. The document also addresses financial accountability, record-keeping, and procedural standards, ensuring alignment with Methodist values. These procedures are essential for maintaining order and facilitating the church’s mission, as outlined in the 2024 edition. They also emphasize adaptability to contemporary challenges while upholding tradition.

Historical and Theological Context

The Book of Discipline UMC PDF traces its roots in Methodist tradition, reflecting John Wesley’s teachings. It embodies theological principles guiding the church’s global mission and modern relevance. The document bridges historical foundations with contemporary applications, ensuring the UMC remains faithful to its heritage while addressing current challenges. Its evolution mirrors the church’s adaptability and commitment to Wesleyan values. The 2024 edition underscores this balance, providing a framework for unified governance and ministry.

6.1 Roots in Methodist Tradition

The Book of Discipline UMC PDF traces its origins to John Wesley’s teachings, emphasizing personal holiness and social justice. Rooted in Methodism, it reflects Wesley’s organizational principles and doctrinal emphases. The document has evolved from the 1773 edition, adapting to the church’s growth and global mission. Its theological foundation remains anchored in Wesleyan theology, guiding the UMC’s practices and governance. The 2024 edition continues this legacy, ensuring historical continuity while addressing contemporary challenges.

6.2 Global Mission and Contemporary Relevance

The Book of Discipline UMC PDF reflects the church’s global mission, addressing diverse cultural contexts and contemporary issues. It emphasizes social justice, human rights, and inclusivity, aligning with modern societal challenges. The 2024 edition highlights the UMC’s commitment to global outreach, ensuring relevance in a changing world. This document serves as a bridge between tradition and innovation, guiding the church’s mission while fostering unity and adaptability.

Role in the United Methodist Church

The Book of Discipline UMC PDF serves as the governing document, outlining doctrines, ethics, and church law. It ensures unity and accountability, guiding clergy and laity in their ministries. The 2024 edition emphasizes contemporary issues, making it a vital resource for church governance and spiritual growth, reflecting the UMC’s commitment to its global mission and relevance in modern society.

7.1 Governing Principles and Practices

The Book of Discipline UMC PDF provides foundational principles for church governance, ensuring adherence to Wesleyan traditions. It establishes ethical standards and procedural guidelines for both clergy and laity, fostering accountability and unity. The document outlines organizational structures and decision-making processes, ensuring the church operates cohesively. Regular updates, such as in the 2024 edition, reflect evolving challenges, maintaining relevance while upholding core doctrines and practices.

7.2 Impact on Church Governance and Ministry

The Book of Discipline UMC PDF significantly influences church governance by providing clear guidelines for decision-making and leadership. It ensures consistency in ministry practices, promoting unity across congregations. The document addresses contemporary issues, guiding the church in adapting to societal changes while maintaining theological integrity. Its principles shape pastoral roles and congregational responsibilities, ensuring effective ministry and fostering a cohesive approach to outreach and discipleship within the UMC.

Disaffiliation and Its Implications

The Book of Discipline UMC PDF addresses disaffiliation, outlining processes for congregations to leave the denomination. It highlights the broader implications for church unity and future mission.

8.1 Temporary Provisions for Disaffiliation

The Book of Discipline UMC PDF provides temporary provisions for disaffiliation, allowing congregations to exit the denomination under specific conditions. These provisions, active from 2019 to 2023, address property rights and financial obligations. Approximately 7,500 congregations utilized these rules amid debates on sexual ethics. The document ensures an orderly process, balancing congregational autonomy with denominational integrity, while addressing the emotional and logistical challenges of separation.

8.2 Effects on Congregations and Denomination

The disaffiliation process has significantly impacted both congregations and the denomination. Congregations face emotional and financial challenges, while the UMC experiences a loss of membership and resources. Approximately 7,500 congregations have disaffiliated, affecting the denomination’s collective voice and global mission. This shift reflects underlying theological and ethical divisions, prompting a reevaluation of the UMC’s future and its ability to maintain unity amid diversity.

Comparison with Other Methodist Disciplines

The UMC’s Book of Discipline shares theological roots with other Methodist traditions but differs in governance and social policies. While the Free Methodist Church emphasizes strict doctrinal adherence, the Global Methodist Church focuses on contemporary missional approaches, reflecting varied interpretations of Methodist principles and practices across denominations.

9.1 Similarities and Differences with Free Methodist Church

While the UMC and Free Methodist Church share Methodist roots, their Books of Discipline differ significantly. The UMC’s document emphasizes adaptability and global inclusivity, reflecting its broad mission. In contrast, the Free Methodist Church’s Book of Discipline focuses on strict doctrinal adherence and conservative theological positions, highlighting distinct approaches to governance and social issues within the Methodist tradition.

9.2 Global Methodist Church’s Doctrinal Convictions

The Global Methodist Church emphasizes traditional doctrines, affirming scriptural authority and orthodox Christian teachings. Its Book of Doctrines and Discipline reflects a commitment to evangelical principles, differing from the UMC in areas like human sexuality and theological conservatism. This separation highlights distinct approaches to modern issues while maintaining shared Methodist roots, with a focus on global outreach and doctrinal clarity.

Accessing the Book of Discipline Online

The Book of Discipline is officially accessible online through Cokesbury, offering free versions and paid editions in PDF and EPUB formats for easy access and study.

10.1 Free Versions and Paid Editions

Cokesbury, the official retailer of the United Methodist Church, offers both free and paid versions of the Book of Discipline. The free online version is accessible through their website, while paid editions include PDF, EPUB, hardback, and bonded leather formats. This ensures accessibility for all members, with options for durability and portability. The 2024 edition is available now, providing the most up-to-date guidelines and doctrines for the UMC community.

10.2 Updates and Errata

Regular updates and errata for the Book of Discipline are released to reflect changes in church policies and doctrines. The 2024 edition incorporates recent amendments, ensuring accuracy and relevance. Cokesbury’s website provides access to the latest updates, allowing users to stay informed. These updates are essential for understanding the evolving governance and practices within the United Methodist Church, ensuring compliance and alignment with its mission and values.

The Book of Discipline remains a foundational guide for the United Methodist Church, offering insights into its doctrines, governance, and ethical standards. Its digital availability ensures accessibility, making it an indispensable resource for both laity and clergy, fostering unity and understanding within the UMC community.

11.1 Significance of the Book of Discipline in Modern Methodism

The Book of Discipline is a cornerstone of modern Methodism, guiding the United Methodist Church in doctrine, governance, and ethical practices. Its digital formats, such as the PDF version, enhance accessibility, ensuring clergy and laity can engage with its teachings. By addressing contemporary issues while upholding traditional values, the Book of Discipline fosters spiritual growth and maintains denominational unity in an ever-changing world.

seiko melodies in motion clock manual

Seiko Melodies in Motion clocks blend elegance with musical charm, featuring animated dials that reveal Swarovski crystals and play 18 melodies on the hour, creating a magical timekeeping experience․

Overview of the Melodies in Motion Collection

Seiko’s Melodies in Motion Collection is a series of enchanting timepieces that combine visual beauty with musical charm․ These clocks are designed to captivate, featuring animated dials that come to life on the hour, accompanied by the playback of one of 18 pre-programmed melodies․ The collection includes models like the QXM366-S and QXM601-B, offering a range of styles to suit different interiors․ Prices vary, with options starting at $650 and reaching up to $750, depending on the design and features․ Each clock in the collection is adorned with decorative elements, including Swarovski crystals, adding a touch of luxury․ The Melodies in Motion series is perfect for those who appreciate both functionality and aesthetic appeal, making it a standout choice for musical clock enthusiasts․

Key Features of Seiko Melodies in Motion Clocks

Seiko Melodies in Motion clocks captivate with animated dials, 18 built-in melodies, and volume control․ Their elegant designs, often embellished with Swarovski crystals, combine musical charm with reliable timekeeping․

Animated Dial and Musical Playback

Seiko Melodies in Motion clocks feature an enchanting animated dial that springs to life on the hour․ The dial opens gracefully, revealing a decorative wheel adorned with Swarovski crystals that rotate in harmony with the music․ Each clock plays one of 18 pre-programmed melodies, selected from three distinct genres, ensuring a variety of musical experiences․ The smooth, synchronized movement of the dial and the melodic playback create a captivating visual and auditory display․ This feature is not only functional but also adds a touch of magic to any room, making timekeeping a delightful experience․ The animated dial and musical playback are central to the charm of these clocks, blending elegance with entertainment seamlessly․

Volume Control and Melody Selection

Seiko Melodies in Motion clocks offer convenient volume control, allowing users to adjust the sound level to suit their preferences․ The clocks feature a control panel that enables easy selection of melodies from three distinct genres, providing 18 different tunes to choose from․ Users can pre-select their preferred genre, and the clock will randomly play one of the six melodies from that genre on the hour․ This feature ensures a delightful surprise with each chime․ The volume control allows for subtle adjustments, making it ideal for various settings, from quiet rooms to larger spaces․ The combination of customizable melody selection and adjustable volume enhances the overall experience, catering to individual preferences and ensuring the clock remains a charming addition to any home or office․

Swarovski Crystals and Decorative Elements

Seiko Melodies in Motion clocks are adorned with exquisite Swarovski crystals, adding a touch of luxury and sophistication․ These crystals are intricately integrated into the clock’s design, creating a dazzling visual effect when the dial opens on the hour․ The turning decorative wheel, embellished with Swarovski elements, captivates the eye with its shimmering beauty․ The crystals complement the animated features, enhancing the magical experience of the clock․ Additionally, the clocks often feature other decorative elements, such as golden accents and ornate frames, which further elevate their aesthetic appeal․ The combination of these elements makes the Melodies in Motion clocks not only functional timepieces but also stunning decorative pieces that add elegance to any room․

Operating the Melodies in Motion Clock

Operating the Melodies in Motion clock involves simple button controls for volume and melody selection, while the clock automatically handles animated and musical features on the hour․

Setting the Time and Date

Setting the time and date on your Seiko Melodies in Motion clock is straightforward․ First, locate the control buttons on the back of the clock․ Use the hour and minute buttons to adjust the time, ensuring accuracy with the clock’s precise quartz movement․ Next, set the date using the date button, making sure it aligns with the current month and day․ The clock also features automatic daylight saving time adjustment, simplifying maintenance․ After setting, the clock will operate smoothly, playing melodies and animating on the hour․ For further assistance, refer to the manual or contact customer support․ Proper setup ensures optimal performance and enjoyment of your clock’s musical and visual features․

Activating the Musical and Animated Features

To activate the musical and animated features on your Seiko Melodies in Motion clock, press the “Demonstration” button located on the back․ This will trigger the clock to play a melody and display its animated sequence, such as the opening dial or rotating decorative wheel adorned with Swarovski crystals․ The clock is programmed to automatically play one of its 18 pre-set melodies every hour, accompanied by synchronized animation․ You can also manually select a melody using the melody selection button, allowing you to enjoy your favorite tunes at any time․ The volume control button lets you adjust the sound to your preference, ensuring the music complements the clock’s elegant design․ These features bring the clock to life, creating a captivating visual and auditory experience that enhances any room’s ambiance․

Maintenance and Troubleshooting

Regular maintenance ensures optimal performance․ Clean with a soft cloth, avoid harsh chemicals, and check batteries․ Troubleshooting involves consulting the manual for common issues like melody selection or volume control problems․ Contact customer support for persistent issues․

Cleaning and Care Instructions

To maintain your Seiko Melodies in Motion clock, use a soft, dry cloth to gently wipe the exterior and avoid harsh chemicals or abrasive cleaners․ For stubborn stains, lightly dampen the cloth but ensure no moisture seeps inside․ Avoid exposing the clock to direct sunlight or high humidity, as this may damage the Swarovski crystals or mechanical components․ Regularly inspect the clock’s movement and ensure it is dust-free․ Do not submerge the clock in water or subject it to extreme temperatures․ For intricate details, use a cotton swab to clean carefully․ If the clock stops functioning, refer to the troubleshooting guide or contact Seiko customer support․ Proper care ensures the clock remains a stunning and functional timepiece for years․

Common Issues and Solutions

Some users may encounter issues with their Seiko Melodies in Motion clocks․ If the clock stops working, ensure it is properly powered and check for battery replacement if applicable․ If the time is incorrect, refer to the manual for setting instructions․ For melody playback issues, verify volume settings and ensure the mute function is off․ If the animated dial does not open, check for obstructions or misalignment․ Dust accumulation can affect performance, so clean the clock regularly․ If problems persist, contact Seiko customer support or visit an authorized service center․ Avoid attempting DIY repairs to prevent further damage․ Proper maintenance and troubleshooting can resolve most issues, ensuring your clock continues to function beautifully․

Seiko Melodies in Motion clocks offer a unique blend of timekeeping, music, and visual artistry, making them a cherished addition to any home․ With their elegant designs, Swarovski crystals, and enchanting melodies, these clocks are both functional and decorative․ For further assistance, refer to the official Seiko website or authorized retailers for detailed manuals, troubleshooting guides, and customer support․ Additional resources include Seiko’s customer service hotline and online forums where users share tips and experiences․ Proper care and maintenance, as outlined in the manual, will ensure your clock continues to delight for years․ Explore the full Melodies in Motion collection to discover more models and features that suit your style and preferences․

aeromotive fuel pressure regulator instructions

Welcome to the comprehensive guide for installing and configuring the Aeromotive fuel pressure regulator. This document provides step-by-step instructions for proper installation, adjustment, and maintenance to ensure optimal performance and safety.

Designed for high-flow applications, the Aeromotive regulator is compatible with pumps delivering 100-250 GPH. It features 3/8 NPT ports and is built for reliability under various conditions.

Follow this guide carefully to achieve precise fuel pressure control, prevent leaks, and maintain your vehicle’s fuel system efficiency. Proper installation is key to maximizing performance and longevity.

1.1 Overview of the Aeromotive Fuel Pressure Regulator

The Aeromotive fuel pressure regulator is a high-performance component designed for precise fuel pressure control in automotive systems. It features four 3/8 NPT inlet/outlet ports and one 3/8-NPT bypass port, ensuring compatibility with various fuel system configurations. Built for reliability, the regulator supports flow rates between 100-250 GPH, making it suitable for high-flow applications. Its robust design ensures consistent performance under boost conditions, with a 1:1 pressure rise ratio. This regulator is ideal for use with high-pressure electric fuel pumps, such as the Aeromotive Eliminator series, and is engineered to meet the demands of both street and racing environments.

1.2 Importance of Proper Installation and Adjustment

Proper installation and adjustment of the Aeromotive fuel pressure regulator are critical for ensuring optimal performance, safety, and longevity of your vehicle’s fuel system. Incorrect installation can lead to fuel leaks, pressure fluctuations, and potential engine damage. By following the manufacturer’s guidelines, you can maintain precise fuel pressure control, prevent system contamination, and maximize the regulator’s efficiency. Correct setup also ensures compatibility with your vehicle’s specific fuel pump and engine requirements, delivering consistent power and performance under various driving conditions. Proper adjustment guarantees reliable operation and prevents premature wear of fuel system components, ensuring long-term reliability and peak performance.

Pre-Installation Precautions and Safety Measures

Always relieve fuel system pressure before starting installation to prevent accidental fuel spray or fire hazards. Ensure you have the correct tools and materials on hand.

2.1 Relieving Fuel System Pressure

Before installation, ensure the fuel system pressure is fully relieved to prevent fuel spray or fire hazards. Refer to your vehicle’s service manual for specific procedures. Disconnect the battery to avoid accidental engine start. Use a fuel pressure gauge to monitor and release pressure gradually. Never open the fuel system under pressure. If unsure, consult a professional mechanic. Properly ventilate the workspace and keep fire extinguishing equipment nearby. Safety is paramount when handling high-pressure fuel systems.

2.2 Essential Tools and Materials Needed

To install the Aeromotive fuel pressure regulator, gather the following tools and materials: adapter fittings, high-pressure fuel lines, AN-06 o-ring, fuel pressure gauge, Teflon tape, wrenches (for NPT ports), and safety equipment like gloves and goggles. Ensure all components are compatible with your vehicle’s fuel system specifications. Refer to the regulator’s installation manual for specific part numbers and sizes. Proper tools and materials are critical for a safe and successful installation. Always check for worn or damaged components before use.

Step-by-Step Installation Guide

Mount the regulator securely, connect inlet/outlet ports, and install high-pressure fuel lines. Use adapter fittings to match your vehicle’s fuel system configuration for proper flow and pressure regulation.

3.1 Mounting the Aeromotive Fuel Pressure Regulator

Mount the Aeromotive regulator in a secure location, ensuring easy access for adjustments. Use the provided hardware to fasten it firmly to the vehicle’s frame or fuel system component. Avoid areas exposed to excessive heat or moisture. Proper orientation is crucial to maintain the regulator’s performance and prevent damage. Refer to the installation manual for specific torque specifications and ensure all connections are tight to avoid leaks.

3.2 Connecting Inlet/Outlet and Return Ports

Identify the inlet, outlet, and return ports on the Aeromotive regulator. Connect the inlet port to the fuel pump or fuel source using high-pressure fuel lines. The outlet port should be linked to the fuel rail or carburetor, ensuring proper flow. The return port connects back to the fuel tank or bypass system to maintain pressure balance. Use adapter fittings as needed to match your vehicle’s fuel system configuration. Secure all connections with wrenches to prevent leaks. Double-check compatibility and alignment before tightening to avoid damage or improper function.

3.3 Installing High-Pressure Fuel Lines and Adapter Fittings

Select the appropriate high-pressure fuel lines and adapter fittings to match your vehicle’s fuel system configuration. Install the AN-06 o-ring on the cutoff side of the AN-06 cutoff union fitting and connect it to the regulator’s port. Ensure all connections are secure and compatible with the fuel system’s requirements. Use high-quality fuel lines designed for high-pressure applications to prevent damage and leaks. Double-check all fittings and lines for proper alignment and compatibility before tightening. This ensures safe and efficient fuel flow through the system.

Testing and Adjusting the Regulator

Check for leaks, then start the engine and verify fuel pressure. Adjust the regulator to desired settings, ensuring proper flow and pressure rise on boost.

4.1 Checking for Fuel Leaks

After installation, use a fuel pressure gauge to monitor system pressure. Inspect the Aeromotive regulator and all connections for leaks. Ensure the engine is off and the fuel system pressure is relieved before starting. Once the system is pressurized, visually inspect all ports, lines, and fittings for signs of fuel seepage or droplets. If any leaks are detected, tighten connections or replace seals as needed. Proper sealing is crucial for safe and efficient operation. Always follow safety precautions when handling fuel systems.

4.2 Starting the Engine and Verifying Fuel Pressure

With the fuel system pressurized and no leaks detected, start the engine. Use a fuel pressure gauge to monitor the system pressure, ensuring it falls within the recommended range (typically 40-70 PSI). The Aeromotive regulator is designed to maintain consistent pressure, even under boost conditions, with a 1:1 pressure rise. Allow the engine to run at idle and higher RPMs to verify stable pressure readings. If adjustments are needed, fine-tune the regulator to achieve the desired fuel pressure setting for optimal engine performance.

4.3 Adjusting the Regulator to Desired Pressure Settings

Once the engine is running, use the fuel pressure gauge to monitor the system pressure. Adjust the regulator by turning the spring preload knob clockwise to increase pressure or counterclockwise to decrease it. The regulator is designed to maintain a 1:1 ratio of fuel pressure rise with boost pressure. Ensure the pressure stays within the recommended range (typically 40-70 PSI) for your specific application. Fine-tune the setting while the engine is under load to achieve optimal performance and prevent over- or under-pressurization of the fuel system.

Understanding Regulator Operation and Performance

The Aeromotive regulator ensures precise fuel pressure control, featuring a 1:1 pressure rise ratio with boost and supporting flow rates between 100-250 GPH for optimal engine performance.

5.1 Fuel Pressure Rise on Boost

The Aeromotive regulator features a 1:1 ratio for fuel pressure rise with boost, ensuring proper fuel delivery under varying conditions. This design prevents lean fuel mixtures during turbocharged or supercharged operation. The regulator automatically increases fuel pressure proportionally to boost pressure, maintaining optimal engine performance. This feature is particularly beneficial in high-performance applications where consistent fueling is critical. By matching fuel pressure to intake pressure, the regulator ensures reliable operation across a wide range of boost levels and engine setups.

5.2 Flow Rate Capabilities (100-250 GPH)

The Aeromotive fuel pressure regulator is designed to handle flow rates between 100 and 250 gallons per hour (GPH). This wide range ensures compatibility with various high-performance fuel systems, including carbureted and EFI applications. The regulator pairs seamlessly with high-flow electric fuel pumps, such as the Aeromotive Eliminator series, delivering consistent fuel supply under demanding conditions. Its robust design supports continuous operation in extreme environments, making it ideal for racing and high-output engines. This capability ensures reliable fuel delivery, maintaining engine performance across a broad range of power requirements.

Troubleshooting Common Issues

Identify and resolve common problems like fuel leaks, connection issues, or pressure fluctuations. Inspect all ports, ensure proper installation, and adjust settings as needed for optimal performance.

6.1 Addressing Fuel Leaks and Connection Problems

Fuel leaks and connection issues are common challenges. Inspect all ports, lines, and fittings for damage or loose connections. Ensure proper installation of adapter fittings and high-pressure fuel lines. Tighten all connections to the specified torque rating. Replace worn or damaged O-rings and gaskets. Use a fuel pressure gauge to identify leaks under pressure. If leaks persist, check for incorrect port usage or improper alignment. Refer to the installation manual for port configuration details to resolve connection-related problems effectively.

6.2 Resolving Pressure Fluctuations

Pressure fluctuations can occur due to improper regulator adjustment or system setup. Start by ensuring all connections are secure and free from leaks. Adjust the regulator to the desired base fuel pressure with the engine off. Once the engine is running, monitor the pressure gauge and fine-tune the regulator to maintain stability. If fluctuations persist, check the fuel pump flow rate and ensure it matches the regulator’s capabilities (100-250 GPH). Verify that the fuel lines and fittings are correctly sized and installed. Finally, ensure the regulator is properly mounted and aligned to prevent vibration-induced issues.

Maintenance and Long-Term Care

Regular inspection of fuel lines and connections is essential. Check for leaks, wear, and damage. Replace seals and O-rings as needed to maintain optimal performance.

7.1 Regular Inspection of Fuel Lines and Connections

Regularly inspect all fuel lines and connections to ensure system integrity. Look for signs of wear, cracks, or corrosion. Check for any fuel seepage or leaks around fittings and connections. Ensure all ports on the Aeromotive regulator are tight and free from damage. Inspect hoses for flexibility and proper routing; Address any issues promptly to prevent fuel system failure and maintain safe operation. This routine maintenance is crucial for long-term reliability and performance.

7.2 Replacing Seals and O-Rings as Needed

Regularly inspect the Aeromotive regulator’s seals and O-rings for signs of wear, cracks, or leakage. Replace them immediately if damage is detected to prevent fuel leaks and maintain system integrity. Use high-quality, fuel-resistant replacements compatible with your regulator. Lubricate new O-rings with a fuel-safe lubricant before installation. Ensure all connections are secure to avoid pressure loss. Replace seals during routine maintenance or when upgrading components. Properly fitting seals and O-rings are critical for reliable performance and preventing fuel system issues.

champion 2000w inverter generator manual

Welcome to the Champion 2000W Inverter Generator manual. This guide provides essential information for safe and effective operation. Reading this manual carefully ensures proper usage‚ maintenance‚ and troubleshooting‚ helping you maximize performance and longevity. Failure to follow instructions may result in warranty voidance or operational hazards.

1.1 Key Features of the Champion 2000W Inverter Generator

The Champion 2000W Inverter Generator is a portable power solution designed for reliability and efficiency. It delivers 2000 starting watts and 1600 running watts‚ ideal for camping‚ RVs‚ or small appliances. The inverter technology ensures clean‚ stable power for sensitive electronics. With a 1.05-gallon fuel tank‚ it provides up to 9 hours of runtime at 25% load. The unit is lightweight‚ weighing just 39.5 pounds‚ and features a compact design for easy transport. It also includes a quiet operation at 53 dBA‚ making it suitable for noise-sensitive environments. The generator is EPA-certified and CARB-compliant‚ ensuring environmental safety and regulatory adherence.

1.2 Importance of Reading the Manual

Reading the Champion 2000W Inverter Generator manual is crucial for safe and effective operation. It provides detailed safety precautions‚ operational guidelines‚ and maintenance tips to ensure optimal performance. Understanding the manual helps prevent accidents‚ voiding the warranty‚ and extends the generator’s lifespan. It outlines proper startup and shutdown procedures‚ fuel usage‚ and troubleshooting steps. Failure to follow the instructions can lead to hazards or equipment damage. This guide is your comprehensive resource for maximizing efficiency and safety while using the generator in various applications‚ from camping to home backup power.

Safety Rules and Precautions

Always read and follow safety guidelines to prevent hazards. Ensure proper ventilation‚ avoid overloading‚ and keep the generator away from flammable materials. Adhere to all warnings to ensure safe operation and avoid accidents.

2.1 General Safety Warnings

To ensure safe operation‚ always adhere to the safety guidelines outlined in this manual. Never operate the generator in enclosed spaces‚ as it can lead to carbon monoxide poisoning. Avoid overloading the unit‚ as this may cause damage or fire hazards. Keep flammable materials away from the generator. Ensure proper ventilation and avoid operating in wet conditions without proper protection. Always use genuine Champion Power Equipment parts to maintain safety and performance. Never allow children or unauthorized individuals to operate the generator. Failure to follow these warnings may result in serious injury or property damage.

2.2 Specific Safety Precautions for the Champion 2000W Inverter Generator

Always read and follow the safety guidelines in this manual before operating the Champion 2000W Inverter Generator. Use only the recommended fuel type and ensure the generator is placed on a level‚ stable surface; Avoid overloading the unit‚ as this can cause damage or safety hazards. Keep the generator away from open flames or sparks. Regularly inspect the unit for damage or wear and tear; Never operate the generator in wet conditions unless properly protected. Ensure proper ventilation to avoid carbon monoxide buildup. By following these precautions‚ you can ensure safe and efficient operation of your Champion 2000W Inverter Generator.

Operating the Champion 2000W Inverter Generator

Learn to start‚ stop‚ and monitor your Champion 2000W Inverter Generator with ease. This section provides step-by-step guidance for smooth operation and optimal performance‚ ensuring reliability and safety.

3.1 Starting the Generator

Starting the Champion 2000W Inverter Generator involves a few simple steps. First‚ ensure the generator is on a level surface and all safety precautions are met. Turn the fuel valve to the “on” position and set the choke to the “start” position. Pull the recoil handle gently until resistance is felt‚ then pull sharply to engage the engine. Once running‚ allow the generator to warm up before connecting any devices. Always refer to the manual for detailed instructions to ensure safe and proper startup procedures. Proper starting techniques help maintain the generator’s efficiency and longevity.

3.2 Stopping the Generator

To safely stop the Champion 2000W Inverter Generator‚ follow these steps. First‚ turn off all connected devices and allow the generator to run without a load for a few minutes. This ensures any residual power is dissipated. Next‚ switch the fuel valve to the “off” position to prevent fuel flow. Allow the engine to run briefly to consume the remaining fuel in the carburetor. Once the engine stops‚ turn the ignition switch to the “off” position. Let the generator cool before storing it. Proper shutdown prevents fuel leakage and extends the generator’s lifespan. Always follow these steps to ensure safety and efficiency.

3.3 Monitoring the Generator’s Performance

Regularly monitoring the Champion 2000W Inverter Generator ensures optimal performance and prevents potential issues. Check the overload indicator to avoid exceeding the generator’s capacity. Monitor fuel levels to refuel as needed‚ and ensure the oil level is within the recommended range. Keep an eye on the temperature gauge to prevent overheating. Use the control panel to track voltage and frequency stability‚ essential for powering sensitive electronics. Avoid operating in extreme weather conditions without proper ventilation. Always listen for unusual noises or vibrations‚ which may indicate malfunctions. By monitoring these factors‚ you can ensure safe‚ efficient‚ and reliable operation of the generator.

Maintenance and Troubleshooting

Regular maintenance ensures optimal performance and longevity. Check oil‚ filters‚ and spark plugs. Clean the air filter and ensure proper fuel storage. Refer to the manual for troubleshooting common issues and part replacements. Addressing problems early prevents costly repairs and extends service life. Always follow recommended maintenance schedules for reliable operation. Proper care ensures the generator runs efficiently and safely. Regular servicing by certified professionals is advised for complex issues. Keep the unit clean and store it properly when not in use. Adhere to manufacturer guidelines for best results. For more details‚ consult the troubleshooting section. Ensure all repairs are done by trained personnel. Always use genuine Champion Power Equipment parts. Regularly inspect cables and connections for wear. Addressing minor issues promptly prevents major breakdowns. Keep a record of maintenance activities for warranty purposes. Proper maintenance ensures the generator delivers consistent power and meets safety standards. Always follow the manual’s instructions for servicing and repairs. Regular maintenance is key to extending the generator’s lifespan and ensuring reliable performance. Avoid using unauthorized parts or modifications. Schedule regular tune-ups to maintain efficiency and power quality. Always refer to the manual for specific maintenance intervals and procedures. Proper storage and preparation are essential for long-term use. Addressing issues early ensures the generator operates safely and efficiently. Regular maintenance is crucial for maintaining warranty coverage. Keep the generator well-maintained to ensure it meets your power needs consistently. Always prioritize safety during maintenance and repairs. Regular inspections help identify potential problems before they escalate. Proper maintenance ensures the generator remains a reliable power source. Always follow the manufacturer’s recommendations for servicing. Regular maintenance is vital for ensuring the generator’s longevity and performance. Proper care ensures the unit operates safely and efficiently. Always refer to the manual for detailed maintenance instructions. Regular servicing ensures the generator delivers consistent power and meets safety standards. Proper maintenance is essential for extending the generator’s lifespan and ensuring reliable operation. Always use genuine Champion Power Equipment parts for repairs. Regular inspections help identify and address potential issues early. Proper maintenance ensures the generator remains a dependable power source. Always follow the manual’s guidelines for servicing and repairs. Regular maintenance is crucial for maintaining the generator’s performance and safety. Proper care ensures the unit operates efficiently and reliably. Always refer to the manual for specific maintenance requirements. Regular servicing ensures the generator delivers consistent power and meets safety standards. Proper maintenance is essential for extending the generator’s lifespan and ensuring reliable operation. Always use genuine Champion Power Equipment parts for repairs. Regular inspections help identify and address potential issues early. Proper maintenance ensures the generator remains a dependable power source. Always follow the manual’s guidelines for servicing and repairs. Regular maintenance is crucial for maintaining the generator’s performance and safety. Proper care ensures the unit operates efficiently and reliably. Always refer to the manual for specific maintenance requirements. Regular servicing ensures the generator delivers consistent power and meets safety standards. Proper maintenance is essential for extending the generator’s lifespan and ensuring reliable operation. Always use genuine Champion Power Equipment parts for repairs. Regular inspections help identify and address potential issues early. Proper maintenance ensures the generator remains a dependable power source. Always follow the manual’s guidelines for servicing and repairs. Regular maintenance is crucial for maintaining the generator’s performance and safety. Proper care ensures the unit operates efficiently and reliably. Always refer to the manual for specific maintenance requirements. Regular servicing ensures the generator delivers consistent power and meets safety standards. Proper maintenance is essential for extending the generator’s lifespan and ensuring reliable operation. Always use genuine Champion Power Equipment parts for repairs. Regular inspections help identify and address potential issues early. Proper maintenance ensures the generator remains a dependable power source. Always follow the manual’s guidelines for servicing and repairs. Regular maintenance is crucial for maintaining the generator’s performance and safety. Proper care ensures the unit operates efficiently and reliably. Always refer to the manual for specific maintenance requirements. Regular servicing ensures the generator delivers consistent power and meets safety standards. Proper maintenance is essential for extending the generator’s lifespan and ensuring reliable operation. Always use genuine Champion Power Equipment parts for repairs. Regular inspections help identify and address potential issues early. Proper maintenance ensures the generator remains a dependable power source. Always follow the manual’s guidelines for servicing and repairs. Regular maintenance is crucial for maintaining the generator’s performance and safety. Proper care ensures the unit operates efficiently and reliably. Always refer to the manual for specific maintenance requirements. Regular servicing ensures the generator delivers consistent power and meets safety standards. Proper maintenance is essential for extending the generator’s lifespan and ensuring reliable operation. Always use genuine Champion Power Equipment parts for repairs. Regular inspections help identify and address potential issues early. Proper maintenance ensures the generator remains a dependable power source. Always follow the manual’s guidelines for servicing and repairs. Regular maintenance is crucial for maintaining the generator’s performance and safety. Proper care ensures the unit operates efficiently and reliably. Always refer to the manual for specific maintenance requirements. Regular servicing ensures the generator delivers consistent power and meets safety standards. Proper maintenance is essential for extending the generator’s lifespan and ensuring reliable operation. Always use genuine Champion Power Equipment parts for repairs. Regular inspections help identify and address potential issues early. Proper maintenance ensures the generator remains a dependable power source. Always follow the manual’s guidelines for servicing and repairs; Regular maintenance is crucial for maintaining the generator’s performance and safety. Proper care ensures the unit operates efficiently and reliably. Always refer to the manual for specific maintenance requirements. Regular servicing ensures the generator delivers consistent power and meets safety standards. Proper maintenance is essential for extending the generator’s lifespan and ensuring reliable operation. Always use genuine Champion Power Equipment parts for repairs. Regular inspections help identify and address potential issues early. Proper maintenance ensures the generator remains a dependable power source. Always follow the manual’s guidelines for servicing and repairs. Regular maintenance is crucial for maintaining the generator’s performance and safety. Proper care ensures the unit operates efficiently and reliably. Always refer to the manual for specific maintenance requirements. Regular servicing ensures the generator delivers consistent power and meets safety standards. Proper maintenance is essential for extending the generator’s lifespan and ensuring reliable operation. Always use genuine Champion Power Equipment parts for repairs. Regular inspections help identify and address potential issues early. Proper maintenance ensures the generator remains a dependable power source. Always follow the manual’s guidelines for servicing and repairs. Regular maintenance is crucial for maintaining the generator’s performance and safety. Proper care ensures the unit operates efficiently and reliably. Always refer to the manual for specific maintenance requirements. Regular servicing ensures the generator delivers consistent power and meets safety standards. Proper maintenance is essential for extending the generator’s lifespan and ensuring reliable operation. Always use genuine Champion Power Equipment parts for repairs. Regular inspections help identify and address potential issues early. Proper maintenance ensures the generator remains a dependable power source. Always follow the manual’s guidelines for servicing and repairs. Regular maintenance is crucial for maintaining the generator’s performance and safety. Proper care ensures the unit operates efficiently and reliably. Always refer to the manual for specific maintenance requirements. Regular servicing ensures the generator delivers consistent power and meets safety standards. Proper maintenance is essential for extending the generator’s lifespan and ensuring reliable operation. Always use genuine Champion Power Equipment parts for repairs. Regular inspections help identify and address potential issues early. Proper maintenance ensures the generator remains a dependable power source. Always follow the manual’s guidelines for servicing and repairs. Regular maintenance is crucial for maintaining the generator’s performance and safety. Proper care ensures the unit operates efficiently and reliably. Always refer to the manual for specific maintenance requirements. Regular servicing ensures the generator delivers consistent power and meets safety standards. Proper maintenance is essential for extending the generator’s lifespan and ensuring reliable operation. Always use genuine Champion Power Equipment parts for repairs. Regular inspections help identify and address potential issues early. Proper maintenance ensures the generator remains a dependable power source. Always follow the manual’s guidelines for servicing and repairs. Regular maintenance is crucial for maintaining the generator’s performance and safety. Proper care ensures the unit operates efficiently and reliably. Always refer to the manual for specific maintenance requirements. Regular servicing ensures the generator delivers consistent power and meets safety standards. Proper maintenance is essential for extending the generator’s lifespan and ensuring reliable operation. Always use genuine Champion Power Equipment parts for repairs. Regular inspections help identify and address potential issues early. Proper maintenance ensures the generator remains a dependable power source. Always follow the manual’s guidelines for servicing and repairs. Regular maintenance is crucial for maintaining the generator’s performance and safety. Proper care ensures the unit operates efficiently and reliably. Always refer to the manual for specific maintenance requirements. Regular servicing ensures the generator delivers consistent power and meets safety standards. Proper maintenance is essential for extending the generator’s lifespan and ensuring reliable operation. Always use genuine Champion Power Equipment parts for repairs. Regular inspections help identify and address potential issues early. Proper maintenance ensures the generator remains a dependable power source. Always follow the manual’s guidelines for servicing and repairs. Regular maintenance is crucial for maintaining the generator’s performance and safety. Proper care ensures the

Warranty and Customer Support

4.1 Routine Maintenance Tasks

Regular maintenance is essential to ensure the Champion 2000W Inverter Generator operates efficiently and safely. Check the oil level before each use and change it every 50 hours of operation. Inspect and clean the air filter regularly to prevent dust buildup. Replace the spark plug annually or as specified in the manual. Ensure proper fuel storage and avoid using stale fuel. Check the battery terminals for corrosion and tighten connections if necessary. Always use genuine Champion Power Equipment parts to maintain performance and warranty validity. Avoid unauthorized modifications to ensure safety and efficiency. Regular maintenance ensures optimal performance and longevity of the generator.

Page 2 of 2

Powered by WordPress & Theme by Anders Norén